

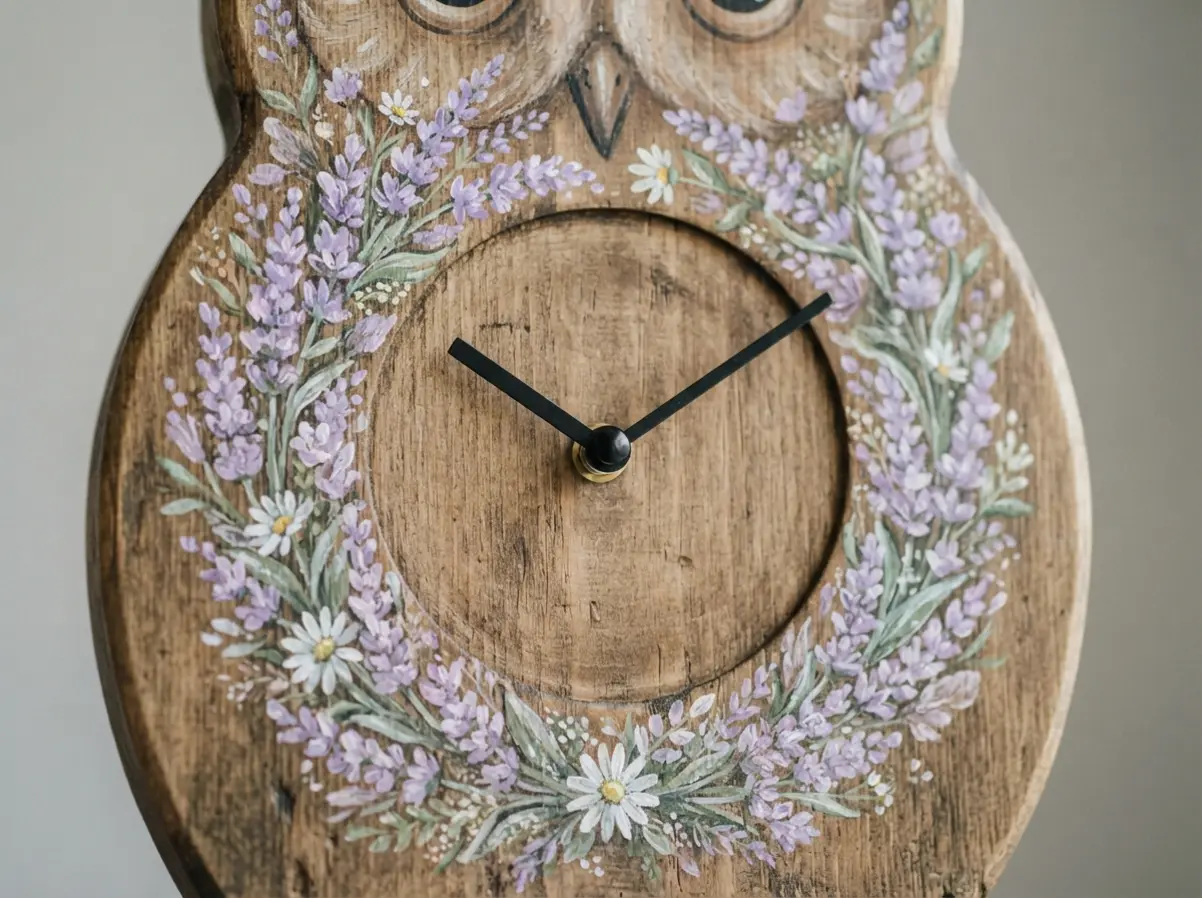
Selecting Reliable Clock Movements for Craft Surfaces
Your project starts with selecting reliable components, and this is where many DIY owl clock ideas often stumble. A standard quartz mechanism often fails on thick birch plywood or layered reclaimed wood. The good news is you need a long shaft clock movement specifically rated for thicker materials, usually measuring at least 12mm.
Trust me on this, you want to check the package for the ‘shaft length’ spec before you buy anything. This ensures the hands have enough clearance to rotate freely without scraping against your beautiful floral embellishments. A heavy-duty movement also handles the slight imbalance from clustered pressed flowers on one side of the owl. It is a small detail that makes the difference between a clock that works for years and one that stops after a month.
Balancing Floral Composition with Clock Face Legibility
The fastest way to ruin most DIY owl clock ideas is letting the blossoms obscure the numbers or hands. Here is the thing, you need to plan your floral arrangement around the clock face, not the other way around. I always map out the twelve, three, six, and nine positions first, keeping those areas clear of large blooms or dark petals.
Use lighter, smaller flowers near the numbers and save your showstopper peonies or sunflowers for the owl’s chest or wings. This careful placement creates a stunning visual effect while keeping the time easy to read at a glance. A monochromatic color palette with subtle value shifts can also tie everything together without sacrificing clarity.
1. Decoupage Rose Print Wooden Owl Clock
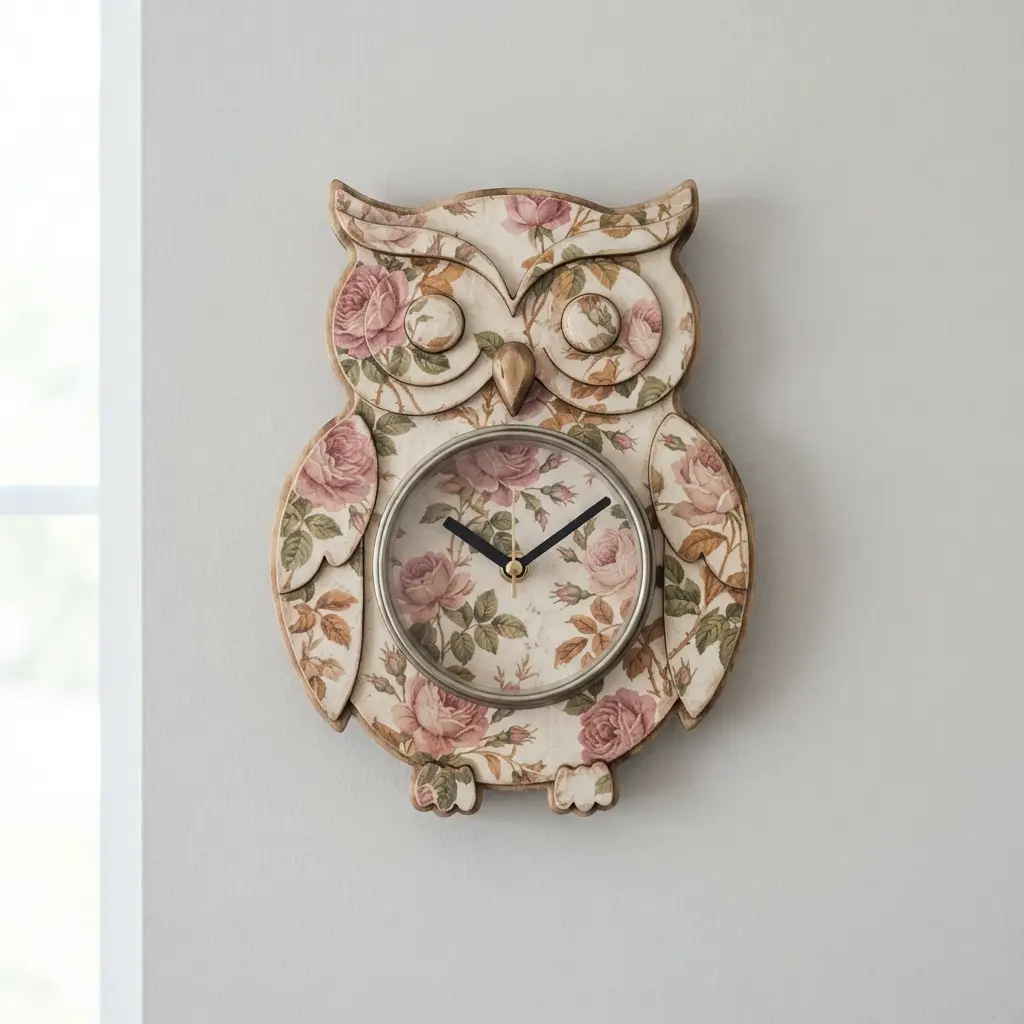
This project looks so elegant, but it is actually one of the most forgiving ways to start with decoupage. You take a simple pre-cut wooden owl base and transform it with beautiful rose prints. The key is applying thin layers of your decoupage medium, smoothing each paper cutout from the center out to avoid bubbles.
After a few sealing coats, you just pop in a clock mechanism and it is ready to hang. I love how this combines a functional piece with your personal style, making it a standout choice among DIY owl clock ideas. For more inspiration on the owl form itself, look at some cute owl craft projects to see the variety of shapes you could use.
Trust me, the moment you see those roses sealed smooth on the wood, you will feel so proud.
2. Hand Painted Sunflower Ceramic Owl Clock
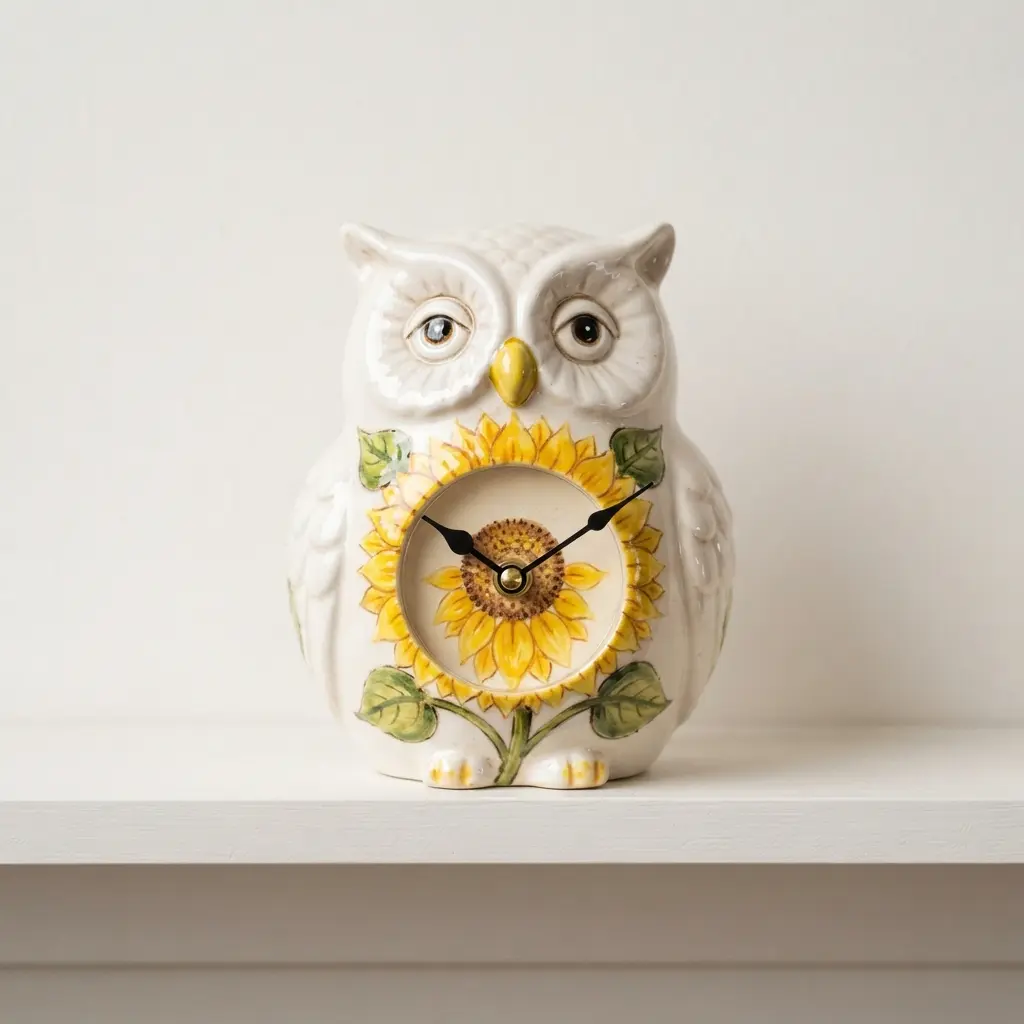
Ever wanted a clock that feels like a piece of cheerful, personal art? This project is your answer. You start with a ceramic owl blank and transform it with vibrant acrylic paints. The key is painting those sunny sunflower designs directly onto its surface, which sets successful DIY owl clock ideas apart from rushed ones.
Getting it right is simpler than it looks. The real secret is using thin, even paint coats and letting each layer dry completely. This prevents colors from getting muddy and helps your sunflowers stay bright and crisp.
Trust me on this one, focusing on a few well-placed elements is a hallmark of well-executed DIY owl clock ideas. Once your masterpiece is dry, seal it with a clear ceramic sealant to protect all that hard work. Then, just pop in a clock movement kit, attach the hands, and you have a charming new focal point for your space.
Feel that warm, sunny satisfaction every time you check the hour.
3. Pressed Floral Resin Owl Clock
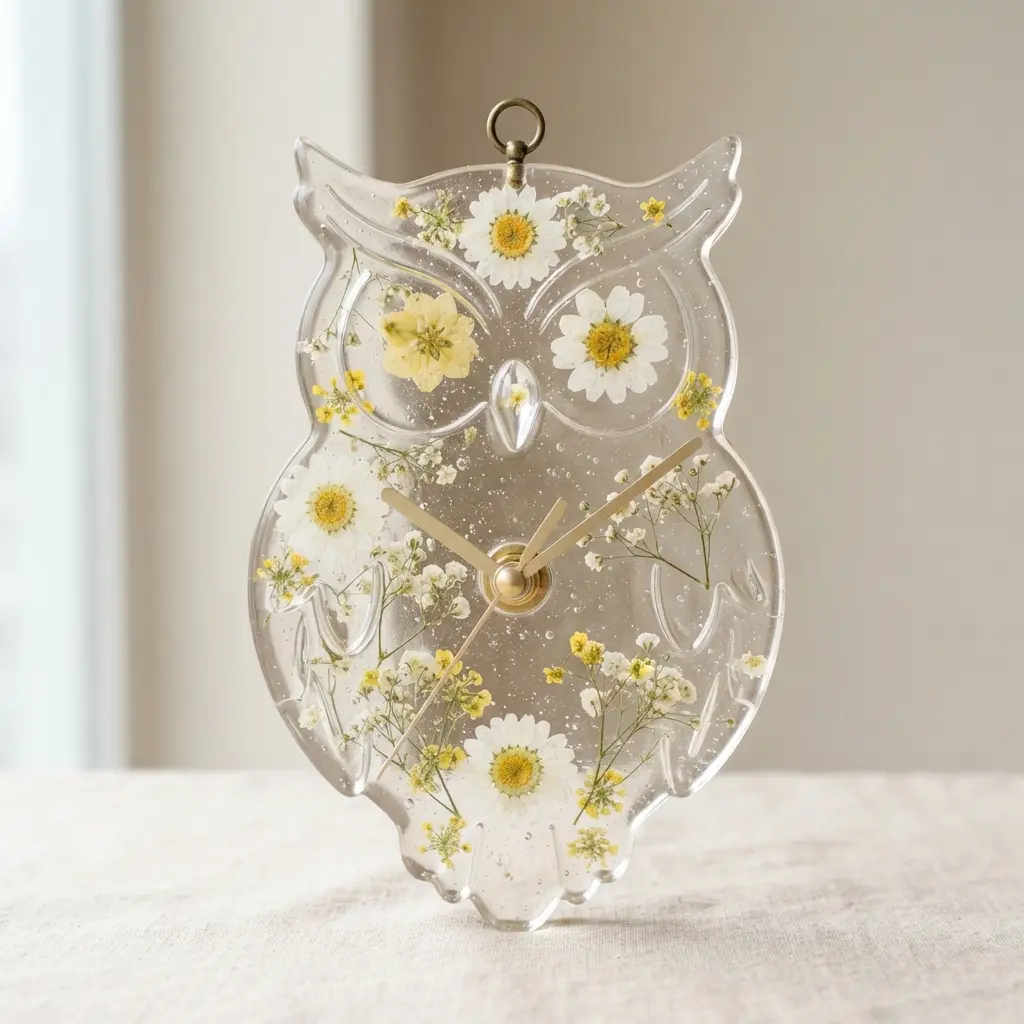
Ever wanted to turn a handful of dried flowers into a functional piece of art? This clock is that magic trick. You start by arranging your pressed flowers inside an owl-shaped silicone mold, a reliable method among DIY owl clock ideas for capturing botanical details.
Then you carefully pour a clear epoxy resin over them, layer by layer, to seal them in a glossy, durable finish. It feels like capturing a little piece of your garden in time. I love that each one is completely unique because of the natural flowers you choose.
The key is ensuring those blooms are absolutely bone dry before they go in. Trust me on this one. Once cured, you add a simple quartz clock movement to the back, and suddenly you have a stunning, one-of-a-kind timepiece for your wall.
Does that not sound wonderfully personal?
4. Embroidered Felt Owl Floral Wallpiece
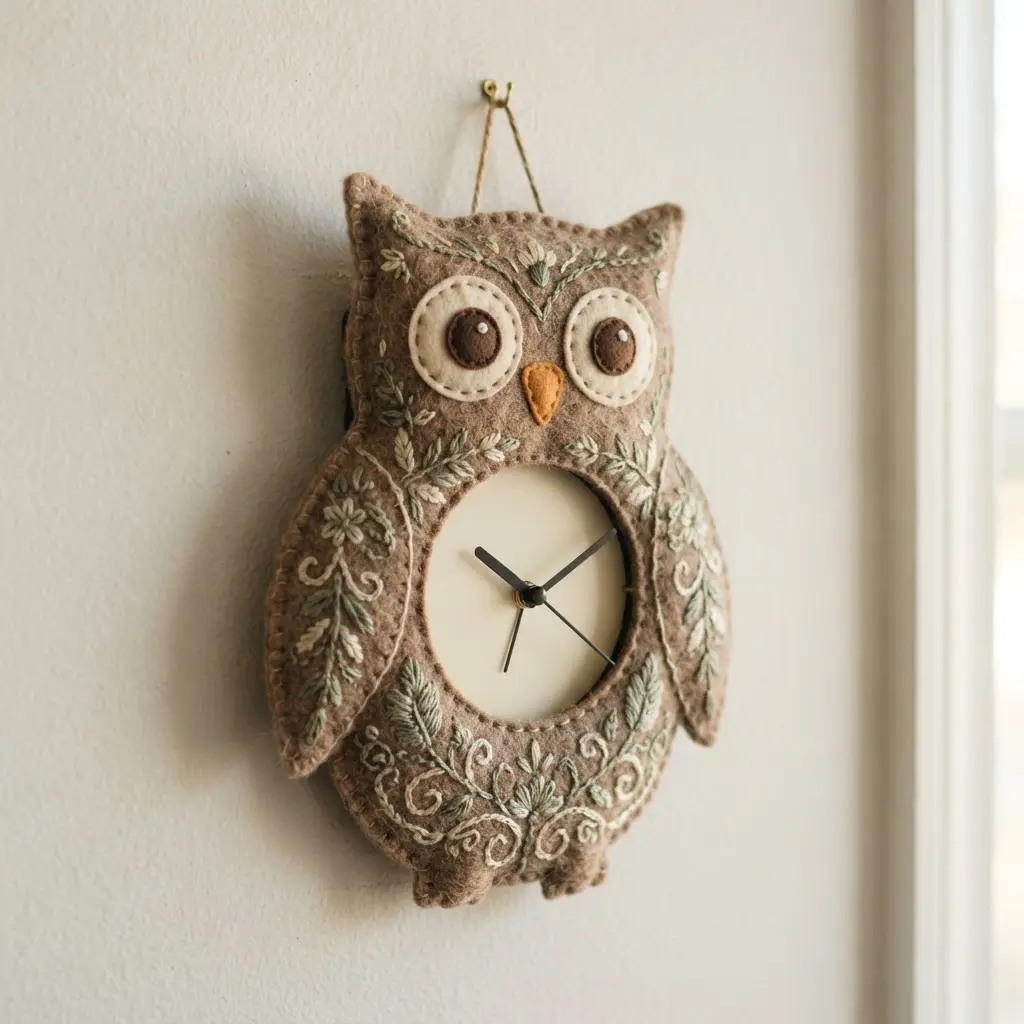
Ever wondered how to add softness and intricate detail to your wall art? This project combines the cozy feel of felt with the classic charm of hand embroidery. You start by cutting out your owl and floral shapes from wool blend felt, then layer them to build up the design.
I love using embroidery floss to add tiny stitches for feathers and flower petals, a detail that elevates handmade DIY owl clock ideas. The tactile mix of materials creates such a rich, engaging texture. Your finished wallpiece feels wonderfully handcrafted and personal.
A quick sketch of your layout before you cut is my go-to tip for keeping all those layers organized. Doesn’t that sound like a satisfying way to spend an afternoon?
5. Minimalist Birch Wood Botanical Owl Clock
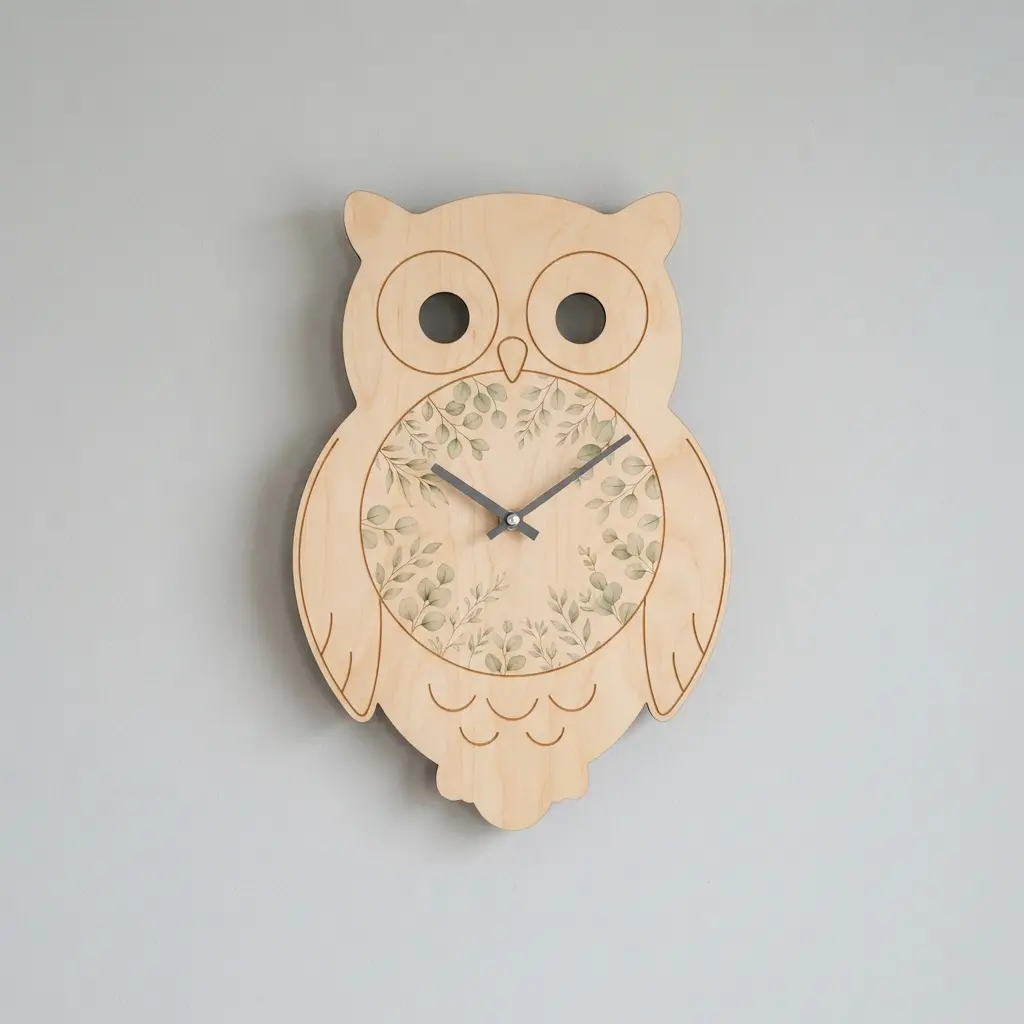
Ever feel like a room needs a touch of nature without going overboard? This design is the perfect answer. You start with a clean, pale piece of birch wood and use a laser or router to gently engrave a simple owl shape and a few leafy sprigs directly into the surface. The magic is in the subtlety.
You do not paint the design on. Instead, you let the natural wood grain show through the engraved lines, a subtle approach that distinguishes minimalist DIY owl clock ideas. This approach gives you a piece of art that feels calm and integrated, not loud or tacked on.
I love how this clock feels more like a quiet sculpture than a timekeeper. You skip the numbers and use tiny dots or lines for the hour markers, which keeps everything looking serene and uncluttered. The whole piece gets finished with a matte clear coat to protect the wood and enhance its natural warmth, keeping most DIY owl clock ideas free from harsh glare.
Trust me, using a satin or matte finish instead of a glossy one makes all the difference.
6. Vintage Paper Collage Owl Clock
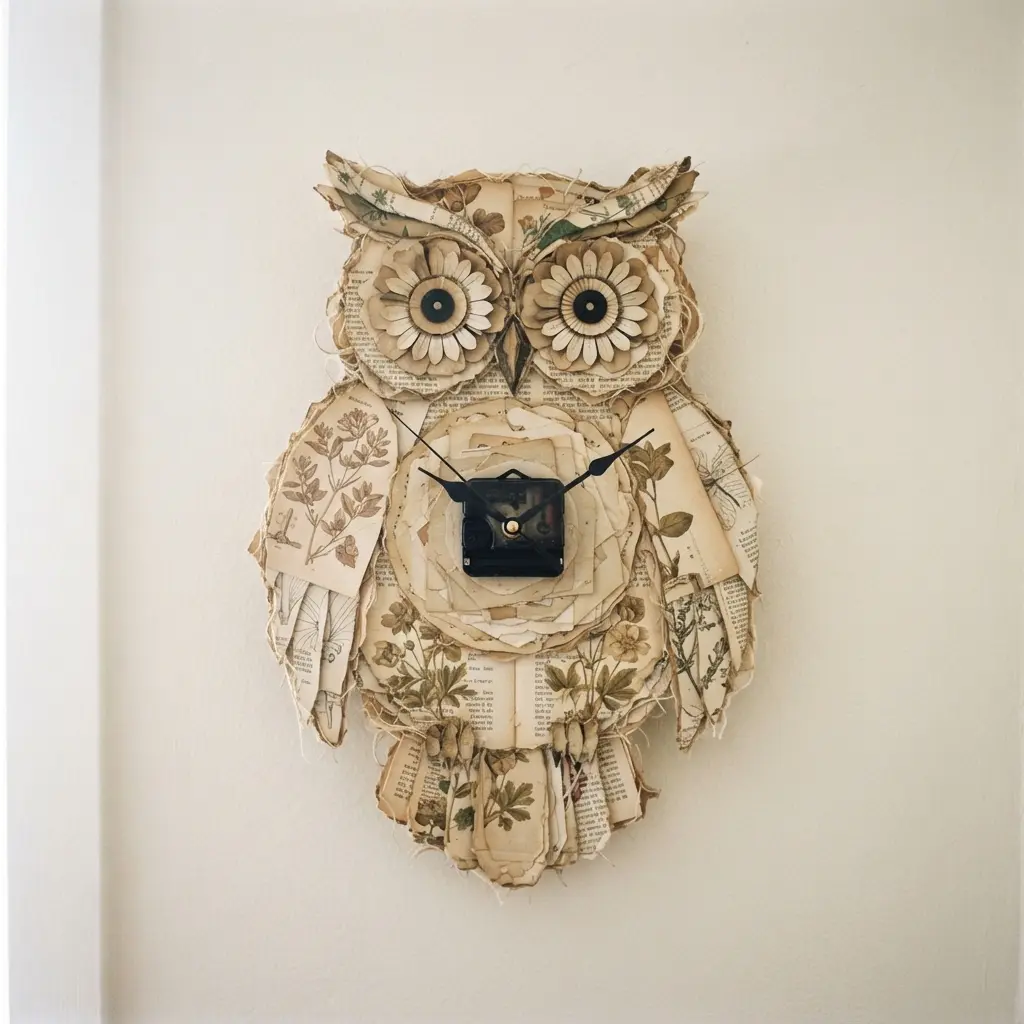
This is the project that looks like a pricey boutique find but is all about repurposing. You will build up your owl shape by layering pieces of vintage paper onto a sturdy base. I love using a wood plaque for this.
Tear or cut your book pages, sheet music, and maps into small pieces to see why collage remains one of the most versatile DIY owl clock ideas. Glue them down with Mod Podge to create a beautifully textured, one-of-a-kind face. The real magic is in the planning.
Lay out your paper pieces before gluing to see how the patterns define the owl’s eyes and wings, ensuring your DIY owl clock ideas maintain crisp readability. This approach gives you complete control over the final look. Isn’t it wonderful to give old paper a new life as a functional piece of art?
My go-to tip is to apply your adhesive in thin layers to prevent warping. Let everything dry completely before sealing it all with a final coat. Then just add your clock mechanism and hands.
You will feel so proud hanging up your handmade, nostalgic creation.
7. Scandi Floral Patterned Plywood Owl Clock
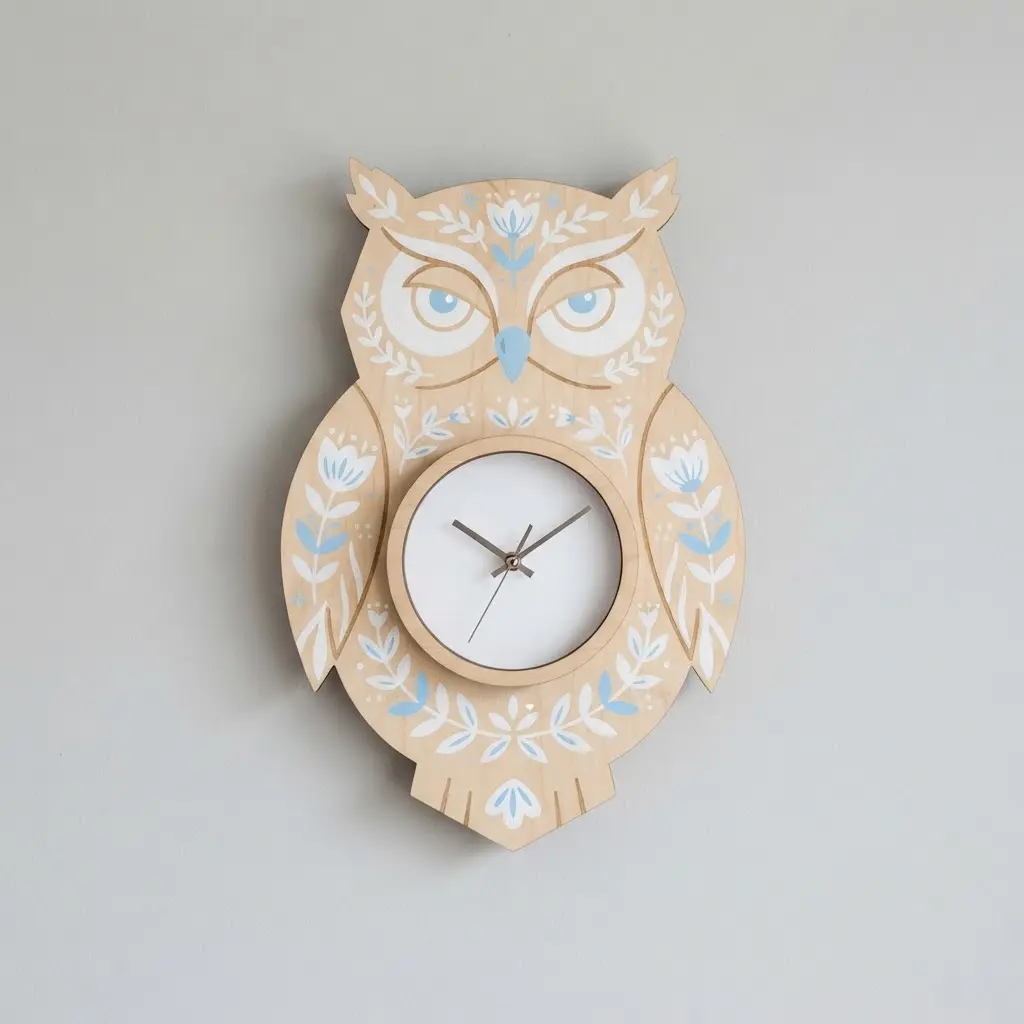
This one feels like bringing a peaceful Scandinavian forest right onto your wall. You start with a piece of light birch plywood cut into a simple, geometric owl shape. The magic happens when you add those soft, muted floral patterns with paint or a transfer. I love how the natural wood grain still peeks through.
You then seal it with a matte varnish to protect your work, a sealing step that preserves the longevity of Scandi DIY owl clock ideas. Finally, you install a quiet quartz movement and minimalist hands. Isn’t that combination of clean lines and organic charm just lovely?
The result is a functional piece of art that feels both modern and wonderfully cozy.
8. Gold Leaf Pressed Flower Owl Clock
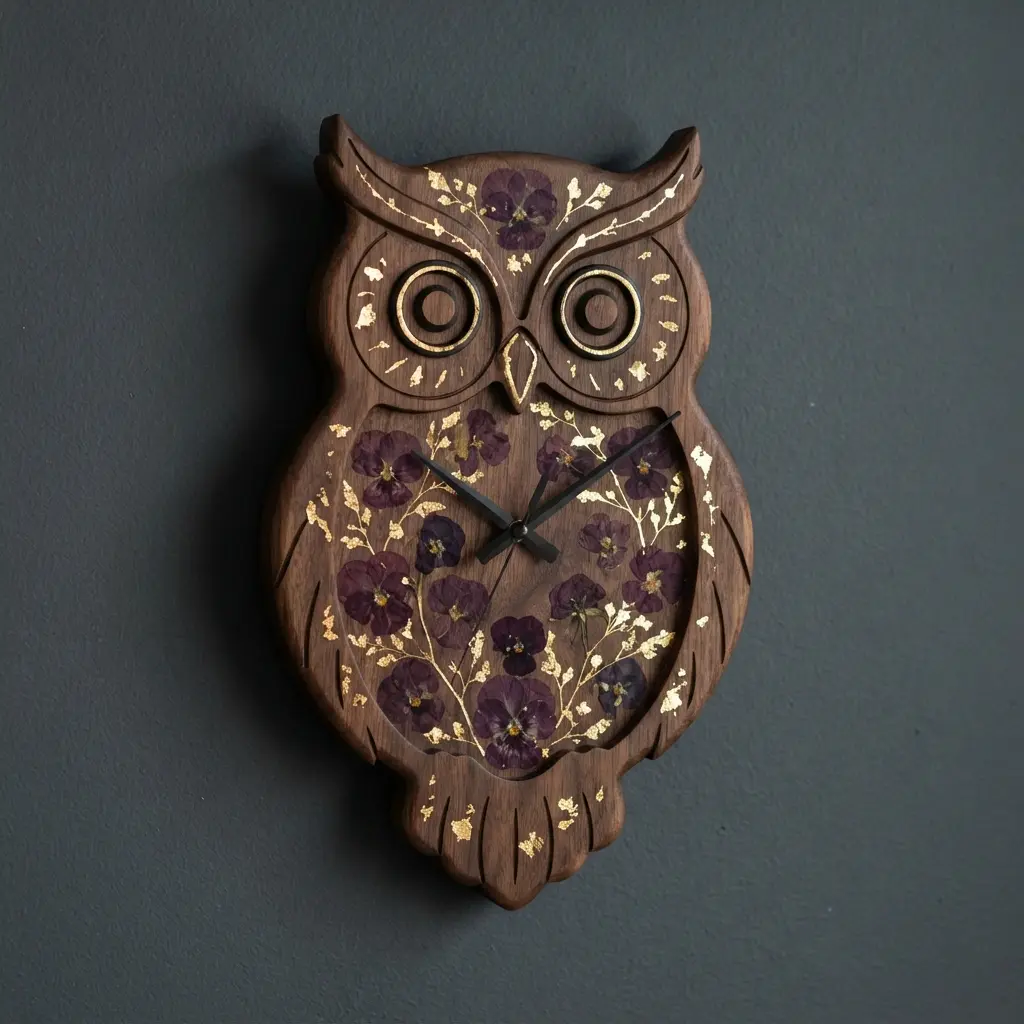
Who would have thought a clock could be this elegant? This project combines the natural charm of pressed flowers with a touch of luxury. You arrange delicate blooms and foliage to form an owl’s shape on your base, then add shimmering accents with gold leaf to create luxurious DIY owl clock ideas.
The secret to its lasting beauty is the clear epoxy resin seal. You pour it over your design, which locks everything in a glossy, protective layer and gives incredible depth. After it cures, you simply install a standard clock movement in the center. Isn’t it satisfying to create a functional heirloom?
Trust me on this one: ensure your flowers are completely dry before sealing to prevent any discoloration over time. You will adore the sophisticated, natural look it brings to your wall.
9. Stenciled Wildflower Silhouette Owl Clock
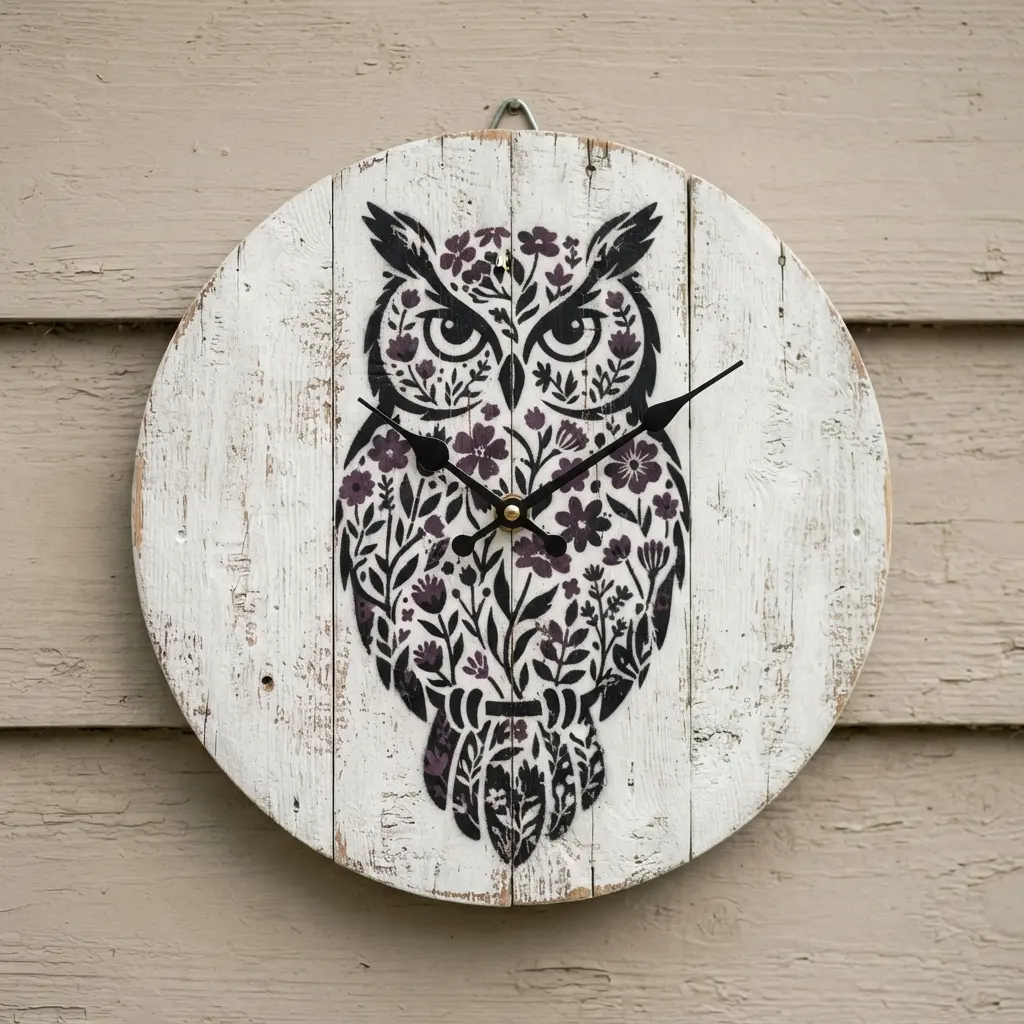
Ever think a bold silhouette project needs expert drawing skills? This one proves you wrong. You start by painting your wooden clock blank with a soft base color. Then, you simply position your owl and floral stencils and dab on a dark, contrasting paint.
The crisp, botanical outline appears like magic, creating a stunning piece of functional art. I love how this technique makes intricate patterns accessible to anyone. The sharp silhouette against a gentle background gives it a modern, graphic feel that works in so many rooms.
Trust me, the key to those perfect lines is a nearly dry foam brush. Seeing that clean, wildflower-framed owl take shape is incredibly satisfying. You will feel so proud hanging this handmade creation on your wall.
10. Watercolored Poppy Motif Owl Face Clock
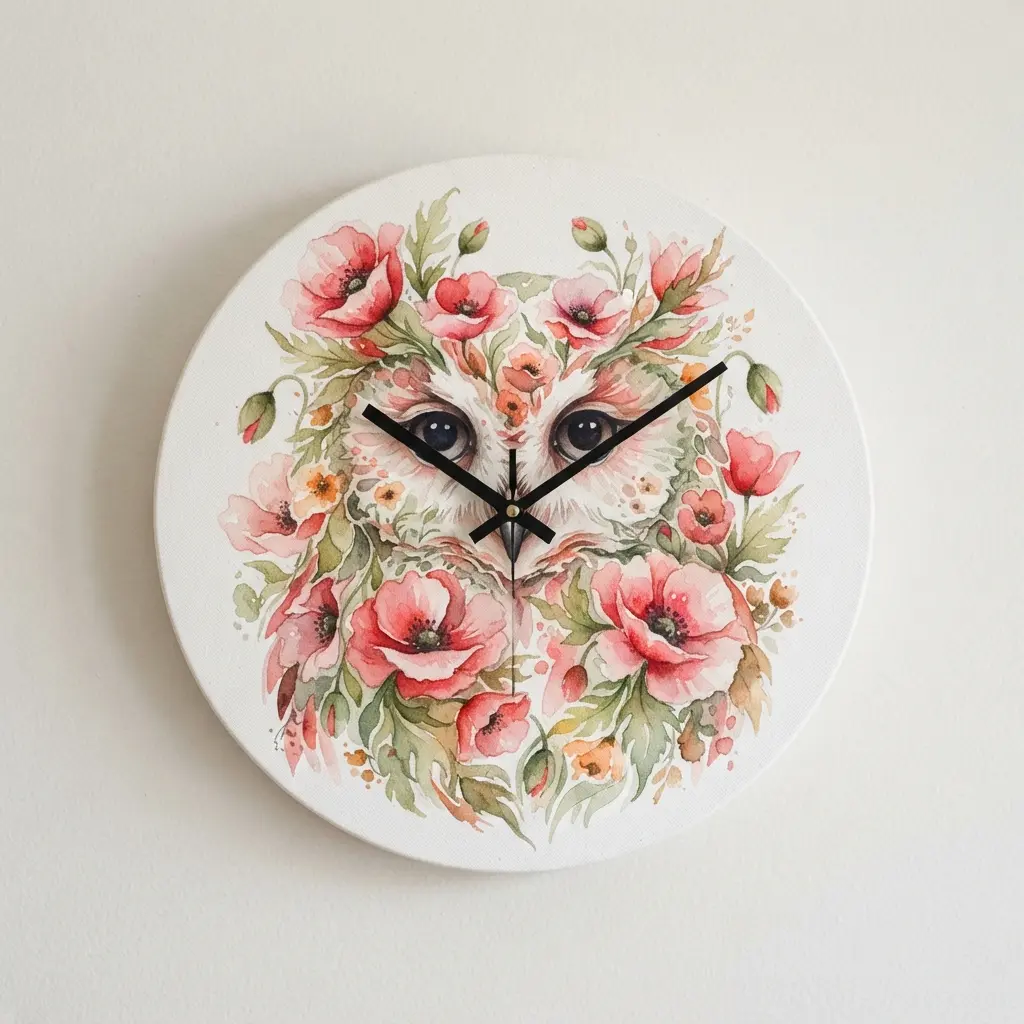
This one feels like a painting you would hang in a gallery, but it is totally doable on a clock. The secret is building up those soft, blended layers of high-quality watercolors on your wooden base. You will paint the owl’s face first, then weave the poppy motif into its feathers or around its eyes for that enchanting, ethereal look.
Trust me, the most satisfying part is seeing those translucent colors blend together. It works because the delicate watercolor style creates a serene mood, perfect for a calming corner of your home. A great tip is to plan your poppy placement in your initial sketch so the final composition feels balanced and magical.
Applying Protective Finishes to Preserve Floral Art
A clear sealant is non-negotiable for protecting your pressed flowers and paint from dust and fading. You will want a matte acrylic spray varnish designed for mixed media, as it dries crystal clear without yellowing. Apply two light coats over your entire finished piece, letting it dry completely between layers.
This seals everything in place, from the most delicate petal to the wood grain, and prevents any future wear from the clock hands moving over the surface. The matte finish avoids a shiny glare that could make the clock face hard to read. Your finished owl clock will stay vibrant and beautiful for years, becoming a true heirloom piece in your home.
Conclusion
So, did any of these DIY owl clock ideas spark that creative feeling? I always love that moment when a project just clicks. Look at the skills you could bring to life, transforming simple materials into a piece that tells time and tells a story about your love for nature and craft. My best advice is to start with the project that makes your heart sing the loudest, even if it’s not the simplest.
That passion will carry you through. Whether you choose the delicate touch of decoupage or the free flow of watercolor, you’re creating something uniquely yours. These floral owl clocks are a wonderful way to add a personal, cheerful touch to your home, blending function with a whole lot of heart.
FAQs
Q: What is the easiest type of DIY owl clock for a beginner?
A: A decoupage owl clock is often the most beginner-friendly. You need a wooden owl base, mod podge, floral napkins or paper, and a clock kit. The technique involves gluing the paper onto the shape and sealing it, which is straightforward and forgiving.
Q: How do I ensure the clock numbers are visible on a busy floral background?
A: Consider using contrasting colors for the numbers or clock hands. Metallic markers, painted numbers in a solid color, or even applying small, plain ceramic numbers over the pattern can create the needed definition. Testing on a scrap piece first helps.
Q: Can I use a real clock mechanism from an old clock?
A: Absolutely, as long as it’s in working order. Just measure the shaft length to ensure it’s long enough to pass through your new owl clock base and attach the hands securely. Many craft stores also sell inexpensive, new quartz clock kits that are reliable.
Q: What type of paint is best for a ceramic owl clock?
A: Use acrylic paints designed for ceramics or multi-surface paints, and always seal your work with a clear ceramic sealant or varnish. This protects the design from wear and allows for easy cleaning if the piece is in a kitchen or bathroom.
Q: How can I make my pressed flower resin clock last longer without yellowing?
A: Use a high-quality, UV-resistant resin to prevent yellowing from sunlight. Ensure your pressed flowers are completely dry and sealed with a light brush of decoupage glue before embedding to prevent moisture bubbles or browning.








