There is a certain feeling that comes with arranging your holiday decor, a mix of nostalgia and the fresh excitement of a new season. While we all know the classic wreath and the string of lights, the simple act of spelling out a meaningful word can anchor an entire space. We have been accustomed to store-bought signs, but a handmade one holds a different kind of warmth, a personal echo of the season spirit. I love this one because it is a project that truly welcomes everyone in, from the quick weekend crafter to the dedicated maker. Exploring these diy joy sign ideas reveals a range of styles, using everything from wood slices to cozy yarn, so you can find the perfect fit for your home. Grab your favorite hot drink and let us find your next project.
Sourcing Reclaimed Wood and Suitable Base Materials
The fastest way to make your sign feel cheap is using thin foam board. Trust me, you want the heft and texture of real wood, and for that, a 1/4 inch Baltic birch plywood is your best starting point. Its smooth, tightly-grained surface accepts paint and stencils without bleeding, giving you super crisp lines. Pallet boards are a fantastic rustic option, but you must spend time sanding them down thoroughly to avoid painful splinters. Beginners often skip this step, but it makes all the difference when pursuing diy joy sign ideas for a polished finish.
Selecting Typography Styles for Optimal Readability
We all know the horror of a beautiful sign you cannot read from across the room. The good news is, high-contrast typography solves this problem every time. Start with a simple, bold script or a clean sans-serif font for your main letters. Here is the thing. You must print a full-scale test of your chosen word and tape it up on the wall first. This lets you check the spacing and overall impact before you commit to paint.
A common mistake is poor kerning, where letters sit too close or too far apart, which disrupts the whole visual flow. Good spacing naturally separates the best diy joy sign ideas from amateur attempts. The best signs use that central ‘O’ as a design anchor, replacing it with a wreath or ornament to break up the text beautifully.
1. Rustic Reclaimed Barn Wood Joy Sign
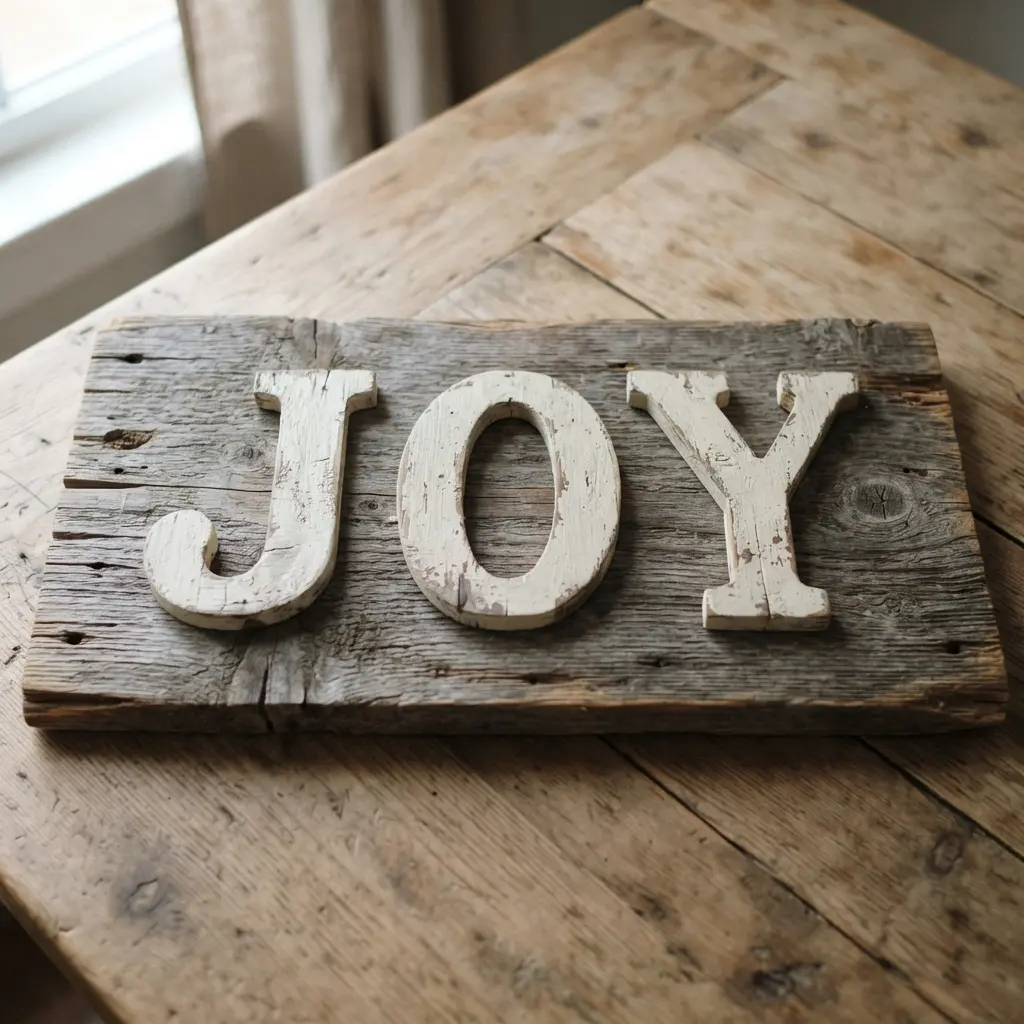
Ever wondered how a simple word can feel so warm and full of history? This project starts with finding the perfect piece of reclaimed barn wood. You will clean it, remove any old nails, and lightly sand it just enough to prevent splinters while keeping all its gorgeous weathered character. Then, you can stencil or hand-paint your Joy lettering onto the surface.
It works because the wood unique story and imperfections make the cheerful message feel authentic and cozy. I love how this becomes a piece of farmhouse decor with instant soul. Many collectors agree this approach defines the top diy joy sign ideas for a welcoming entryway. Trust me, embracing those natural flaws is the key.
2. Oversized Scrabble Tile Joy Wall Art
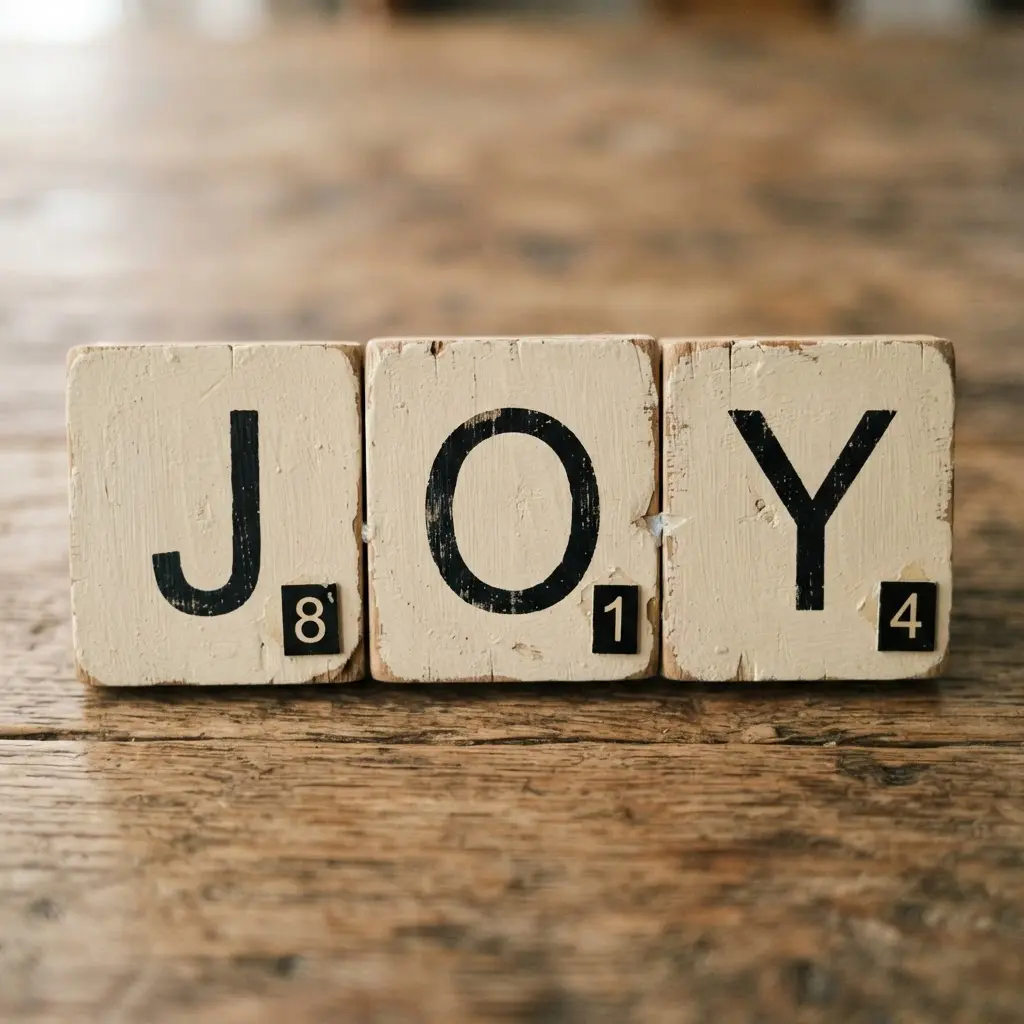
This project looks so professional, but it is surprisingly simple to pull off. You start with three pre-cut wood squares and finish them with your favorite stain or paint color. Then, you add the letters and their point values using easy vinyl decals or a stencil and paint. I love how this lets you customize the look, from rustic and distressed to sleek and modern.
Why does it work so well? The word JOY is short, sweet, and universally positive, making it a perfect fit for holiday decor. It is a versatile piece you will want to keep up all season long. For a crisp and easy finish, trust me on this one, vinyl lettering is your best friend. You will find this playful technique featured in countless diy joy sign ideas collections. Feel the satisfaction when you hang your cheerful new artwork.
3. Natural Wood Slice Joy Garland
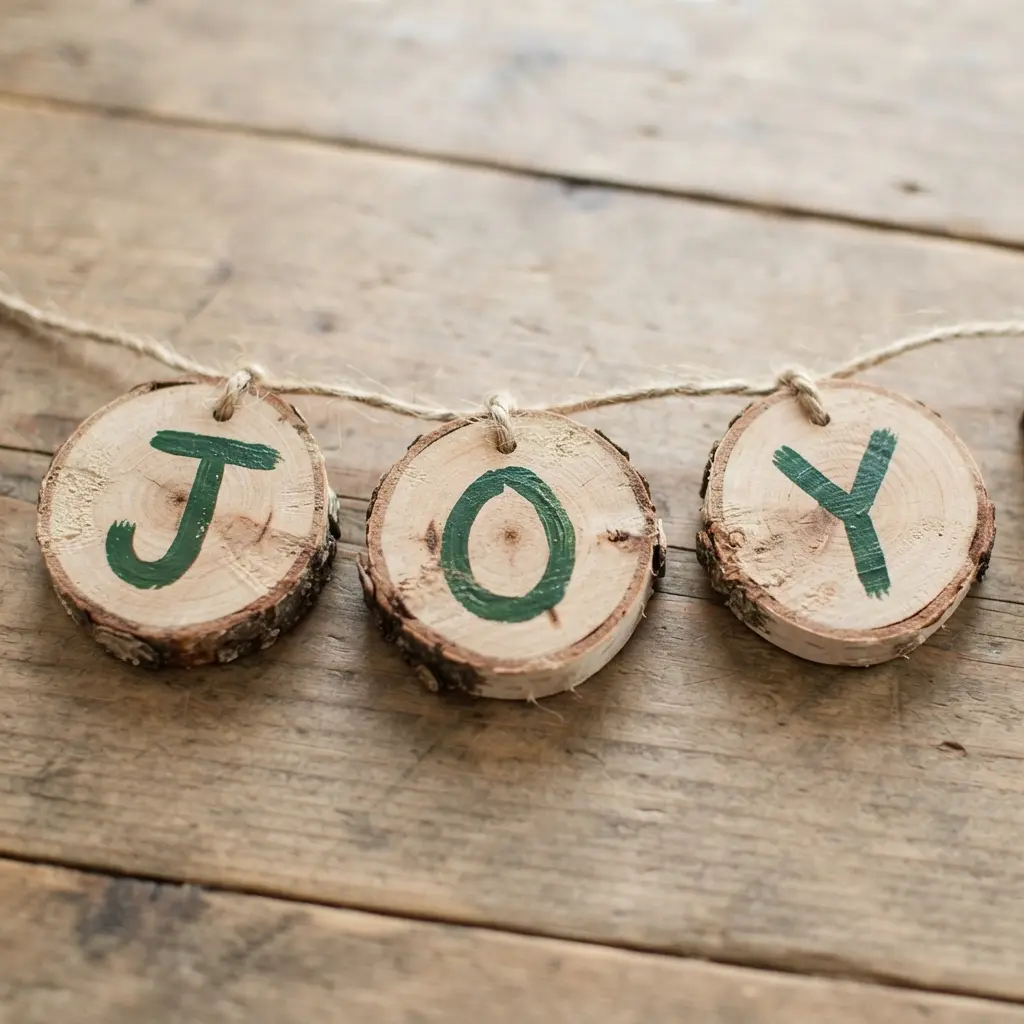
Who would have thought a few slices of wood could bring so much rustic charm? This project looks wonderfully handcrafted but honestly takes under an hour. You start by drilling two small holes near the top of each wood slice, using a scrap piece of wood underneath to prevent splintering. Then you lightly sketch and paint your J, O, and Y letters, applying several thin coats for a clean finish.
String them onto some jute twine, knot them in place, and you have a beautiful, earthy garland. The reason it works so well is that natural wood brings a cozy, organic feel to your holiday decor that plastic just can not match. It pairs perfectly with other rustic elements like pine cones and burlap.
My favorite tip is to use a small detail brush for the letters and let each coat dry completely. Trust me on this one, the satisfaction of hanging up your own handmade joy is unbeatable when you follow diy joy sign ideas that prioritize natural textures.
4. Soft Yarn Wrapped Cardboard Joy Letters

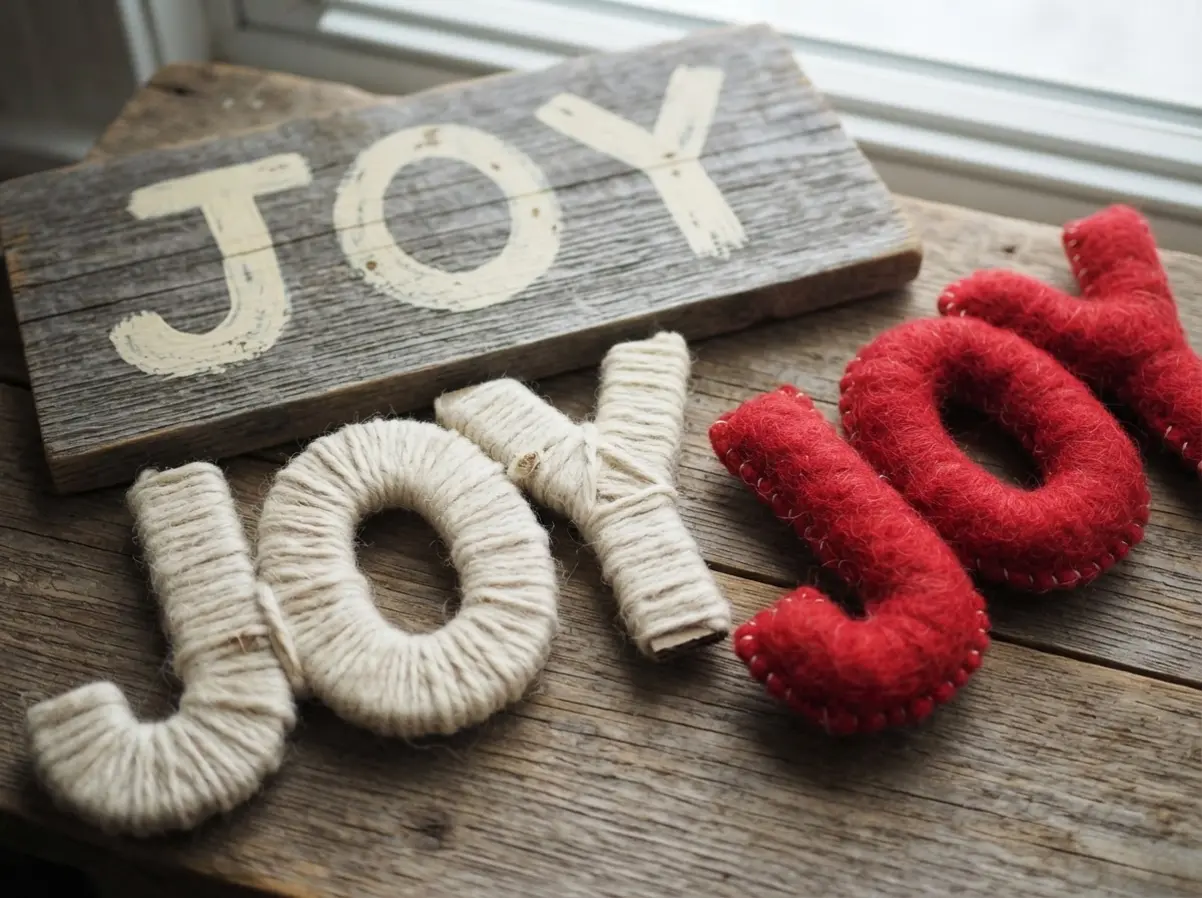
This is the project that looks incredibly intricate but is actually quite forgiving and simple. You start by cutting out thick block letters from old cardboard boxes, then you wrap them tightly with your favorite soft yarn. The magic happens as you cover every edge, creating a wonderfully cozy, textured feel that is perfect for holiday decor. Soft textures naturally elevate your list of diy joy sign ideas without requiring expensive tools.
I love how you can make each letter unique with different colors or a plush chenille yarn. The key is to wrap neatly and secure all your ends with a low‑temp glue gun on the back. Isn’t it satisfying to transform basic supplies into something so warm and personal? You will feel so proud hanging up your finished JOY sign.
5. Stenciled Burlap Pennant Joy Banner
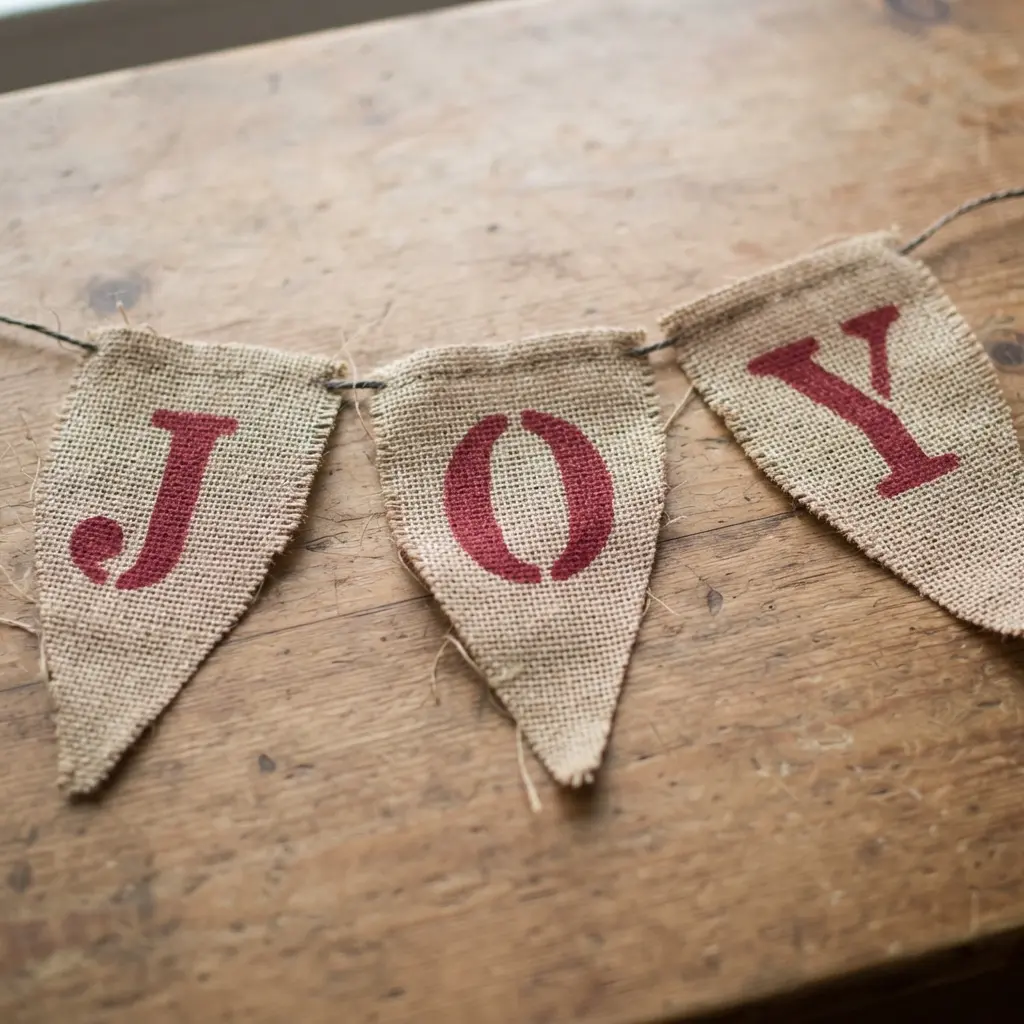
This one looks so professional, but trust me, the process is wonderfully simple and accessible. You start by cutting your natural burlap fabric into uniform pennant shapes. Then, you secure a letter stencil to each piece and dab on your contrasting paint with a stencil brush or sponge, building up color in light layers. Once dry, you just fold the tops over some twine and glue them in place. The magic is in that rustic, handcrafted texture paired with a crisp, festive message.
The burlap texture makes this one of the most versatile diy joy sign ideas to display anywhere in your home. I love how it works because the materials are so forgiving and inexpensive, making it a perfect project to try even if you have never crafted with fabric before. A great tip is to lightly apply some Fray Check to the cut edges before you begin painting. It keeps everything neat.
This banner also makes a fantastic handmade gift, and you can easily extend the idea to other words or names. Before you start painting, it is a smart idea to read a guide on how to create a holiday card wreath for similar rustic crafting techniques.
6. Felted Wool Puffy Joy Mantle Decor
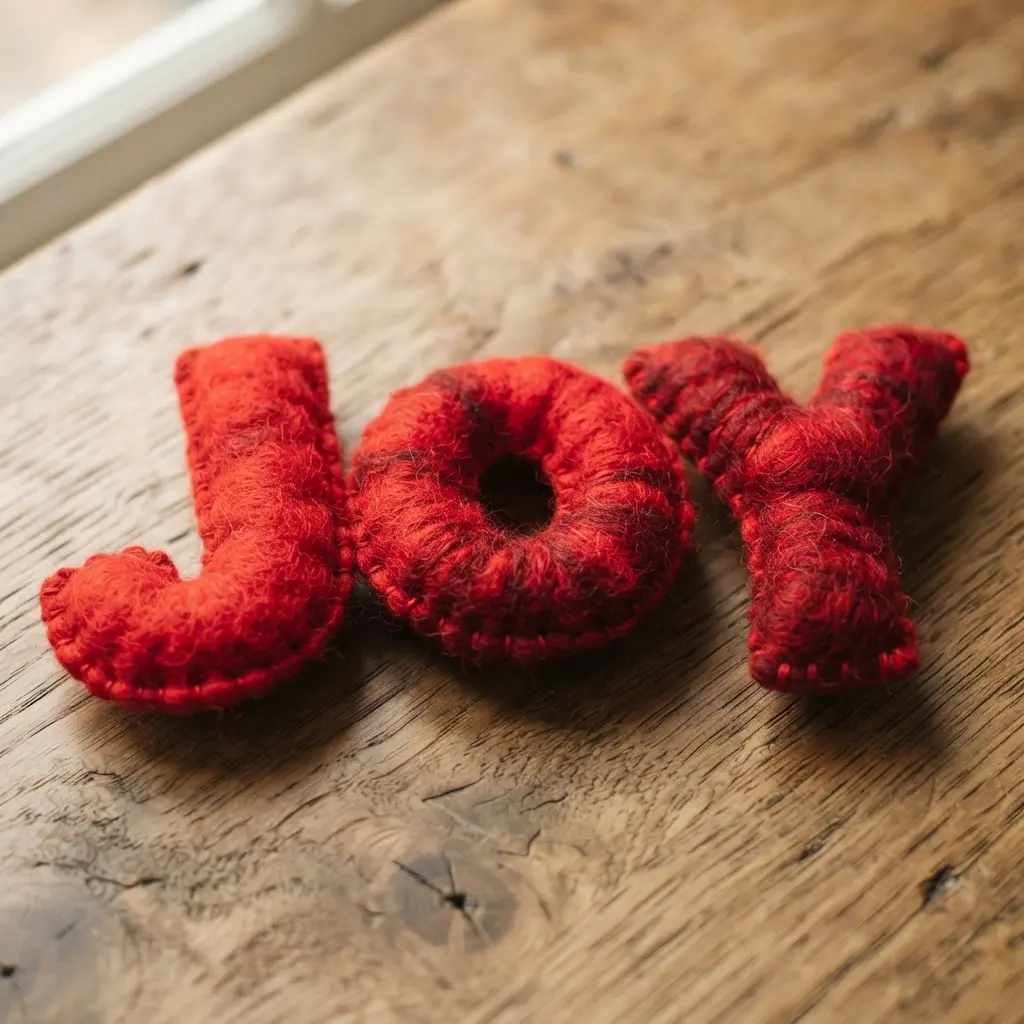
Ever feel like your mantle needs a bit of cozy, handmade charm? This project looks so professional, but I love how simple the process really is. You cut your three letters from thick felted wool, sew them together, and stuff them with soft filling to get that adorable plump shape.
It is instantly festive and brings such a warm, tactile feeling to the space. The best part is you can choose colors that perfectly match your room palette, making it work for the holidays or all year long. Adding soft wool brings cozy tactile appeal to your diy joy sign ideas for winter. Trust me, the final result is so satisfying to see sitting up there.
7. Distressed Painted Plank Joy Entryway Sign
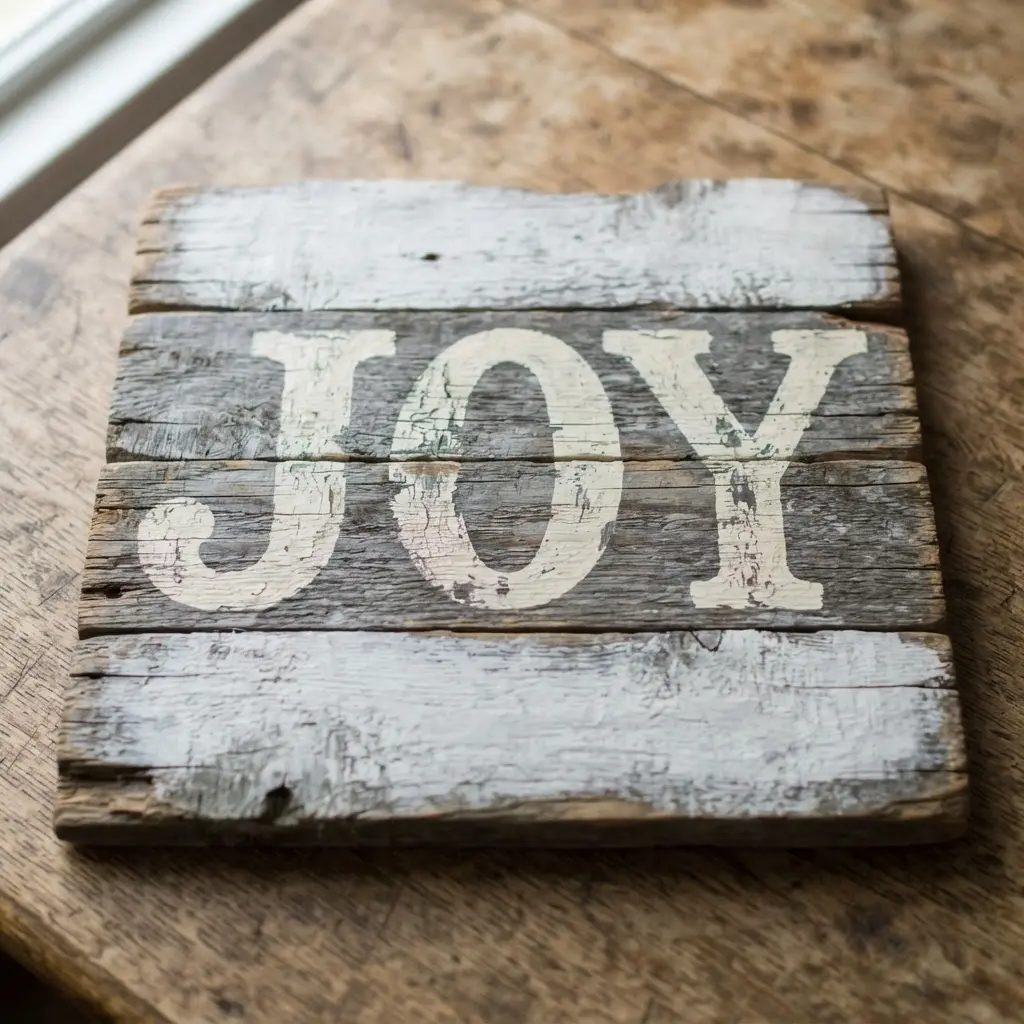
This sign looks like it has a story to tell, doesn’t it? The secret is layering. You start by securing your planks together and applying a light base coat of paint. After that dries, you lightly sand the edges and some flat spots to let the wood peek through. I love how this creates instant character.
Then you stencil or paint your JOY letters in a bold, contrasting color. The final magic touch is a quick pass with sandpaper over the letters too, so they look like they have aged along with the wood. Achieving that worn vintage look places this among the top diy joy sign ideas for entryways. It works because the rustic, worn feel makes the cheerful message feel cozy and genuine, not brand new.
Before you add any hanging hardware, think about where it will go. Reading a guide on an easy shadow box ornament craft can give you great ideas for displaying dimensional holiday pieces. Feel that handmade warmth the moment you hang it up.
8. Metallic Spray Painted Foam Joy Letters
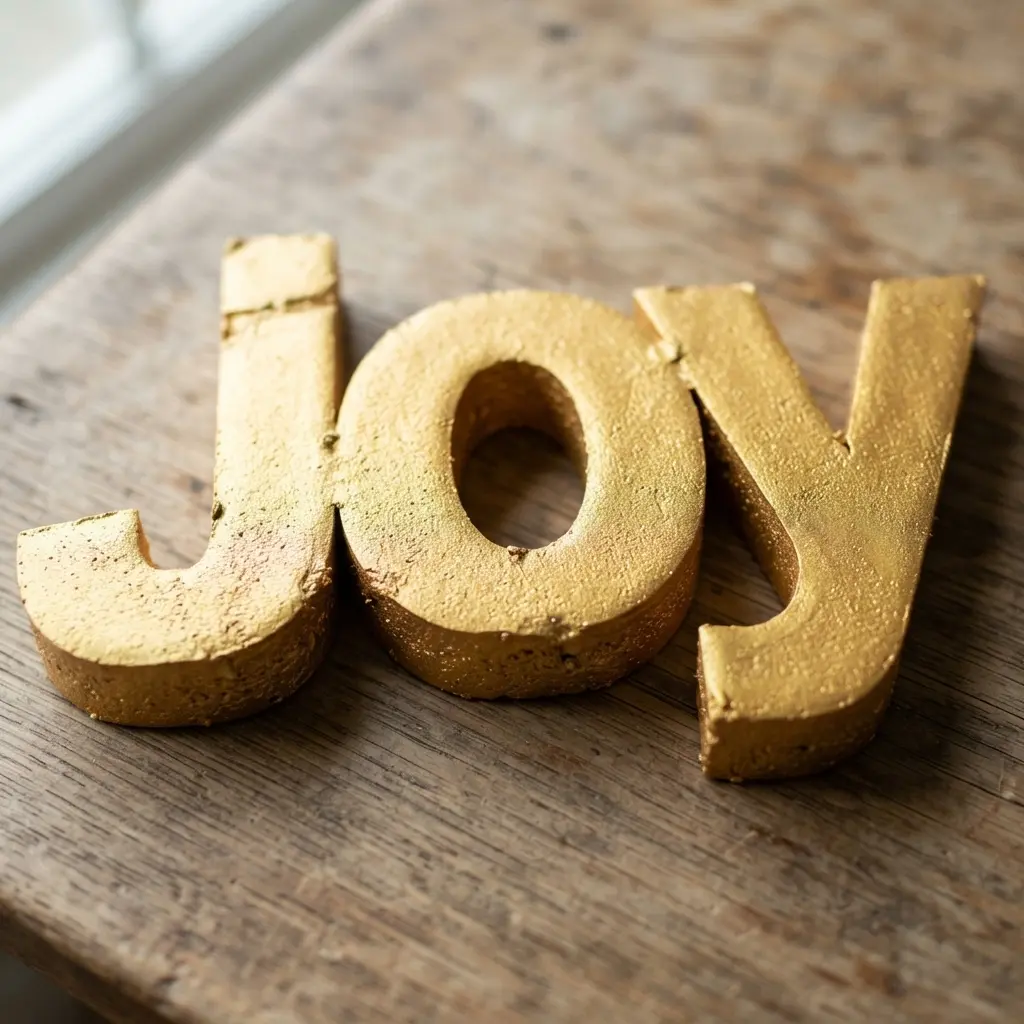
Ever wondered how to get that high-end metallic look without a hefty price tag? This project is your answer. You start with simple foam letters and transform them with foam-safe spray paint. The key is applying several thin, even coats from a good distance, letting each dry fully. It is surprisingly quick, and the shiny finish catches every bit of light in a room.
I love how this technique turns basic materials into something so festive. The metallic sheen gives your holiday decor instant glamour and a personal touch. Trust me, seeing your own JOY letters sparkling on the mantle feels incredibly rewarding. Quick metallic finishes show why spray paint dominates modern diy joy sign ideas trends.
Your most important step is reading the paint can label. Using the wrong type can melt the foam, so always double-check for that foam-safe label before you start. Once you have that, you are set for a gorgeous, lightweight display piece.
9. Minimalist Wire Script Joy Wall Hanging
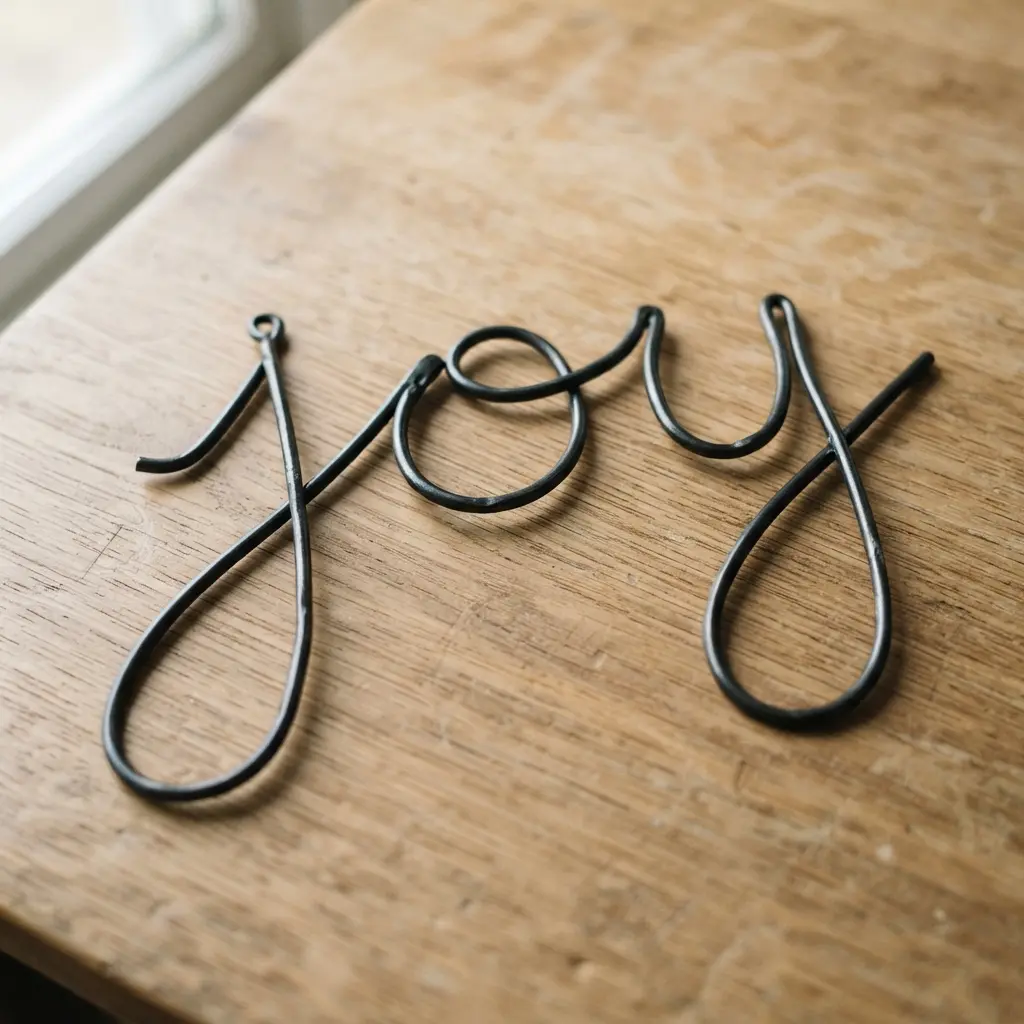
Ever wonder how those delicate wire words get their smooth, graceful look? The secret is in round-nose pliers. You use them to make small, gradual bends, tracing a printed script template to form each letter from a single continuous piece of wire.
Minimalist wire bends create sleek options that refresh your list of diy joy sign ideas for modern spaces. Work slowly and compare your shape to the guide often, connecting the J to the o to the y in one fluid motion. I love how this project turns a simple positive word into such an elegant, modern accent for your space.
Your finished piece makes a wonderfully personal gift, and if you’re looking for another festive, hands-on project, you could pair it with some Christmas ornament coloring pages for a full afternoon of holiday crafting.
10. Lighted Marquee Style Joy Sign Project
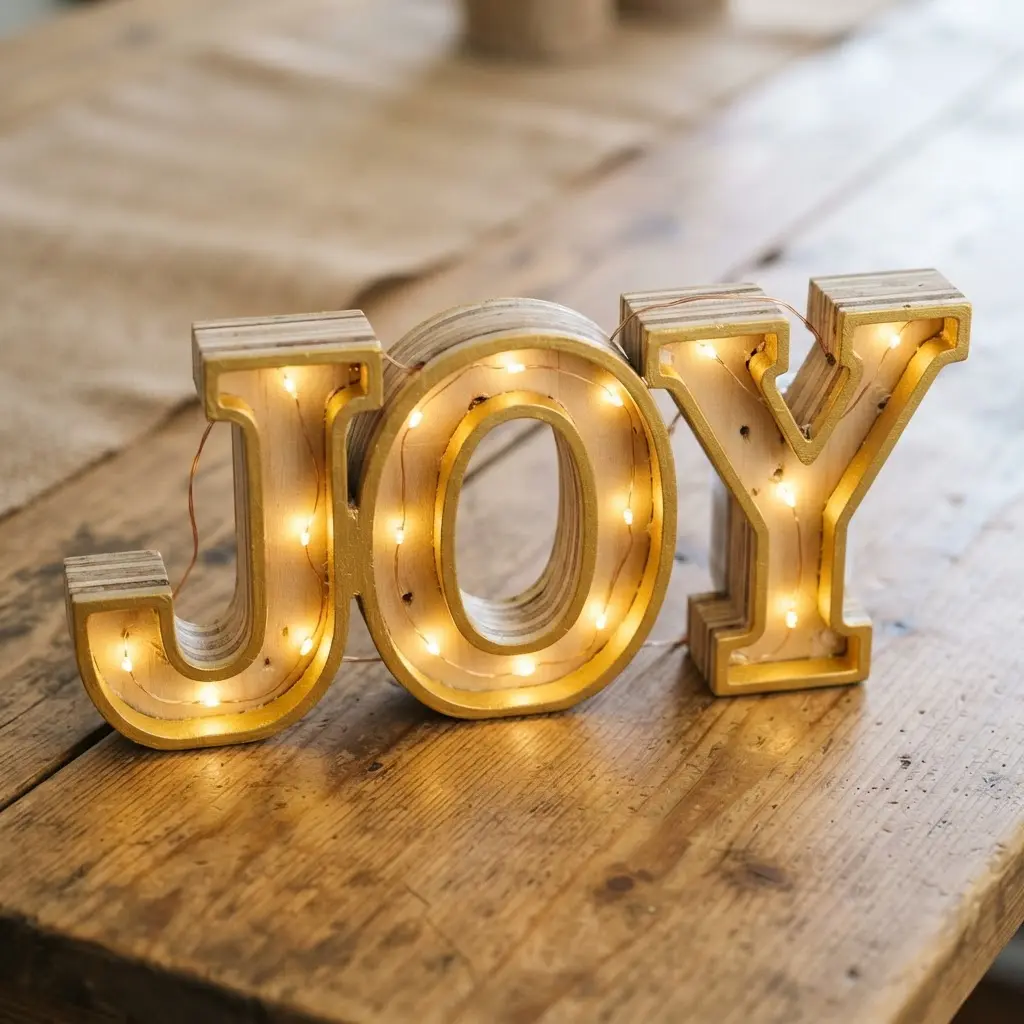
Ever wanted to capture the magic of an old theater sign? This marquee style project brings that vintage glow right into your home. You will build dimensional letters for J, O, and Y, drilling holes for E12 candelabra sockets to hold the bulbs. I love how the warm white LEDs pop against a painted or metallic finish, creating a real showpiece. It works because you are blending a classic aesthetic with modern, safe lighting for a stunning holiday display.
Trust me on this one: start with thick foam board for your first attempt. It is easy to cut and lets you perfect your template and light spacing before moving to more permanent materials. Adding warm bulbs transforms this marquee project into one of the most dramatic diy joy sign ideas available. Wire all the bulbs in a parallel circuit so if one goes out, the rest stay lit. Feel the pride when you flip the switch and your handmade JOY lights up the room.
Applying Weather Resistant Sealants for Exterior Displays
All your hard work disappears if sun and moisture ruin the finish. Outdoor durability separates temporary crafts from lasting diy joy sign ideas that survive winter storms. For any sign destined for a porch or garden, you need an outdoor-rated acrylic topcoat. I prefer a matte finish because it prevents that plastic-looking shine and resists yellowing in direct sunlight.
Apply two thin, even coats with a soft brush, letting each layer dry completely. This seal locks in your paint and any delicate embellishments like glitter or metallic leaf. It also protects the raw wood from warping or cracking with seasonal humidity changes. Your finished piece will stay vibrant and beautiful for seasons to come with this simple final step.
Conclusion
So, did you feel that spark of inspiration? Look at the possibilities you have gathered—it is real creative fuel right there. A handmade sign is more than decor; it is a little piece of your own holiday spirit made tangible. My best piece of advice is to pick the one that made you smile first, gather your supplies, and give yourself an afternoon to simply enjoy the making. The result will be a beautiful reminder of the season and the satisfaction of having made it yourself. Gather your materials from any of these diy joy sign ideas and start building your holiday centerpiece.
FAQs
Q: What is the easiest joy sign build for a beginner?
A: The yarn-wrapped cardboard letters are very straightforward. You only need cardboard, yarn, and glue, with no complex tools. It is a perfect project to start with.
Q: Can I make a joy sign without power tools?
A: Absolutely. Projects like the wire script, yarn letters, or stenciled burlap banner require only simple hand tools like scissors, wire cutters, or a paintbrush.
Q: What kind of paint works best on wooden boards?
A: Acrylic craft paint is excellent for most wooden boards. It dries quickly, comes in many colors, and adheres well to sanded wood surfaces.
Q: How do I hang a heavy wooden sign securely?
A: Use a sturdy picture hanging kit with D-rings and wire. For extra weight, attach the D-rings directly to the back of the sign with screws, not just to the surface.
Q: Where is the best place to display a holiday joy sign?
A: An entryway table, a fireplace mantle, or a prominent spot on a shelf are all classic choices. The goal is to place it where you and your guests will see it first.