

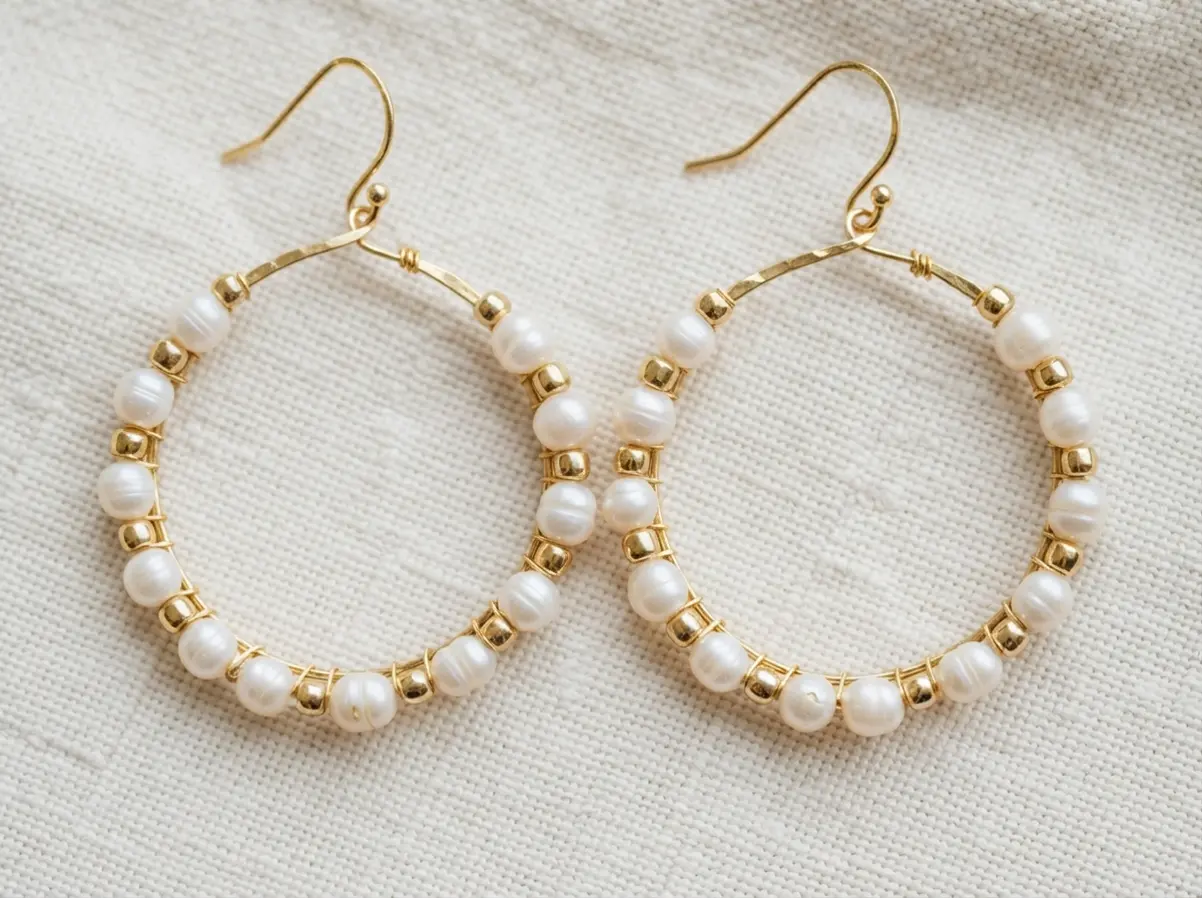
Adding beads transforms a simple hoop into a wearable piece of art. It blends metallic shine with rich texture and color. I love how a single strand of seed beads can whisper elegance. A cluster of vibrant glass makes a bold statement.
This collection is all about that joyful transformation. We have gathered ten distinct styles, from minimalist designs to ornate creations. Each showcasing a different way to play with gold and beads. Grab your pliers and your favorite spools of wire. Let us get inspired to create something beautiful for your ears.
Selecting Durable Metal Basework For Jewelry
The fastest way to ruin beautiful diy gold beaded hoops is with a flimsy wire base that bends out of shape the first time you wear it. Here is the thing, you need a metal with enough memory to spring back into a perfect circle after handling. For gold beaded hoops, 14k gold-filled wire offers that ideal balance of workability and durability you want. Gold-filled wire has a thick, permanent outer layer of 14k gold bonded to a core of brass.
It feels substantial and resists tarnish far better than plated metals. This core gives your hoop the structural integrity to support the weight of your bead selection without drooping. You will notice the difference immediately when you work with it. It holds its shape beautifully while still being soft enough to open and close your earring findings.
Measuring Bead Hole Gauge For Hoop Compatibility
Nothing stops a project faster when planning diy gold beaded hoops than a beautiful bead that simply will not fit on your hoop wire. You must check the internal diameter of every bead before you commit to a design. Your hoop wire gauge, like 20 or 22 gauge, needs to slide smoothly through the bead’s hole with a little room to spare. This extra space is crucial because you are not just threading beads.
You are also navigating the curve of the hoop itself. If the fit is too tight, you will force the wire and risk breaking delicate beads like freshwater pearls. Always test with a short piece of your actual wire first. Trust me on this, a quick compatibility check saves the frustration of realizing your focal stone is stuck halfway around your carefully formed circle.
1. Minimalist Gold Seed Bead Hoop Earrings
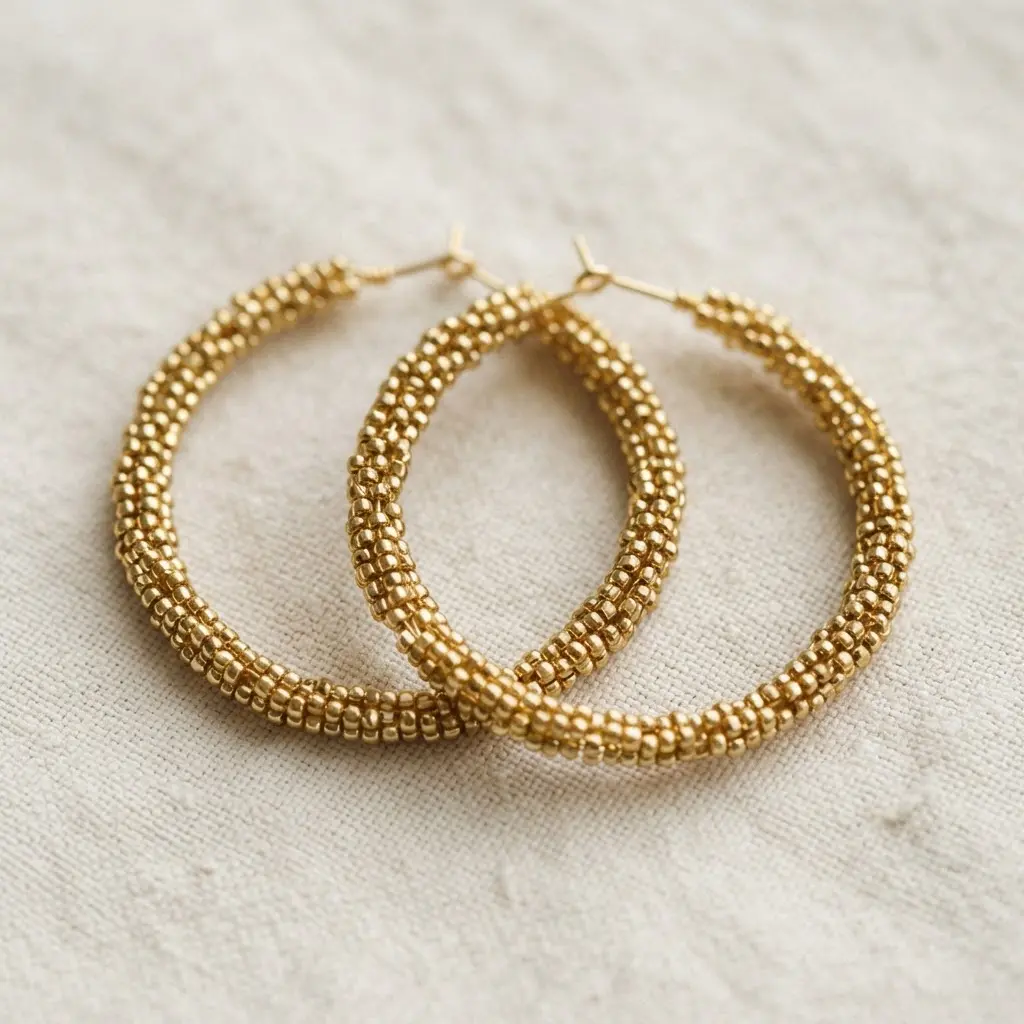
Ever wondered how those dainty, perfect diy gold beaded hoops are made? You start with a simple gold hoop and thread on tiny, uniform seed beads. I love how you can wrap them snugly around the base for full coverage or leave elegant gaps for a more open look. Their beauty lies in the clean, monochromatic texture.
You get a polished piece that feels light and goes with absolutely everything. Isn’t that the goal for everyday earrings? If you are new to working with small components, practicing on a simple crafting bangle jewelry project first builds great hand control. Feel that quiet satisfaction when your final wrap is tight and even.
2. Bohemian Turquoise and Gold Hoop Earrings
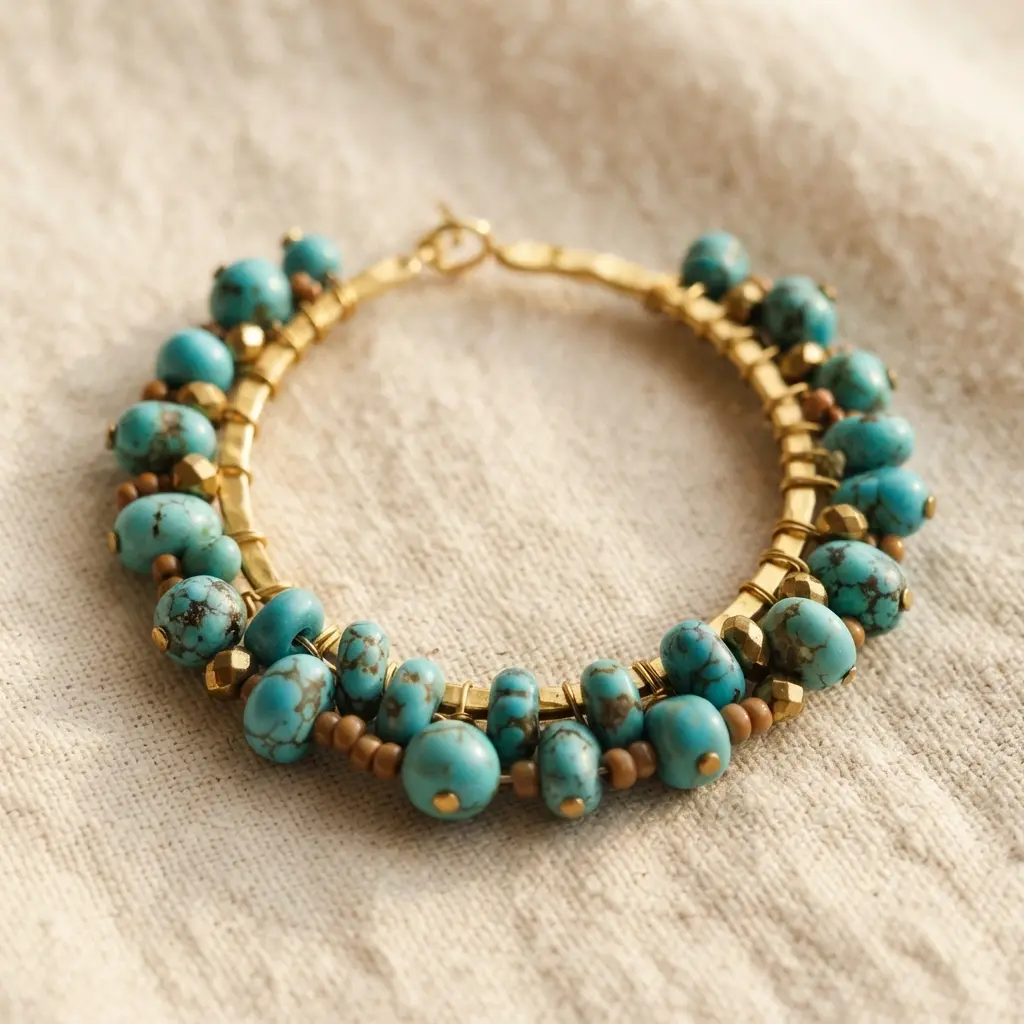
Ever felt a piece of jewelry just captures that free-spirited, creative energy you love? These earrings do exactly that. You start by shaping a gold wire hoop to your preferred size, which is a classic step for diy gold beaded hoops. Then, you carefully string or wire-wrap your chosen turquoise beads onto the loop.
I love how the combination of a warm metal and a cool, earthy stone creates such a vibrant contrast. The key is to avoid overcrowding the design. A few well-placed beads feel much more sophisticated than a cluttered look. Trust me, you will adore the finished, artisanal feel of these handmade hoops.
3. Elegant White Pearl Gold Hoop Earrings
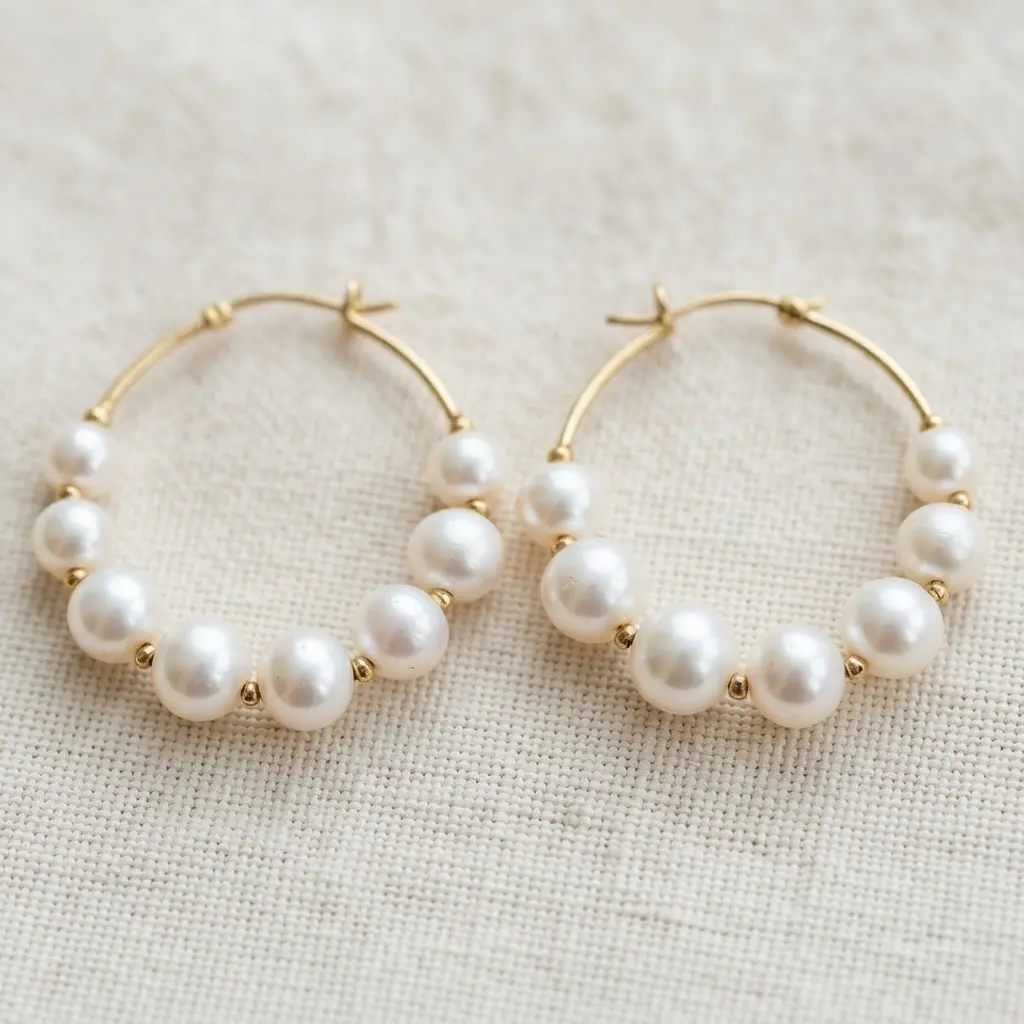
Ever wondered how a single accessory can feel both classic and fresh, much like a pair of diy gold beaded hoops? This design combines a polished gold hoop with a beautiful white pearl. I love the contrast of the warm, shiny metal against the pearl’s cool, soft luster. You simply attach the pearl to the bottom of the hoop.
Let it dangle freely for a touch of movement. The magic is in the materials. For a piece that lasts, start with 14k gold vermeil for the hoop. It gives you that rich, warm look without the solid gold price tag.
Pair it with a round freshwater pearl for its lovely, natural glow and great value. This combination creates an earring that works for absolutely everything. Trust me, keeping your pearls looking their best is simple. Always wipe them gently with a soft cloth after wearing.
Store them separately. This prevents scratches and keeps that elegant shine perfect for years. Does that not sound like the perfect staple for your jewelry box?
4. Art Deco Faceted Crystal Hoop Earrings
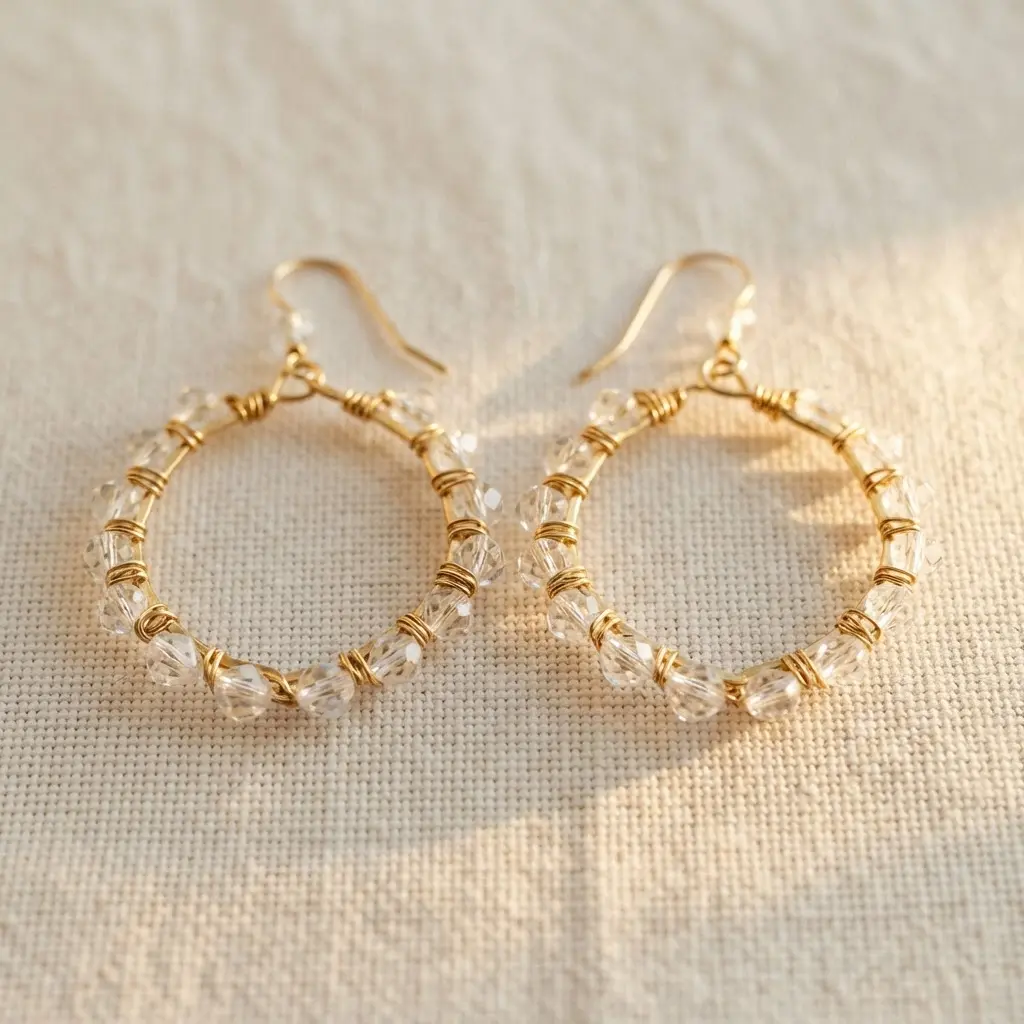
This style is all about geometric shapes and brilliant light, a foundation for many diy gold beaded hoops. You will select a gold-toned hoop blank with a stepped or angular profile, then arrange your faceted crystals in a clean, linear pattern. I love how the precise placement creates such a structured look. It works because the symmetry feels so intentional and elegant.
Trust me, the payoff is huge when you see those crisp lines catch the light.
5. Geometric Gold Tube Bead Hoop Earrings
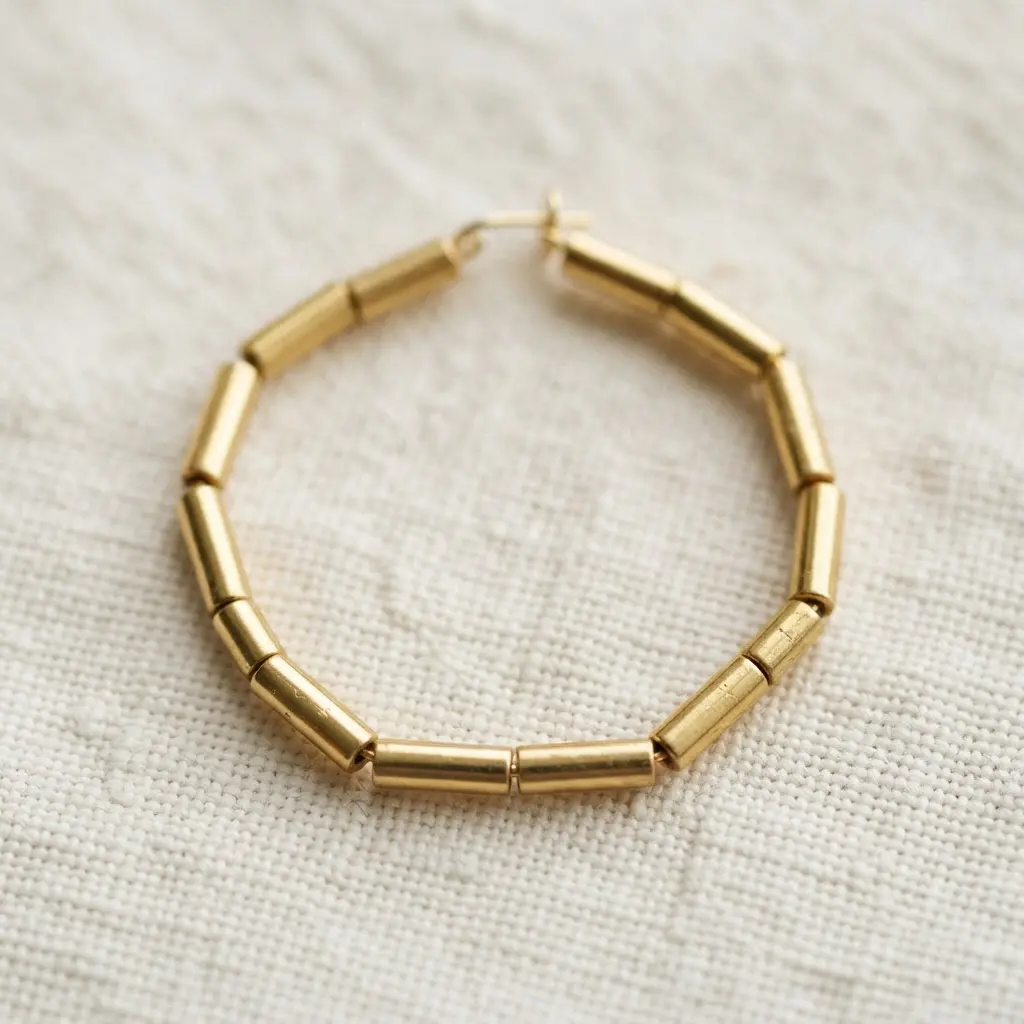
Ever thought about how a few simple beads could transform a classic hoop? Geometric gold tube beads add a modern, architectural edge to diy gold beaded hoops that feels both chic and easy to wear. You simply thread them onto a gold hoop blank, creating segments of texture that catch the light. I love how this design balances structure with elegance.
Making it a versatile piece for everything from jeans to a little black dress. The key is choosing tube beads with the right inner diameter for your hoop wire. If the fit is too loose, they will slide and clank together, which gets annoying fast. A snug fit keeps everything looking polished and intentional.
Once you have your beads secure, you will appreciate how this style organizes handmade jewelry pieces in your collection. Its clean lines make it a standout you will reach for again and again.
6. Chunky Gold Metal Bead Hoop Earrings
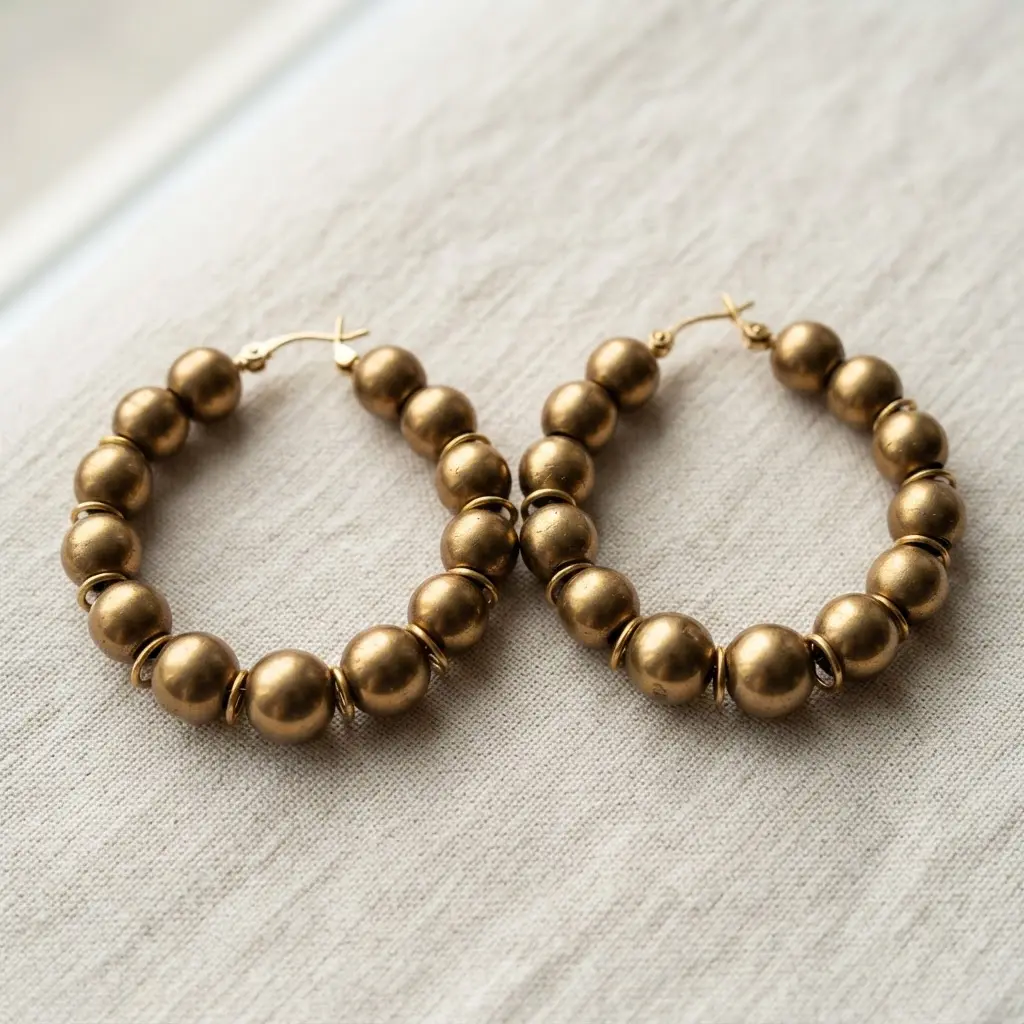
Ever wonder how to make a statement without saying a word when crafting chunky diy gold beaded hoops? These chunky hoops do exactly that. The core idea is simple: a substantial hoop is your blank canvas, and those gold-toned metal beads are your texture. You will either slide beads onto a thick wire before forming the hoop or attach them with solder for a permanent look.
I love how the weight feels substantial but not overwhelming, and the beads catch the light with every turn of your head. The hinge and snap bar closure keeps everything secure and comfortable. Why does this style work so well? It blends classic hoop elegance with a modern, textured twist.
That makes it incredibly versatile. You can wear these with a simple t-shirt or dress them up for a night out. The gold tone, whether it is vermeil or a quality plating, adds a warm glow to your complexion. Pro tip: always check the total weight before you buy or make a pair. A very heavy design can be uncomfortable over time. Try it and feel that instant boost of confidence when you put them on.
7. Delicate Rose Quartz Gold Hoop Earrings
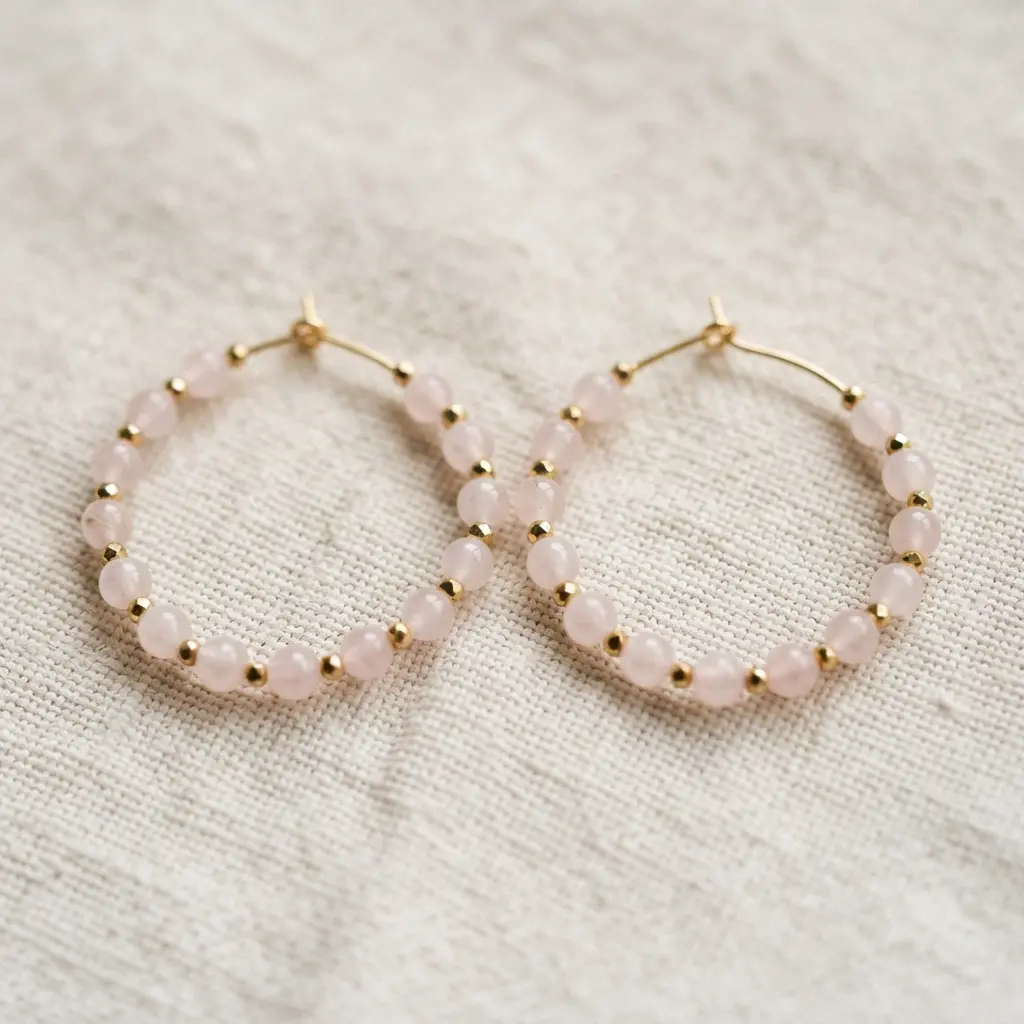
Have you ever wanted to add a whisper of color to your everyday look while stringing delicate diy gold beaded hoops? This design lets you do exactly that. You string small, pale pink rose quartz beads onto a thin gold hoop wire. I love how the soft pink pairs with a warm rose gold finish, but yellow or white gold works beautifully too for a different vibe.
What makes these earrings so special is their light, airy feel. You keep the hoops small and the quartz pieces dainty, so they never feel heavy. It is a quiet, elegant statement, perfect for dressing up a simple outfit. This is a great project if you are new to working with gemstones, as rose quartz is quite durable.
After you finish your earrings, you might find yourself wanting to try another beaded accessory project, like making some fabric bracelet tutorials. Does that soft pink just feel lovely?
8. Vibrant Multi-Color Glass Bead Hoop Earrings
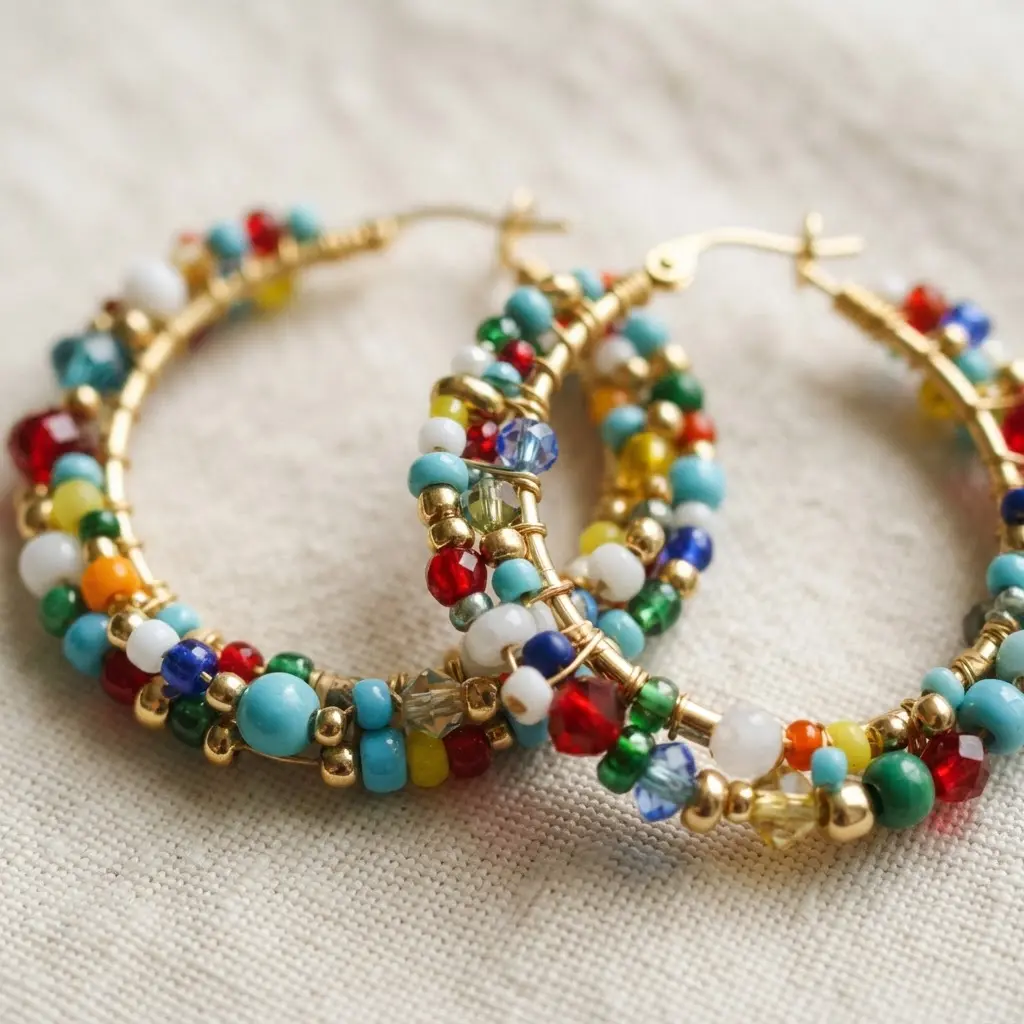
Who doesn’t love a serious dose of color to brighten up a simple outfit with vibrant diy gold beaded hoops? These hoops are pure, wearable joy. You start by selecting your glass beads in a rainbow of shades, then thread them directly onto your chosen hoop base. I love playing with different bead sizes and patterns, from a random confetti mix to a neat ombre fade. The result feels wonderfully artisanal and full of personality.
Getting the look right is all about balance. You want a vibrant, eye-catching effect without making the earrings too heavy to wear comfortably. That means spacing your beads thoughtfully and not overloading the wire. A pro tip is to plan your color arrangement on a flat surface before you start stringing. Isn’t it satisfying when those final pops of color come together?
9. Textured Hammered Gold Accent Hoop Earrings
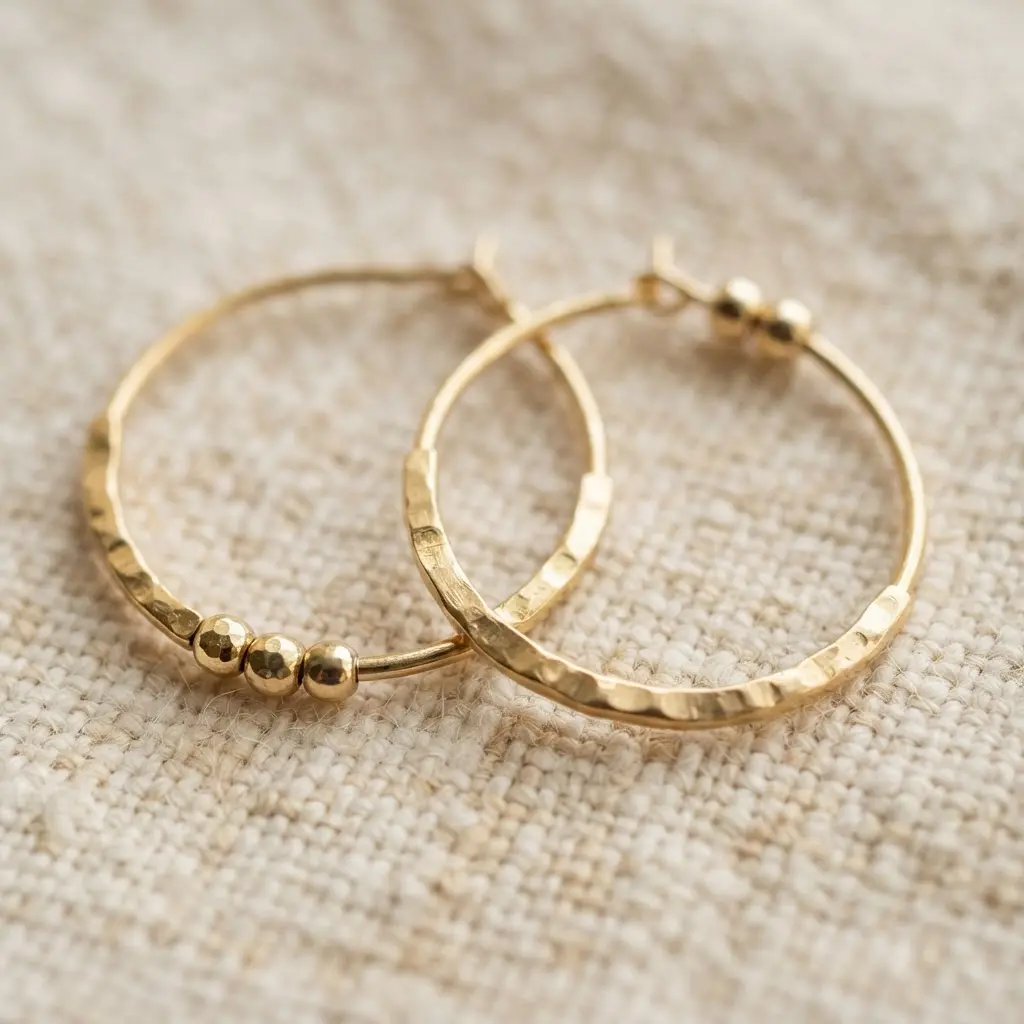
Ever notice how a simple gold hoop can feel so much more special when it has that artisanal texture, a finish often seen on diy gold beaded hoops? The secret is in the hammered surface. By striking the gold, you create tiny facets that scatter light in every direction, giving the metal a soft, dimensional sparkle instead of a flat shine. I love that this technique works with any hoop shape, from classic rounds to organic ovals.
Just remember, the quality of your gold accent material makes all the difference in how these earrings wear over time. Gold-filled or solid gold options will keep their warm glow much longer than a basic plating. For a truly personal touch, you can apply this handmade texture to your own designs, much like the creative process behind creating unique painted glass necklaces. The payoff is a pair of earrings that feel uniquely yours and catch the light with every turn of your head.
10. Vintage Style Ornate Gold Hoop Earrings
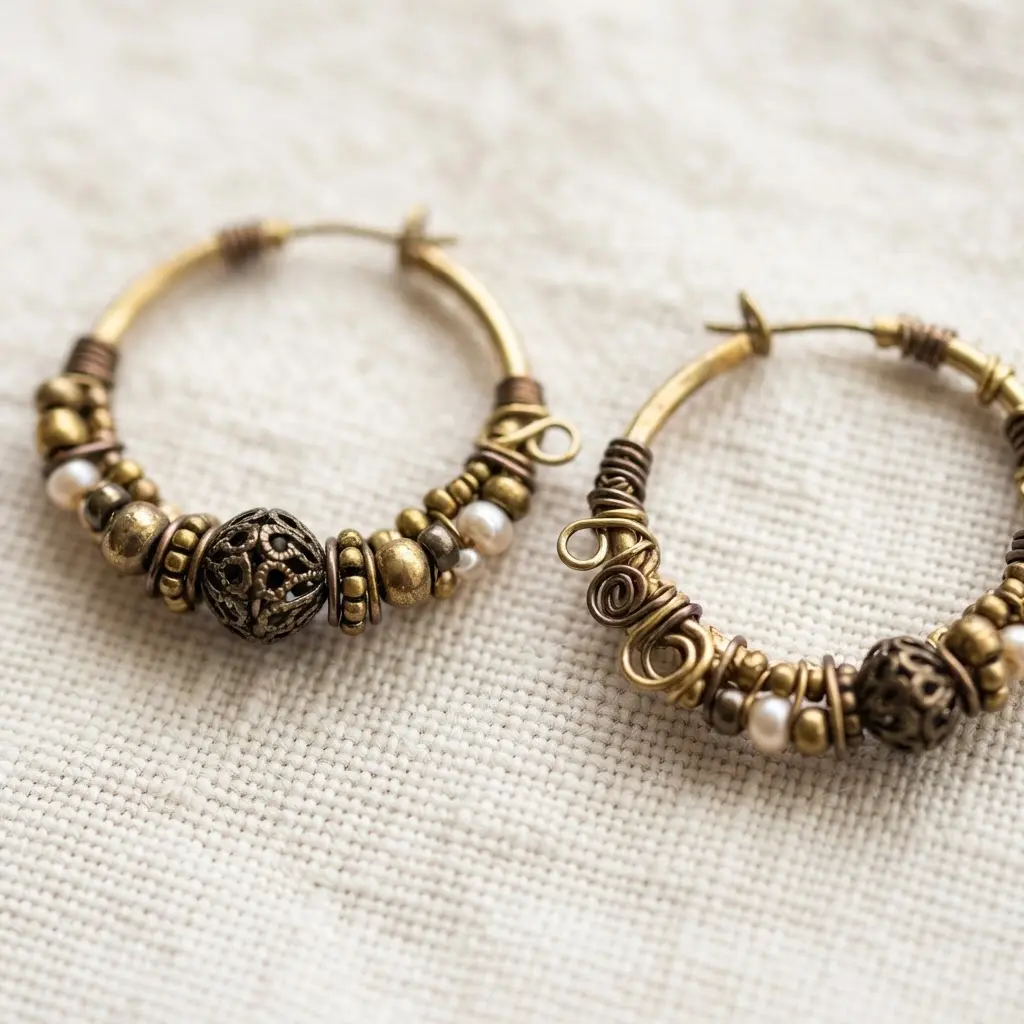
Ever wonder how those heirloom-looking diy gold beaded hoops get their intricate detail? It is not magic, it is meticulous handwork. You start by forming a simple gold wire hoop, then apply ornate details directly to the surface. I love using filigree wire for delicate, lace-like patterns, or a texturing hammer for a softer, hammered effect. This approach works because it layers rich texture onto a classic shape.
You get a piece that feels personal and full of history, not just another pair of earrings. Trust me, the payoff when you hold that finished, detailed piece in your hand is pure joy.
Polishing And Preserving Handmade Gold Jewelry
A quick polish with a dedicated jewelry cloth is the final step that makes your handmade pieces look professionally finished. These cloths are impregnated with a gentle polishing compound that removes fingerprints and minor surface scratches without being abrasive. For gold-filled components, you want to avoid any harsh chemical dips or ultrasonic cleaners, as they can damage the gold layer over time.
After polishing, store your finished work in a soft pouch or a compartment in your jewelry box. This prevents them from scratching against other pieces. This simple habit keeps your diy gold beaded hoops looking lustrous and protects those weeks of careful assembly. Your finished piece deserves that little bit of extra care to ensure it stays beautiful for years.
Conclusion
So, which design spoke to your creative spirit? Look at all the possibilities you have right at your fingertips, from the quiet elegance of pearls to the vibrant energy of mixed glass. The real magic happens when you take these ideas and make them your own, perhaps by swapping in a gemstone you adore or adjusting the scale to suit your style.
My best piece of advice is to start with a design that excites you, but also feels manageable; confidence grows with each successful closure and securely wrapped loop. Creating your own diy gold beaded hoops is about more than just making jewelry; it is about crafting a little piece of joy you can wear every day. Now, pick your favorite from this gallery and get started on your next pair.
FAQs
Q: What is the best wire gauge for stringing beads onto gold hoops?
A: A 24-gauge gold-filled or sterling silver wire is a versatile choice. It is strong enough to hold the hoop shape but thin enough to fit through most bead holes. Always test your beads on the wire before you begin your project.
Q: How do I stop beads from sliding around on the hoop?
A: Use a crimp bead or a tiny piece of coil-less wire guard at each end of your beaded section. You can also tightly wrap the wire around the hoop base several times before and after adding your beads to create a secure stop.
Q: Can I use gold-plated findings for these projects?
A: You can, but for durability and a professional finish, gold-filled components are a better investment. Gold-plated items may tarnish or wear off with frequent handling, while gold-filled findings are much more resistant to wear.
Q: How do I choose beads that complement a gold hoop?
A: Consider both color and texture. Metallic, glass, pearl, and gemstone beads all pair beautifully with gold. For a cohesive look, match the tone of your gold—warm yellow gold with amber or citrine, rose gold with rose quartz or copper beads.
Q: What tools are absolutely essential for making beaded hoops?
A: You will need a good pair of round-nose pliers for making loops, chain-nose pliers for opening and closing jump rings, and sharp wire cutters. A bead board or mat is also helpful for organizing your design before you string it.









