Choosing Durable Findings and Comfortable Necklace Cord
The fastest way to guarantee your ice cream cone necklace crafts get worn all summer is choosing a soft, adjustable cord over a fixed metal chain. You surely know how fussy a scratchy chain feels on a hot day. For your pendant, pair it with a hypoallergenic jump ring that will not irritate sensitive skin. This small metal loop acts as your anchor point, so pick a thicker gauge that resists bending.
A nylon or satin cord lets you adjust the length for a perfect fit, and it stays lightweight even with a clay charm attached. Trust me, a secure bail glued to the back of your pendant makes all the difference, so it hangs nicely without twisting. The right hardware feels invisible, letting the sweet design take the spotlight.
Selecting High Contrast Summer Color Palettes
A mint green cone with a rich chocolate scoop and hot pink sprinkles creates instant visual pop that reads as an ice cream treat from across the room. This high contrast look explains why ice cream cone necklace crafts achieve that playful realism we love. You will notice pastel pinks and bright blues make the treat look extra juicy and fun. Think about pairing a pale yellow cone with a deep purple scoop for a bold, berry-inspired look.
The summer shades are easy to find in polymer clay or felt packs. Avoid muddy, low-contrast combinations that make the details hard to see. Your goal is making each part of the treat distinct, so the sprinkles and textures stand out for maximum sweet effect.
1. Pom-pom Pastel Scoop Felt Cone Necklace
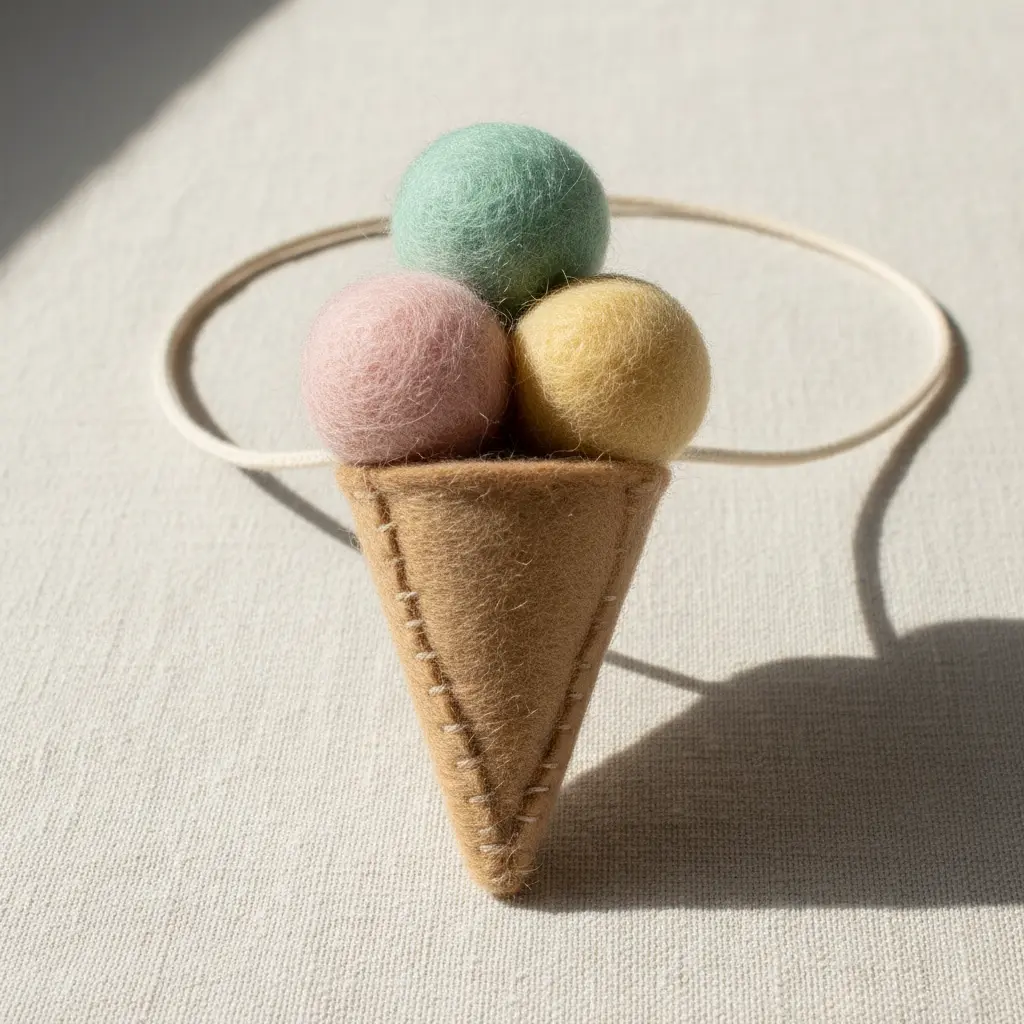
Does not this look like a bite of summer? I love how the soft pastel pom-pom sits so perfectly in its felt cone. You start by cutting a small felt semicircle, rolling it into a cone shape, and gluing the seam. Then, you nestle a fluffy trim right inside the top.
That combination of smooth fabric and fluffy detail makes your ice cream cone necklace crafts wonderfully tactile. For a similar playful vibe, find more fun popsicle shape necklace crafts to try next. A quick tip from my own bench: use a tiny dot of adhesive when attaching the trim so it does not soak through the base. Feel that cheerful, handmade joy when you put it on.
2. Textured Polymer Clay Waffle Cone Pendant
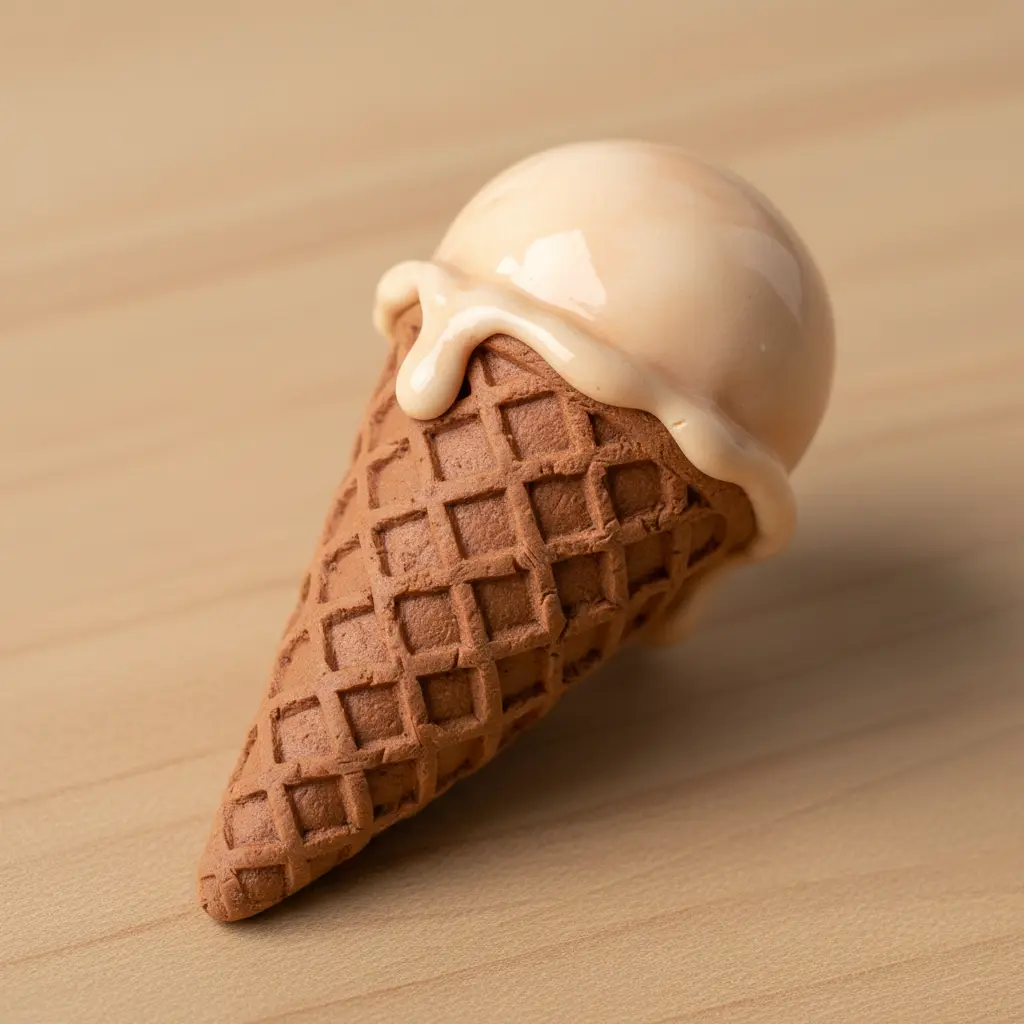
This one looks professional but remains surprisingly simple to master. You start by rolling out a sheet of conditioned clay, then press a waffle cone texture sheet firmly into the surface to create that realistic grid pattern. Cut the textured material into a semi-circle, roll it around a paintbrush handle to form the shape, and insert an eye pin before baking.
The key is applying even pressure during texturing so every little square pops. Your ice cream cone necklace crafts capture every tiny grid detail when you apply steady pressure. Trust me, pulling that perfectly textured shape from the oven is unbeatable.
3. Cardstock Cone Seed Bead Sprinkle Necklace
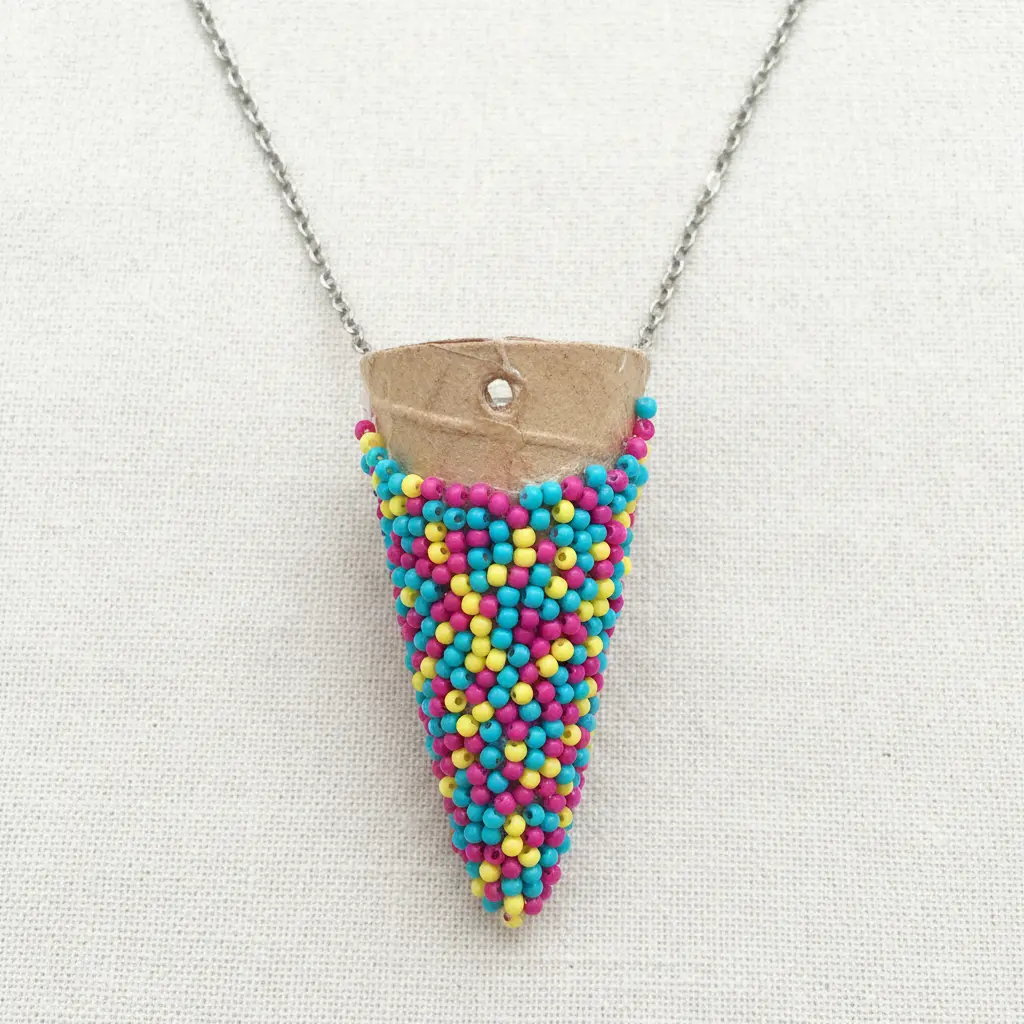
Who would have thought that paper cones could look so delicious? This piece uses leftover materials from other projects beautifully. You will roll small circles into neat cones and secure them with a dab of craft glue. The real fun begins when you add your sprinkles.
Apply a thin layer of clear-drying adhesive to the surface, then press beads into place while it stays wet. Let them dry completely before stringing onto your cord, adding small spacer beads if desired. Securing those beads firmly ensures your ice cream cone necklace crafts withstand daily play and travel.
It works so well because the paper base stays wonderfully light, and the glass catches the light with every movement. For a perfect match with your summer wardrobe, pair this accessory with some cute pom pom ice cream projects for a full themed look. Does that not deliver a sweet result?
4. Painted Wooden Bead Ice Cream Pendant
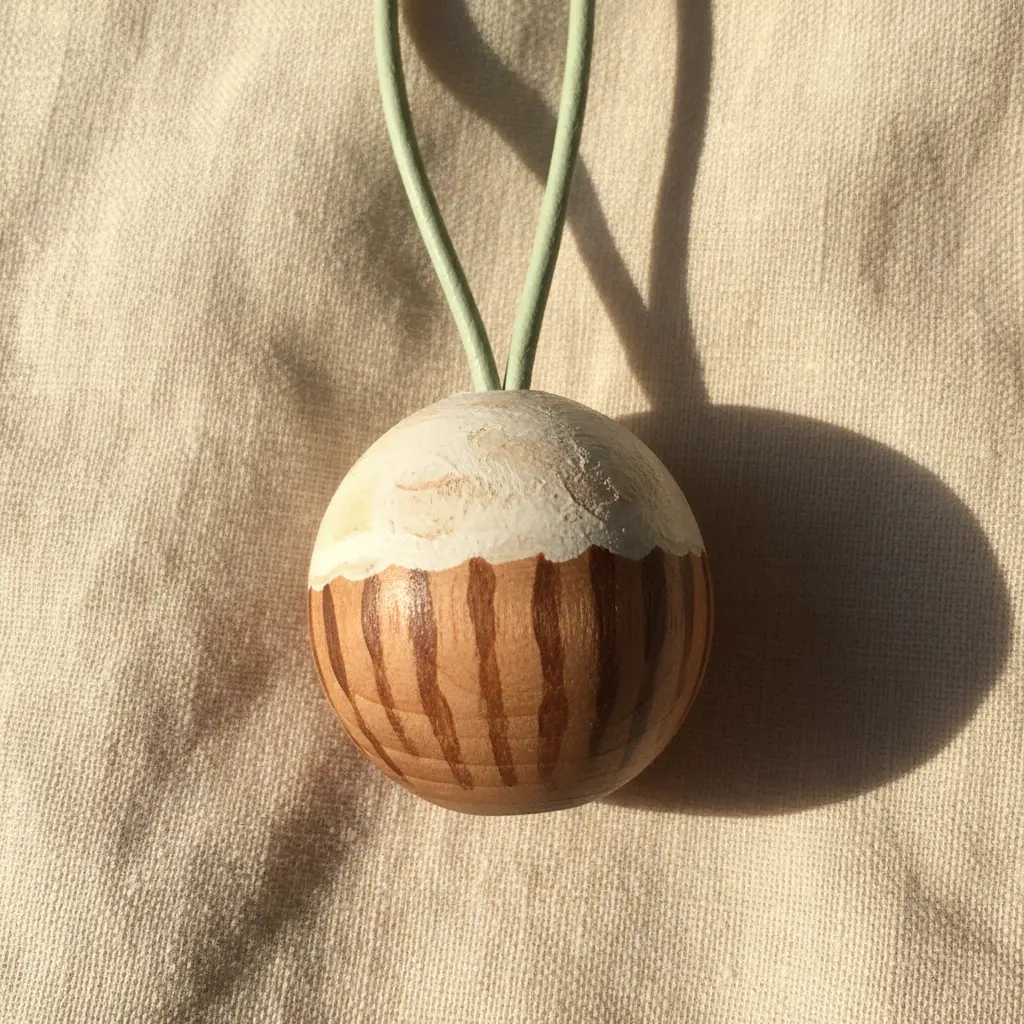
This project surprised me, proving it looks complex while remaining a fantastic beginner task. You paint a wooden form for the base and stack round beads on top as colorful scoops. I love using fine-tipped brushes to add tiny sprinkles or a drizzle of chocolate. Patience is your best friend when painting ice cream cone necklace crafts, so let each layer dry completely before adding details or sealant.
This drying step prevents smudging and guarantees a smooth finish. For secure assembly, a dab of strong craft glue between elements works wonders before you seal everything. A small eye screw at the top provides a secure spot for your chain.
Once sealed and dry, you have a reliable base for your accessories. If you enjoy this hands-on assembly, you might like to create a beach glass piece next for a different coastal vibe. Feel proud of your delicious, handmade charm.
5. Felt Ball Triple Scoop Pastel Necklace
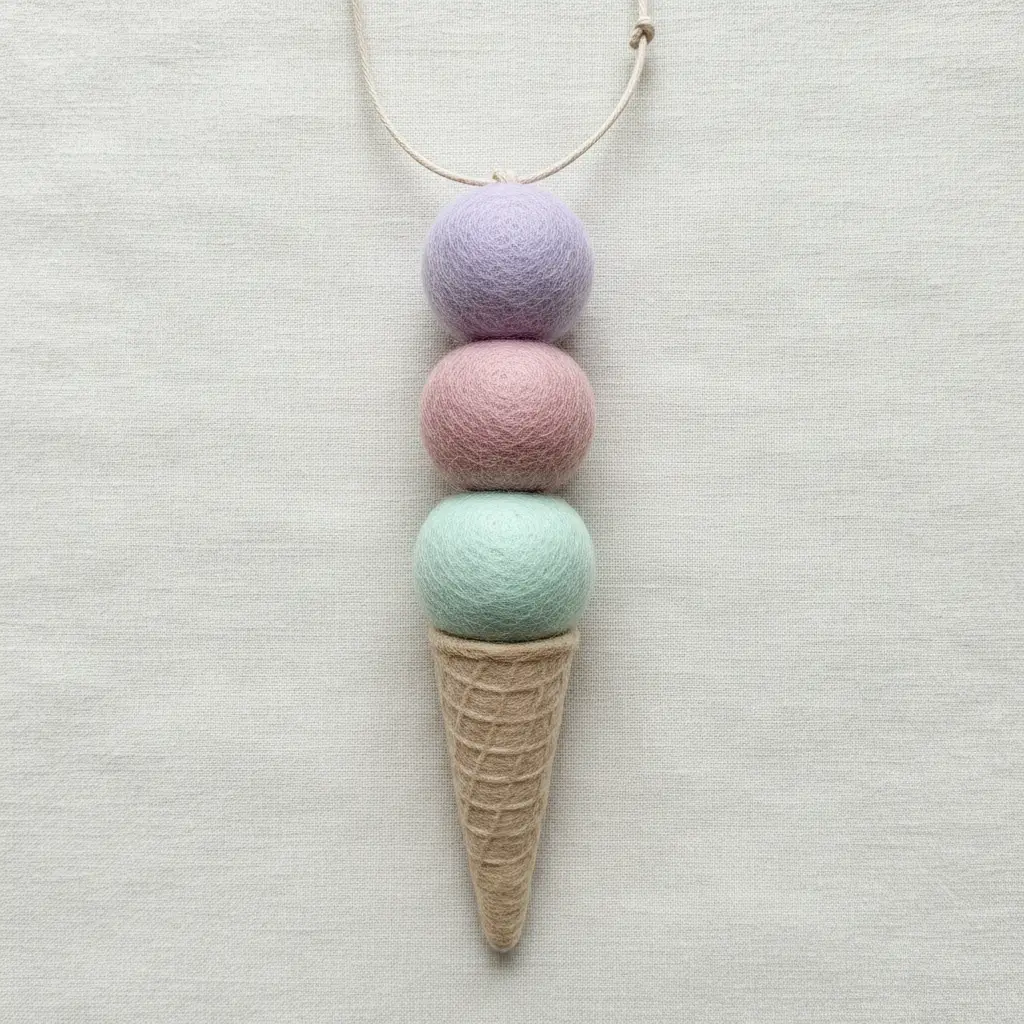
Who knew something so cute requires minimal effort? This accessory brings pure joy to create. You start by picking three soft wool felt balls in dreamy pastels like mint or lavender. Then, you assemble them into a sweet little stack using a reliable fabric adhesive.
Threading them onto a needle and string works perfectly too. The soft textures and sweet shades make ice cream cone necklace crafts feel wonderfully playful and nostalgic. Try this simple technique and feel that cheerful lift every time you wear your creation.
6. Miniature Funnel Fabric Cone Summer Charm
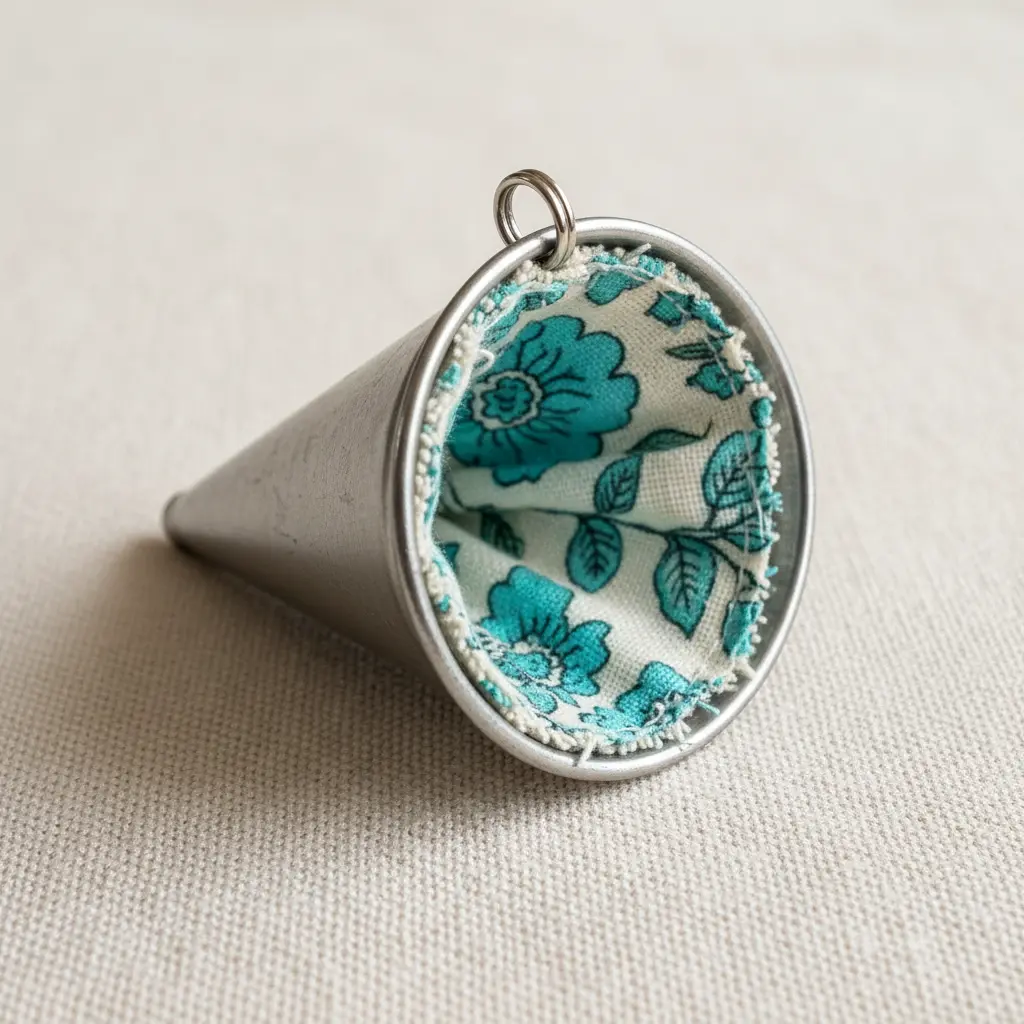
This piece acts as a total charmer and looks far more detailed than the actual steps reveal. You essentially cut a fabric wedge, roll it into a cone shape, and secure the seam. I love using bright quilting cotton scraps for this. The trick involves measuring your paper template carefully so the roll forms neatly without gaps.
Once your little shape is stitched or glued, the summer fun truly begins. Add a tiny trim on top or stitch on seed beads for sprinkles. Attaching a metal loop and your favorite chain guarantees your ice cream cone necklace crafts look polished and ready for wear. It remains a satisfying way to use up tiny fabric pieces.
For a creative variation, pair this charm with an adorable heart themed craft necklace for a sweet layered ensemble. The playful mix of shapes brings a bright energy. Does that not perfectly capture summer fun?
7. Puffy Paint Waffle Texture Cone Necklace
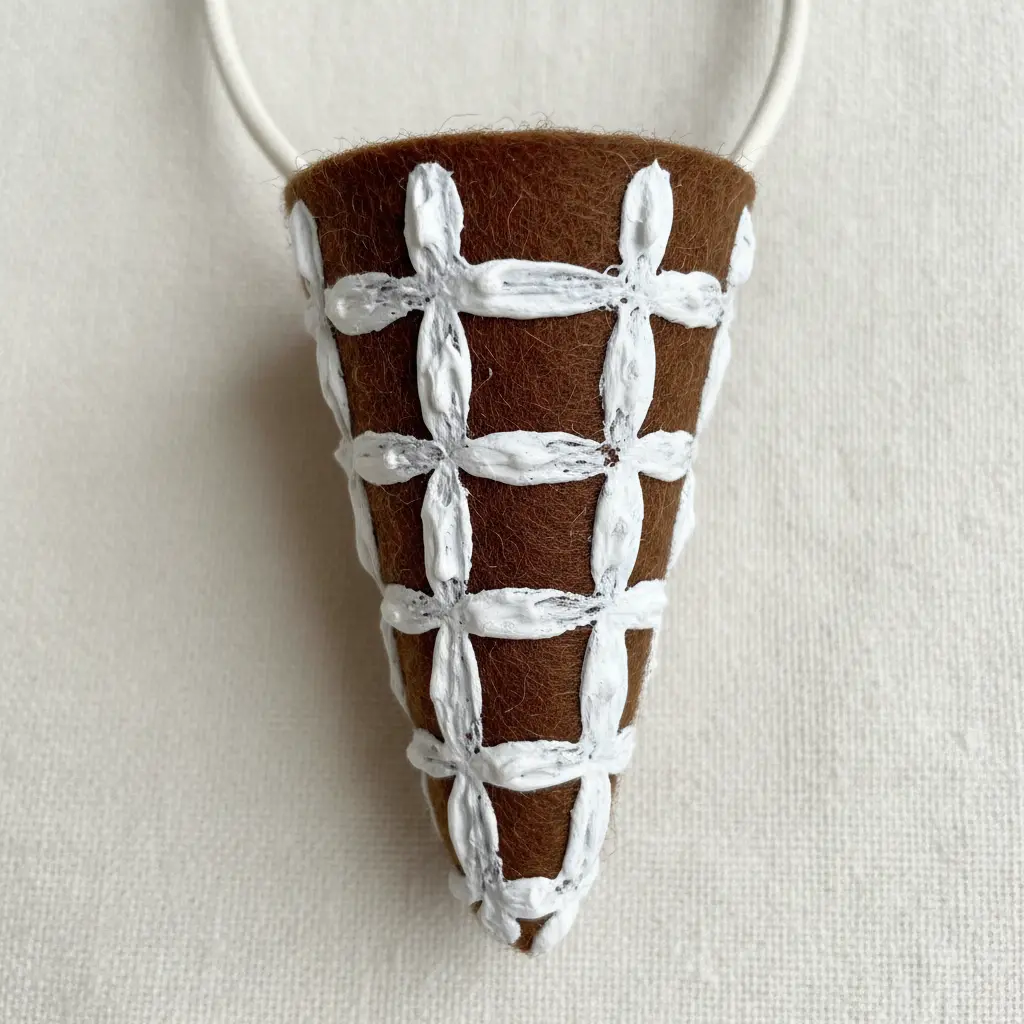
Who knew a simple shape could receive such a squishy upgrade? This project focuses entirely on tactile dimension. You will roll your base from heavyweight cardstock and let it set completely. Then, apply dimensional paint in a neat grid pattern to mimic that classic baked look.
I love how the medium dries raised, giving your pendant a wonderfully touchable feel. The trick requires you to let the design cure overnight, ensuring your ice cream cone necklace crafts maintain that crisp, durable texture. Trust me, your patience rewards you with a finish that looks absolutely fantastic.
Once set, add a metal loop and your favorite chain. You have created a sweet, summery accessory that feels completely unique. Does that process not bring pure satisfaction?
8. Glitter Cardstock Strawberry Cone Pendant
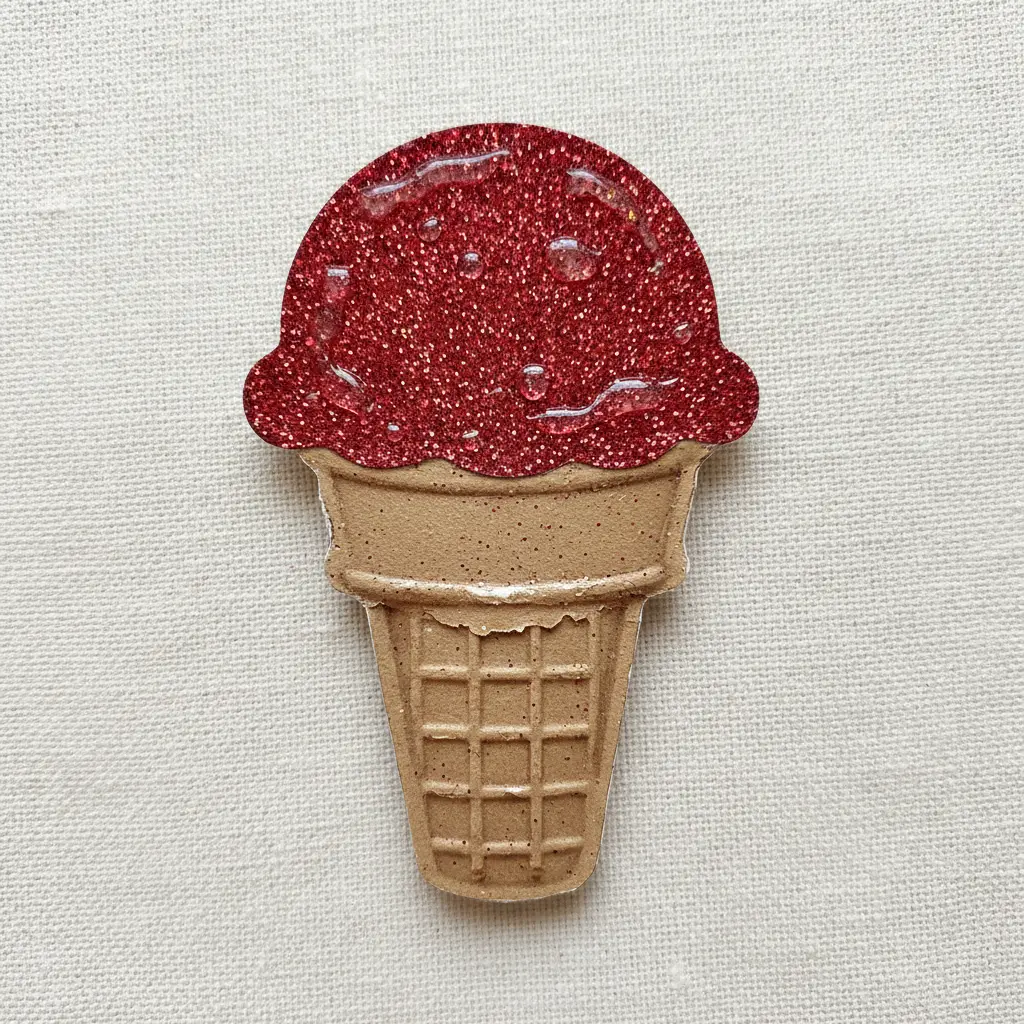
Who imagined shiny paper could produce such a sweet pendant? You start by cutting identical berry shapes from red glitter cardstock and a leafy cap from green. Make a small slit up from the bottom point on each piece and overlap the edges to glue them into a shallow dish shape.
Join the two sides together, then attach the foliage on top. I love how the sparkle catches the light beautifully. Using adhesive sparingly prevents the powder from dulling, which keeps your ice cream cone necklace crafts brilliantly sparkling until the final seal. This design fits perfectly into any sweet candy themed wearable craft collection.
Does that not look absolutely stunning when finished? You simply overlap the edges to lock the shape in place before moving to assembly.
9. Crochet Mini Cone Pendant Summer Jewelry
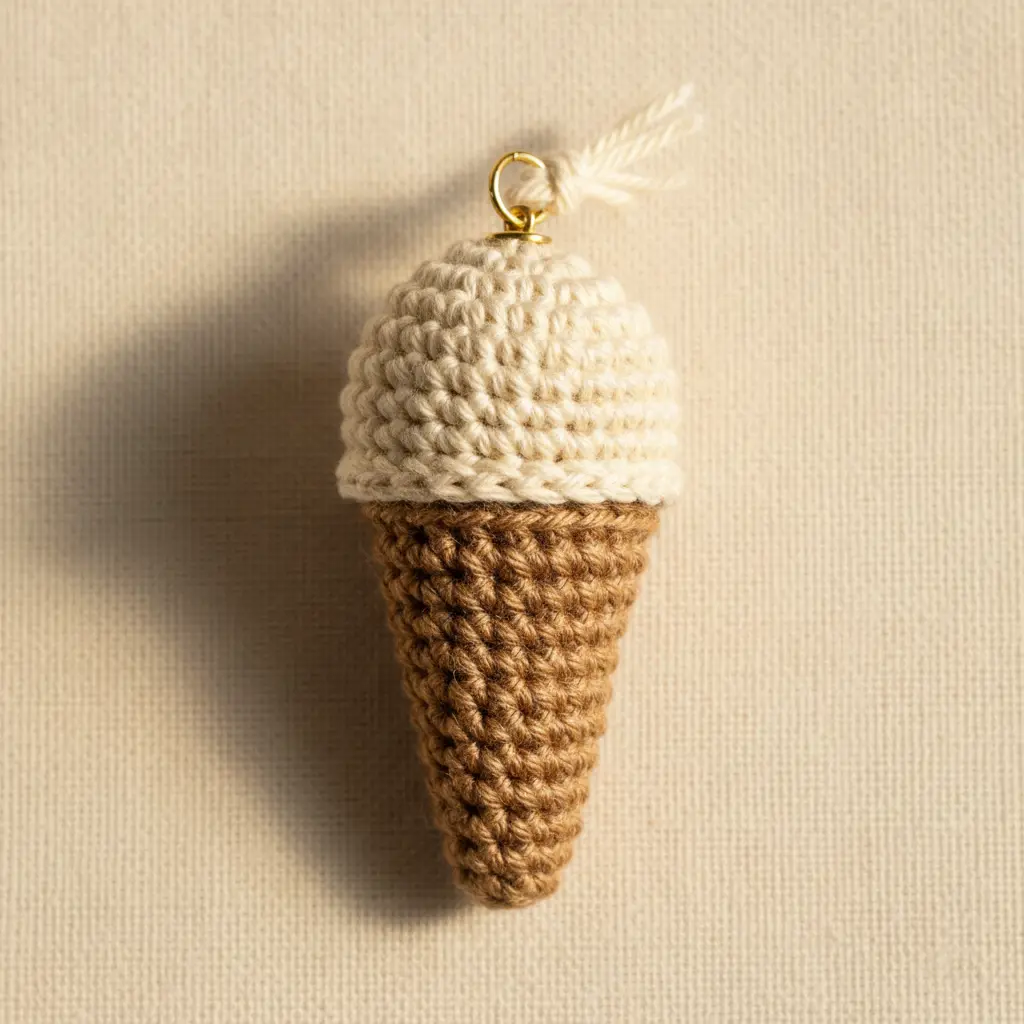
This technique surprised me with its simplicity. It reads like a delicate sculpture but only requires basic stitches. You start with a magic ring and build the base shape by increasing loops every few rounds.
I love using fingering weight cotton yarn because it holds its structure perfectly and comes in bright seasonal hues. A small hook keeps your loops tight. Consistent tension gives your ice cream cone necklace crafts a wonderfully structured foundation that resists stretching.
This approach remains a fantastic starter task that provides creative freedom. Once you complete your shape, you might even make your own pom pom necklace for a playful matching set. Feel the lightness and bright energy it brings to any outfit.
10. Sequined Fabric Cone Scoop Delight Necklace
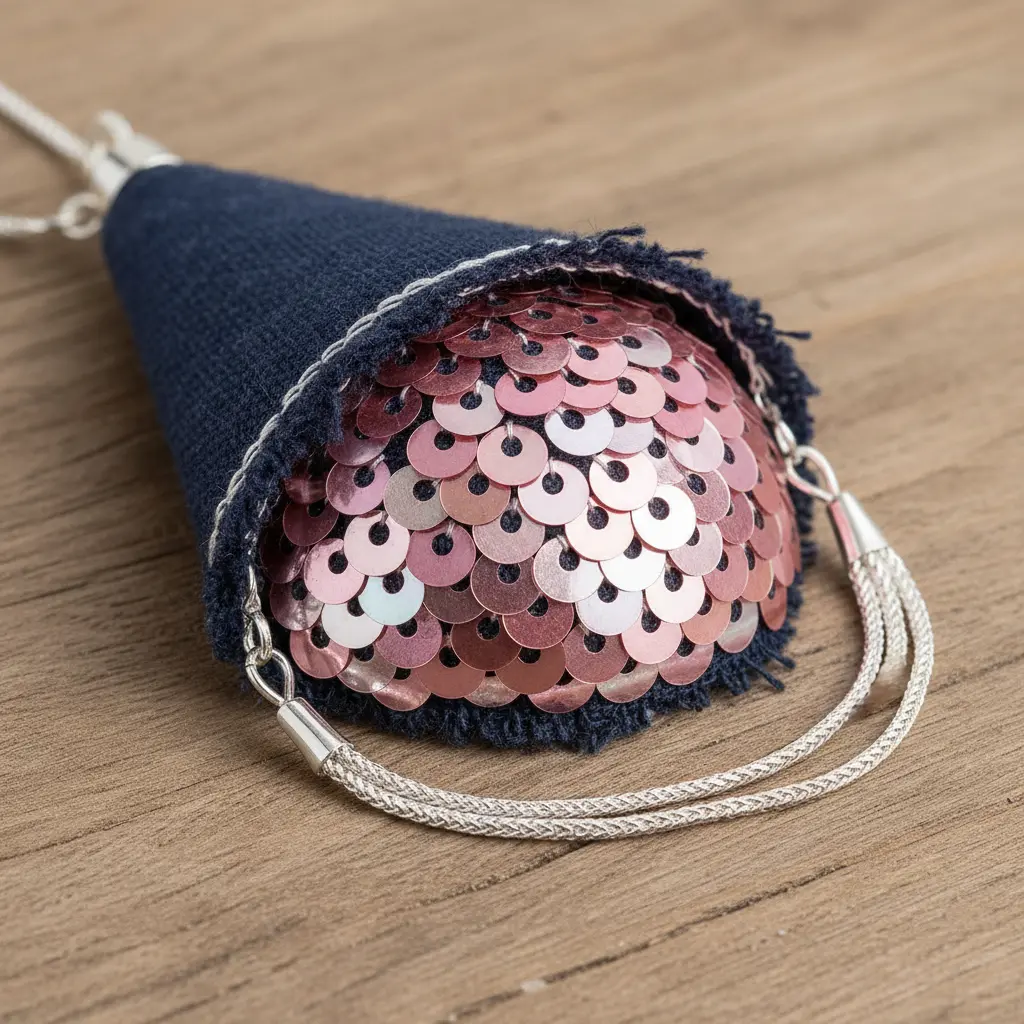
This piece looks like a portable celebration. You start by cutting and sewing rounded sequined fabric shapes into little scoops, stuffing them lightly so they remain plump. Next, you form the cones from a contrasting material like linen, and tuck each sparkly shape inside its crisp holder.
The true magic lies in mixing those textures, proving that ice cream cone necklace crafts feel wonderfully chic and deeply nostalgic. I love watching those playful shapes take form before my eyes. Removing sequins from your seam allowance before stitching saves your needle and prevents frustration. Trust me, arranging your finished units on a chain brings instant delight.
Applying Protective Glaze for Jewelry Longevity
A glossy high-shine finish transforms your clay charm from a weekend project into lasting jewelry. This clear coat seals your detailed work and prevents colors from fading. For clay pieces, you need a water-based polyurethane varnish that cures to a tough surface. Brush it on in a thin, even layer over your completely baked piece, covering every edge.
Let it dry fully before applying a second layer for extra depth and defense. Locking in those details guarantees your ice cream cone necklace crafts survive everyday adventures without losing their shine. It takes minutes, yet it protects hours of creative play from normal wear and tear.
Conclusion
So, how did your creative session unfold? I hope browsing these sweet designs provided as much inspiration for you as it did for me. Look at the variety available, which shows true creative potential right at your fingertips. Each project offers a unique path to play with color, demonstrating exactly why ice cream cone necklace crafts remain a favorite summer tradition.
Start with materials you already own at home, because simple felt or colorful paper transforms into something special. Pick your preferred design, gather your supplies, and begin creating your own wearable summer treasure right away.
FAQs
Q: What are the easiest materials for a beginner to use?
A: Felt and cardstock make fantastic starting points because they cut cleanly and bond easily. Pom-poms also add instant volume and texture without requiring advanced techniques.
Q: How do I make the necklace strong enough to wear?
A: Use a reliable adhesive formulated for mixed media and heavy objects. Reinforce the jump ring or cord attachment with an extra layer of sealant, and apply a clear protective spray over painted surfaces to prevent chipping.
Q: Can I make these accessories without specialized equipment?
A: Absolutely. Basic household scissors, white glue, and cotton string provide everything you need for most patterns. Simple cardboard templates and standard buttons easily replace professional tools when you are starting out.
Q: How do I choose the right colors for my project?
A: Draw inspiration from your favorite seasonal flavors or your current wardrobe favorites. Pairing mint with white or soft pink with deep brown guarantees a sweet, cohesive look. Mixing bold and pastel shades creates a striking visual balance.
Q: What is the best way to finish the edges of a felt base?
A: A simple running stitch using thick embroidery floss adds a lovely handmade accent while reinforcing the layers. Alternatively, applying fabric bonding adhesive or a precision hot glue gun creates a clean, professional seal.