Selecting Archival Materials for Longevity
A Halloween bookmark made from acid-free cardstock will hold its color for years without degrading your favorite books. This is the single best choice you can make for the base material, as it prevents yellowing and won’t transfer acids to the pages. When you prioritize longevity for your diy halloween bookmark crafts, you create pieces that age gracefully alongside your library. For your decorative elements, stick with pigment-based markers or alcohol inks rather than dye-based ones, as they resist fading from light exposure. The good news is you can find these archival supplies at any craft store, and they are worth the small extra investment. Trust me, using these materials means your spooky creations become lasting keepsakes, not just seasonal decorations that crumble after a few uses.
Balancing Decorative Elements With Page Safety
The fastest way to ruin a book’s spine is using bulky embellishments like thick layers of hot glue or oversized plastic charms on your bookmark. You want to keep the overall thickness minimal, so your creation slips in and out of a page without snagging or bending the binding. Opt for low-profile adhesives like a strong glue runner or double-sided tape to attach flat layers of felt or craft foam. A simple machine stitch around the edge of cardstock adds a lovely finished look without adding bulk. Keeping your diy halloween bookmark crafts slim ensures they respect your pages while still making a festive statement.
1. Layered Black Cardstock Bat Silhouette
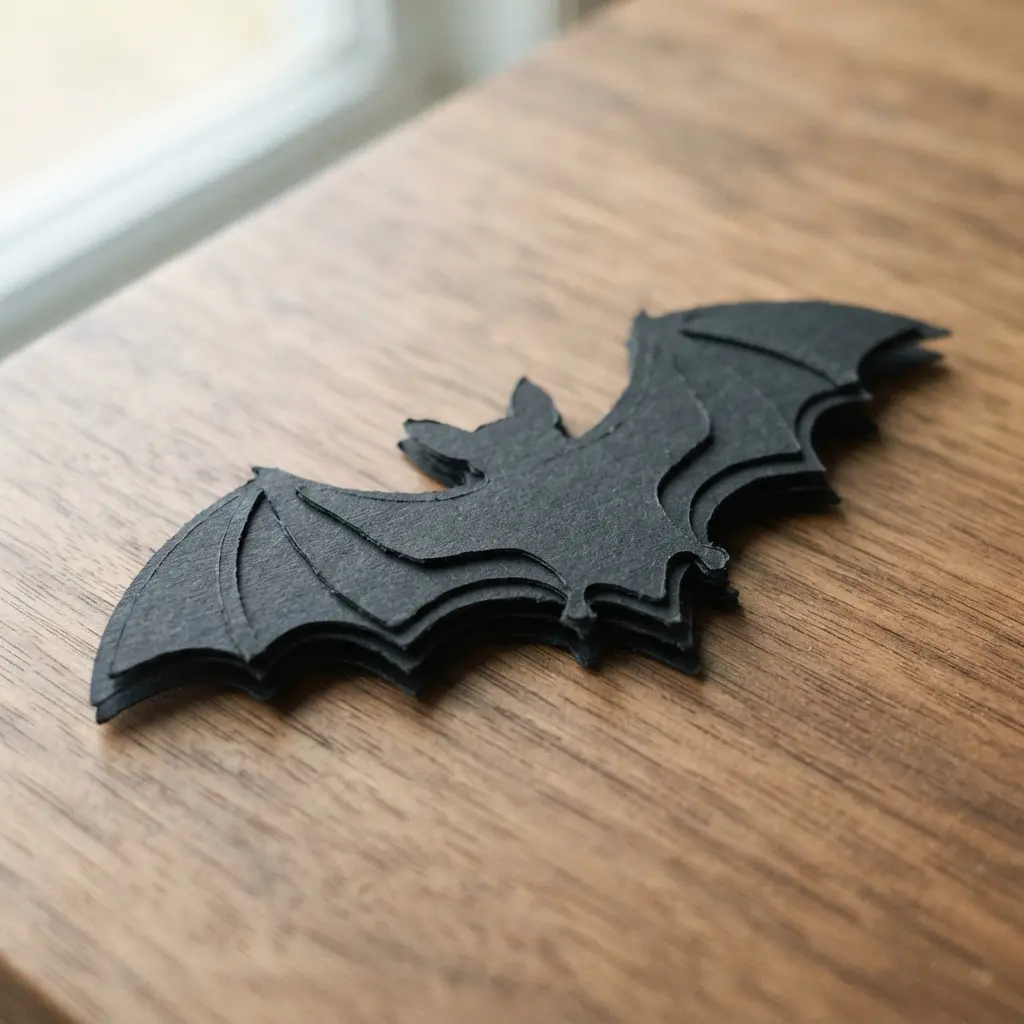
Ever wondered how to make a flat shape look like it is leaping off the page? This project is your answer. You cut multiple bat silhouettes from black cardstock, each one slightly smaller than the last. Then you stack them with foam dots in between to build up that dramatic, shadowy depth. It looks intricate, but the process is wonderfully simple.
I love how this technique creates such a bold statement with just one color. The layers catch the light and cast tiny shadows, making your bat look truly three-dimensional. It is a fantastic way to add a spooky touch to your diy halloween bookmark crafts without being overly complicated. Before you start cutting, it is smart to look over some easy Halloween crafts for adults to get comfortable with basic supplies and techniques.
My go-to tip? Use a cutting machine if you have one for perfectly clean edges every time. You will be amazed at how professional your finished bookmark looks.
2. Multi-Eyed Fuzzy Monster Cardstock Bookmark
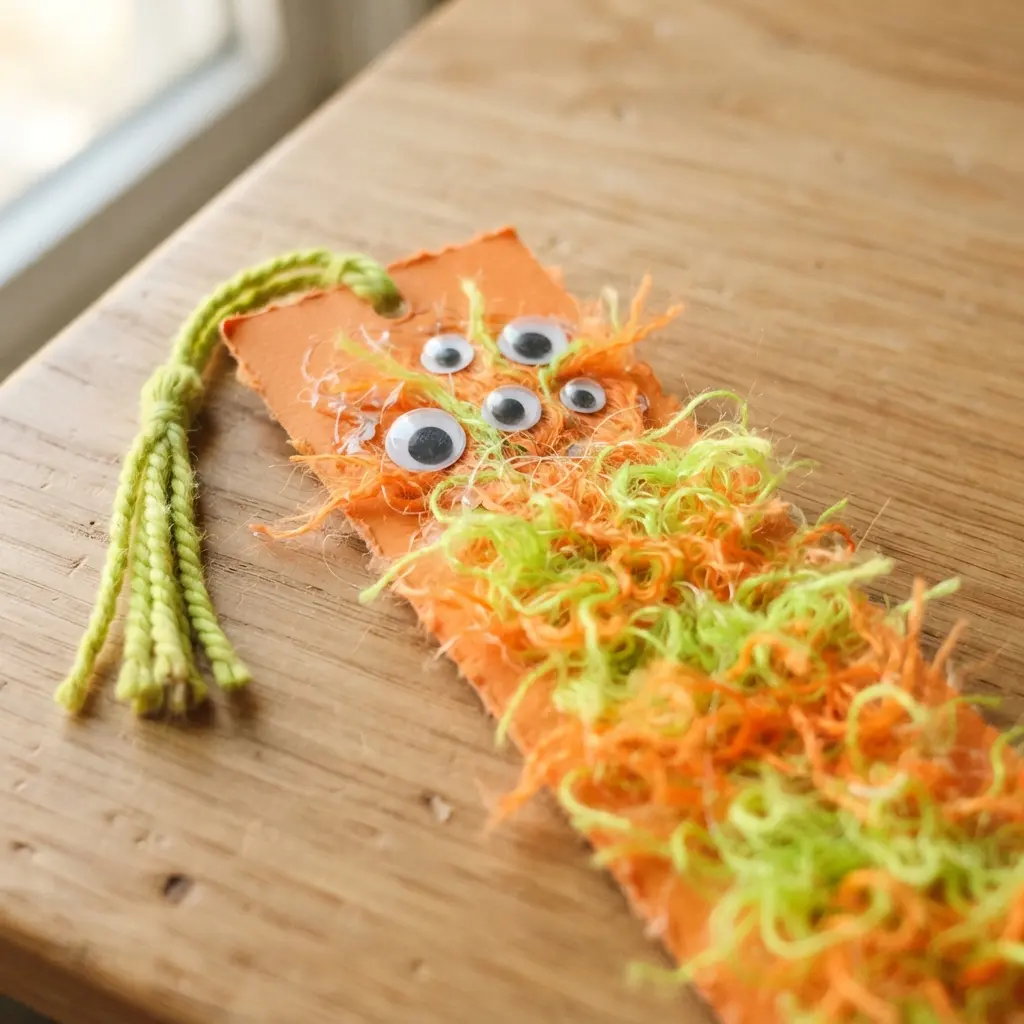
Who said a bookmark has to be serious? This fuzzy little monster is here to prove otherwise. You start with a simple rectangle of bright cardstock and cut the top into a fun, wavy monster shape. Then, the real personality comes from gluing on a wild assortment of googly eyes or paper circles you make yourself. I love how the texture makes it so much fun to hold. The trick is to use plenty of strong craft glue for the yarn or pom-poms so they stay put through many readings. Vary the sizes and positions of the eyes for a truly chaotic, friendly expression that brings your favorite diy halloween bookmark crafts to life.
It is a quick project with a huge payoff in smiles, and it makes marking your page feel like a little party. For a similar burst of creepy-cute energy, making some spooky spider crafts for Halloween follows the exact same playful spirit.
3. Origami Paper Vampire Fang Corner Bookmark
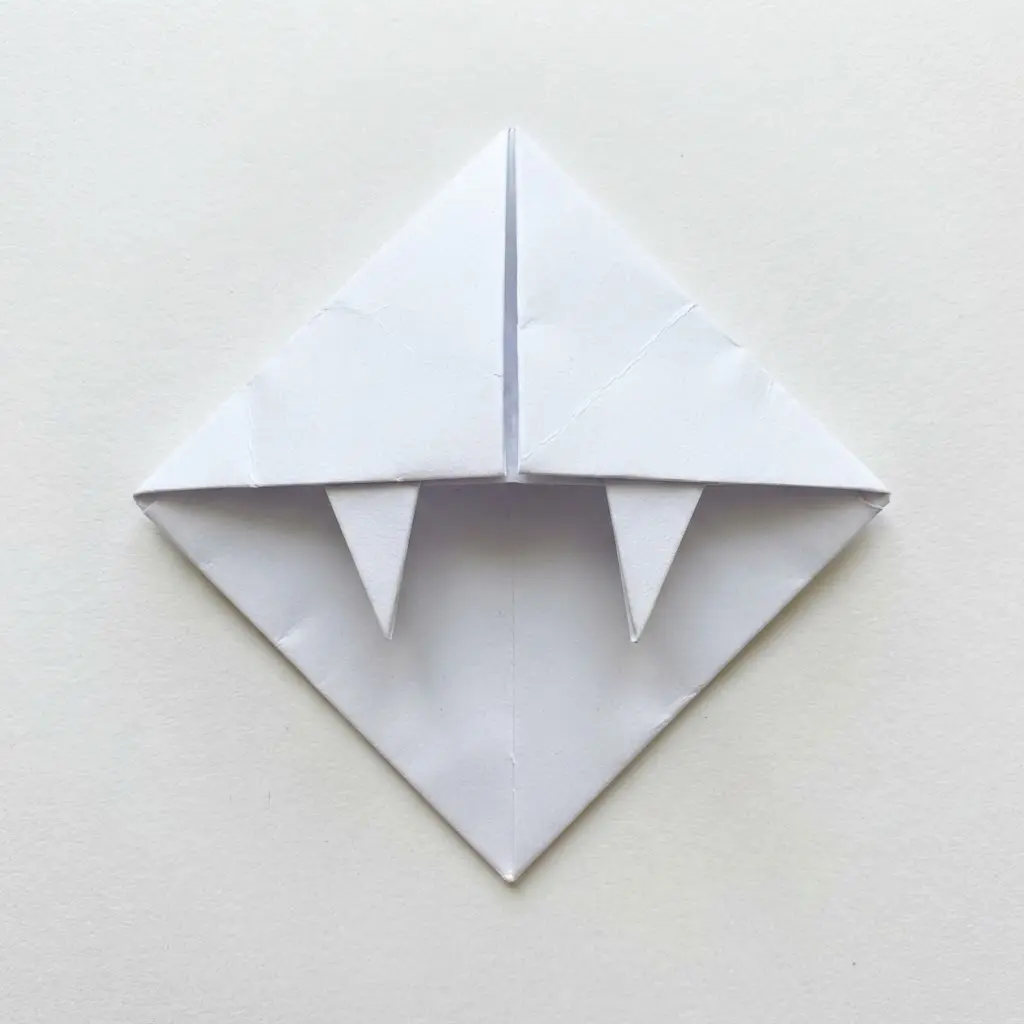
This one surprised me. It looks so clever but it relies on just a few simple folds. You start with a single square of two-toned paper, white side up for the fangs. The trick is to make a standard corner bookmark base first, then fold down the top corners into sharp little points. Isn’t that satisfying? I love how the white side naturally forms those two iconic fangs.
The final shape slips right onto your page and looks like a tiny monster took a bite. It works because it is a practical bookmark with a huge dose of spooky personality for any set of diy halloween bookmark crafts. Try using glow-in-the-dark paper for a fun surprise when you turn off the lights. Once you have your book marked, you can move on to bigger seasonal projects like making a DIY Halloween wreath for your door. It is the perfect way to keep the festive spirit going all month long.
4. Felt Jack-O’-Lantern Pumpkin Bookmark with Tassel
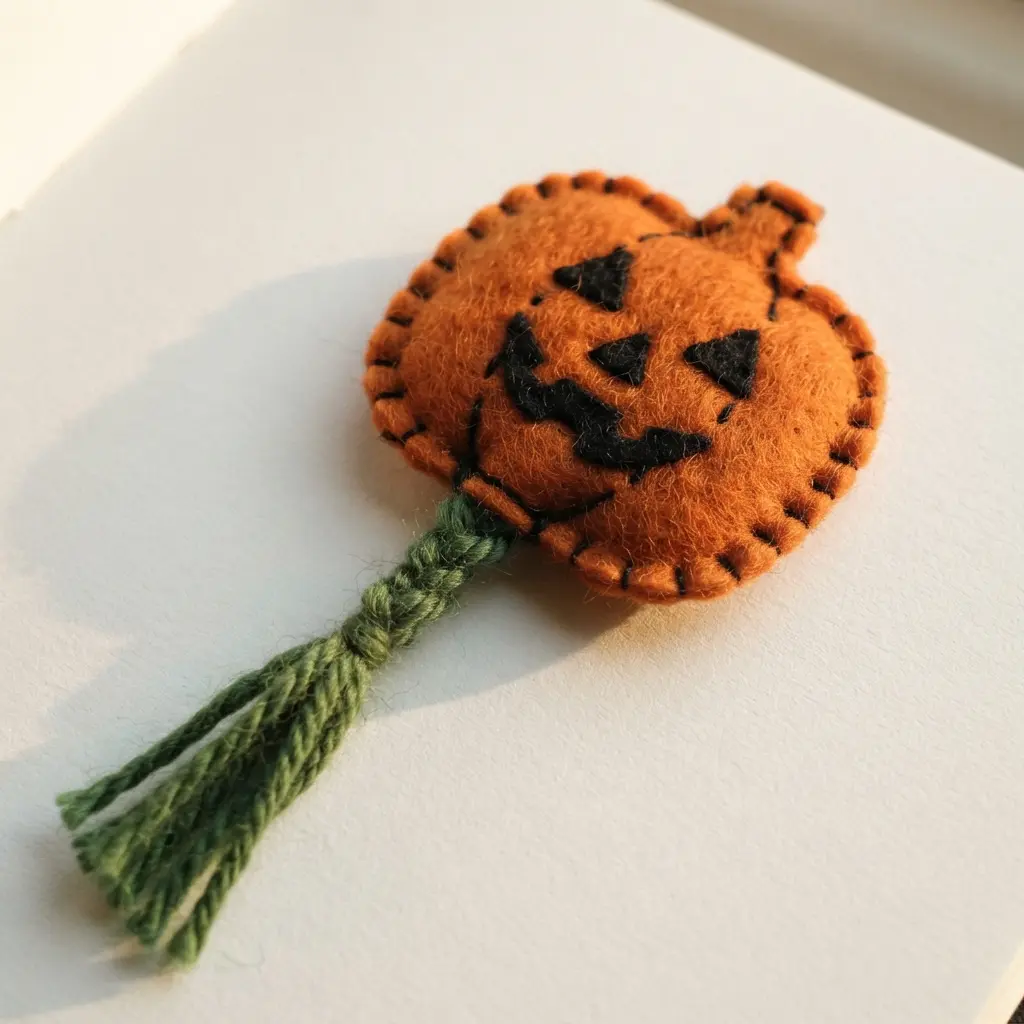
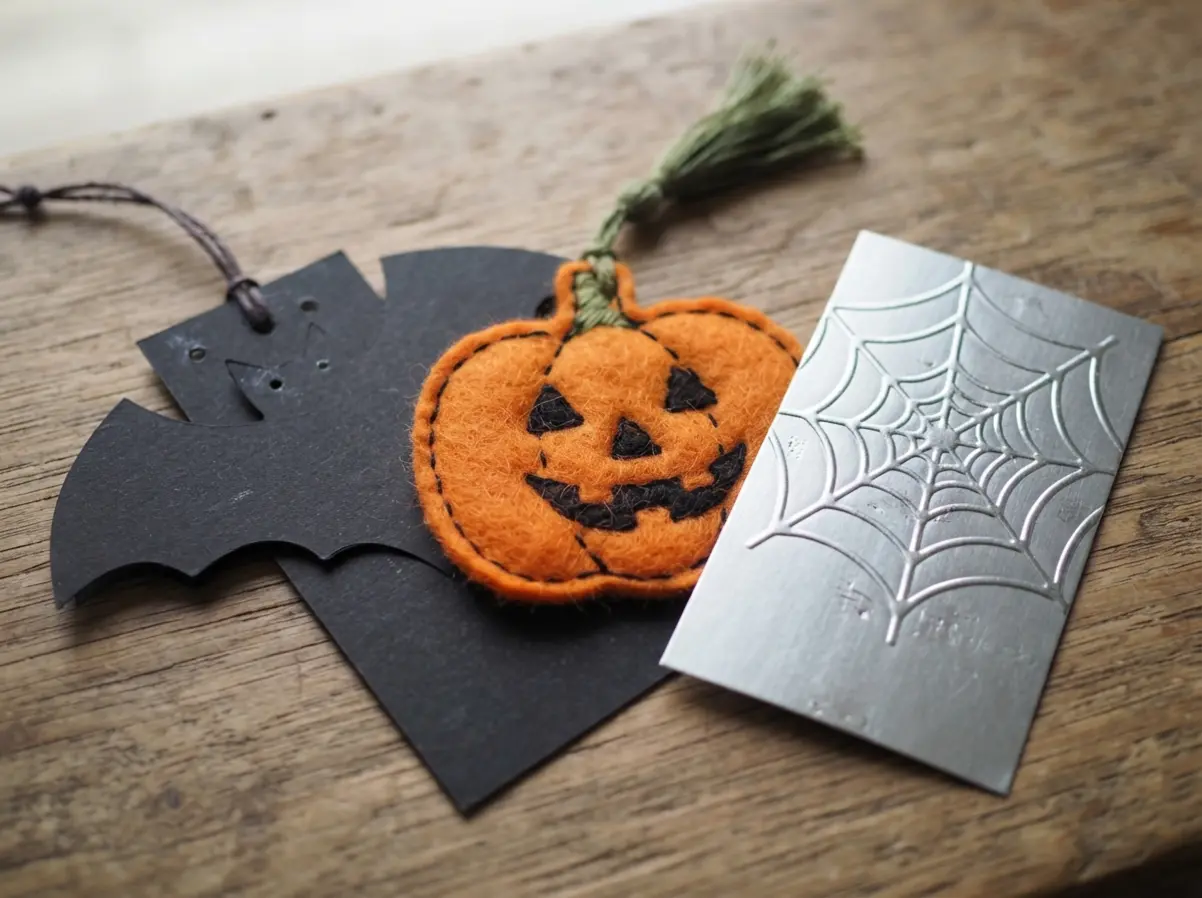
This project looks so intricate, but it is surprisingly simple to put together. You start by cutting out two identical pumpkin shapes from orange felt and the face details from black. I love using a tiny dab of fabric glue to hold those little pieces in place before I stitch them on. It keeps everything from shifting and gives you a crisp, clean jack-o’-lantern face every time. Once the face is set, you sew the two pumpkin pieces together around the edges. This is a great time to use a simple blanket stitch with orange embroidery floss.
That stitch gives it a lovely finished look and makes the bookmark durable. Adding a handmade tassel at the top brings extra charm to your diy halloween bookmark crafts. It works so well because the soft felt is gentle on your pages, and the cheerful design makes reading feel like a celebration. Making a few of these is a fantastic way to create some DIY Halloween gift tags for friends who love books.
Does that not sound like a perfect afternoon project?
5. Ghostly White Cardstock Die-Cut Bookmark
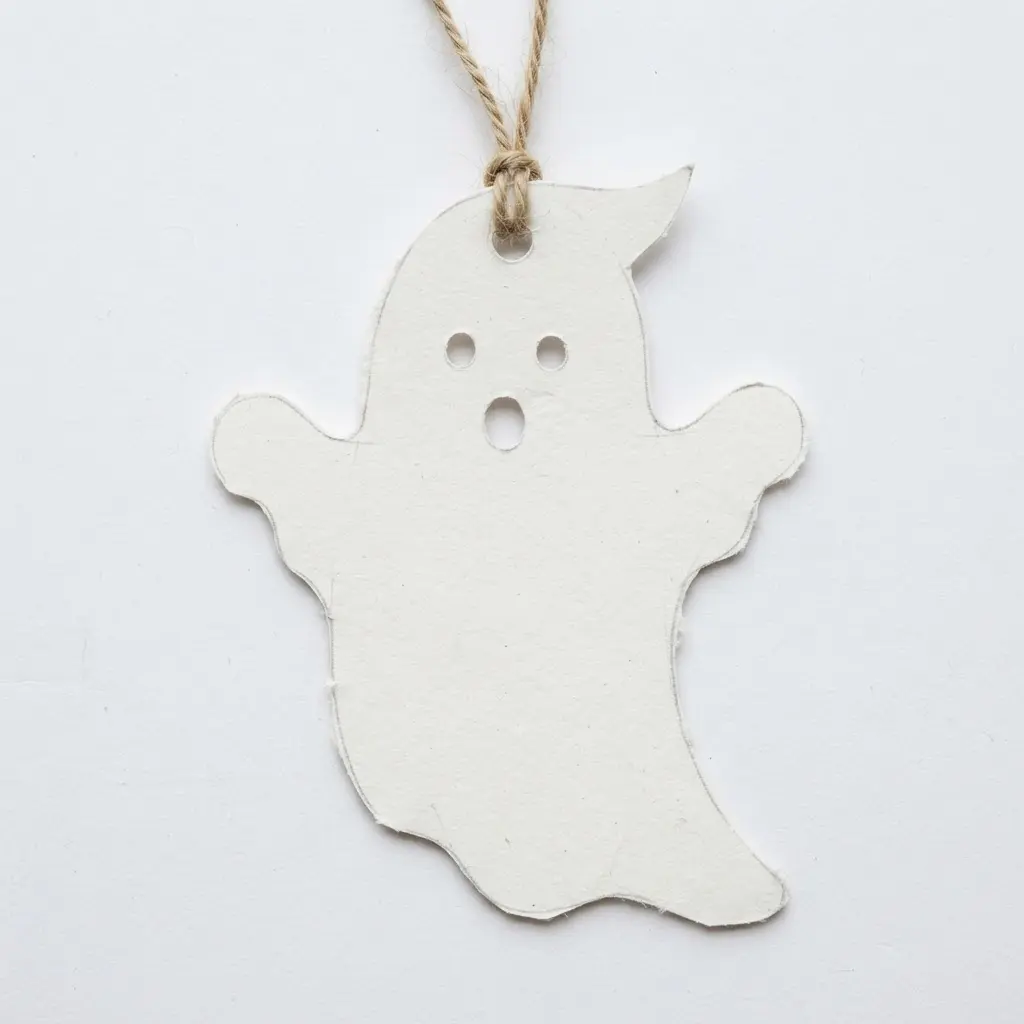
This one looks so delicate, but it relies on a precise cutting method rather than complex folding. The magic is in the intricate die-cut design you choose. Think of ethereal wisps or lace-like patterns cut from a sheet of pure white cardstock. I love how the negative space creates a subtle, haunting shape. You will feed your heavy-weight paper through a machine for a crisp, clean cut every time. Does that sound complicated? It is really not once you get the hang of it. This elegant project fits perfectly into any curated collection of diy halloween bookmark crafts.
This approach is a perfect match for readers who also enjoy making creative pumpkin crafts for kids. It offers a sophisticated touch of Halloween without any spooky mess. Trust me, the result feels beautifully premium.
6. Witch Hat Paper Clip Bookmark Marker
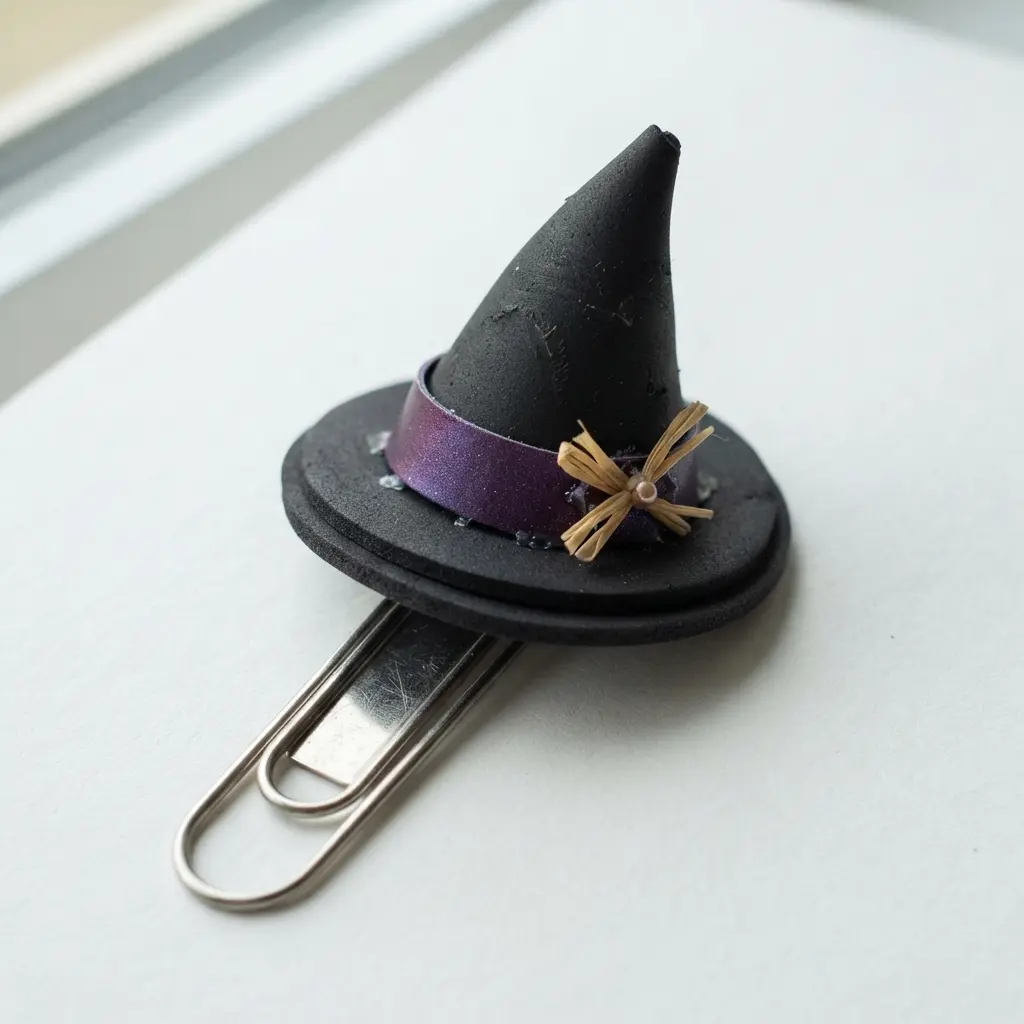
Who would have thought a jumbo paper clip could become such a charming page holder? This one is a delight because it looks detailed but assembles in minutes. You simply cut your witch hat pieces from black felt or cardstock, glue the cone to the brim, and wrap a colorful band around the base. Then, you attach the whole hat to the longer loop of the paper clip with a strong adhesive. It works so well because that little hat peeking out from your book is impossible to miss, making it both festive and functional. I love how customizable it is, letting you match any book’s vibe with your color choices while assembling your diy halloween bookmark crafts.
If you enjoy this project, you will find tons of other cute witch crafts and ideas to build a whole magical theme. A pro tip is to use your adhesive sparingly in thin lines to prevent any messy seepage.
Does that not look like a fun way to mark your spot?
7. Watercolor Spooky Cemetery Landscape Bookmark
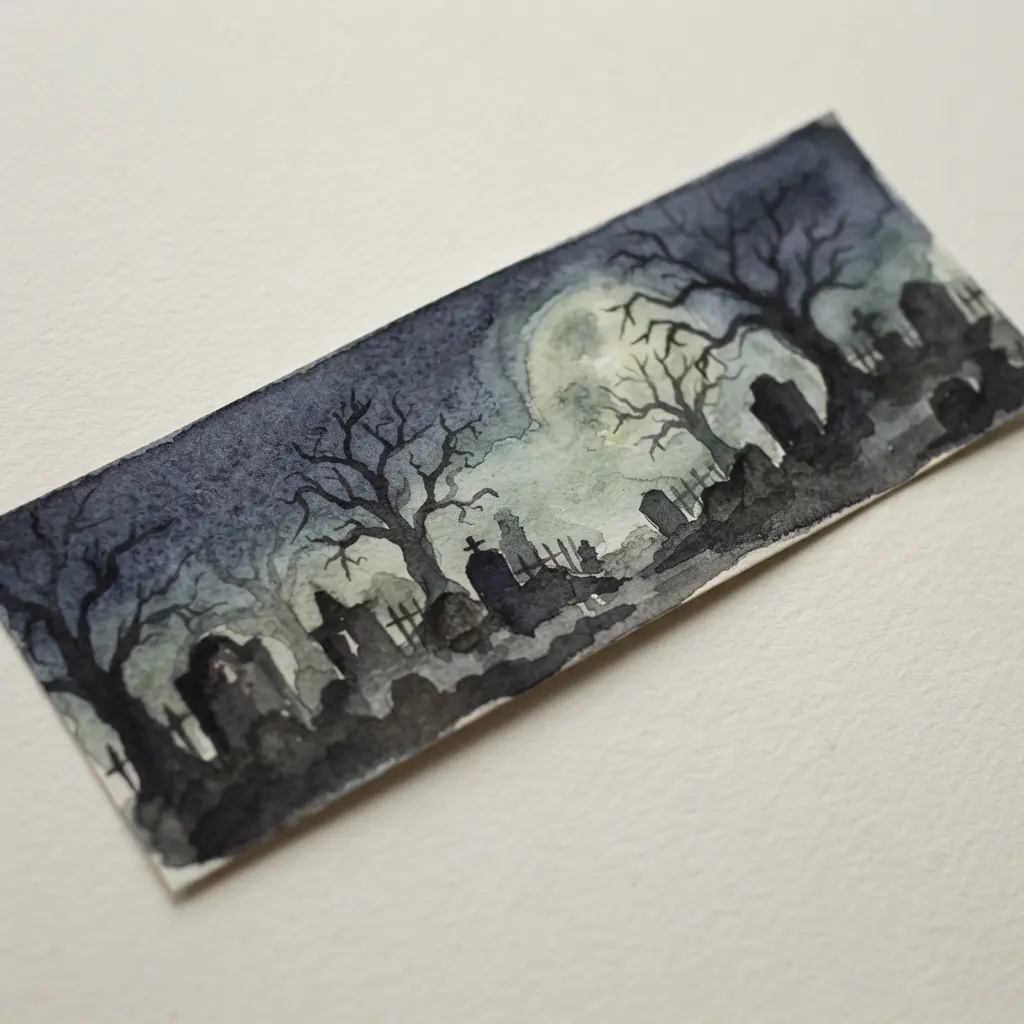
This one looks so professional, but it’s all about simple washes and silhouettes. You start with a light pencil sketch for your horizon and moon, then use a large wash brush to lay down a moody sky of blues and purples. While that’s still damp, drop in darker colors for distant hills and fog to create those soft, ethereal blends. Let it dry, then paint your tombstones and trees with a smaller brush and more concentrated dark paint for crisp silhouettes. The beauty of this project is how the watercolor medium naturally elevates simple diy halloween bookmark crafts.
You do not need to be perfect. I love how those happy accidents with the paint can look like mist creeping over the graves. It is so satisfying to see the scene emerge from a few simple layers. For a fun related activity, these pieces pair wonderfully with a set of printable Halloween coloring pages for a full afternoon of creative, seasonal fun. My go-to tip is to practice your washes on a scrap piece of paper first. Trust me, it helps you get a feel for how much water to use so your final sky does not get muddy. Let each layer dry completely before adding details, and you will have a stunning, usable piece of art.
8. Embossed Metallic Spider Web Bookmark
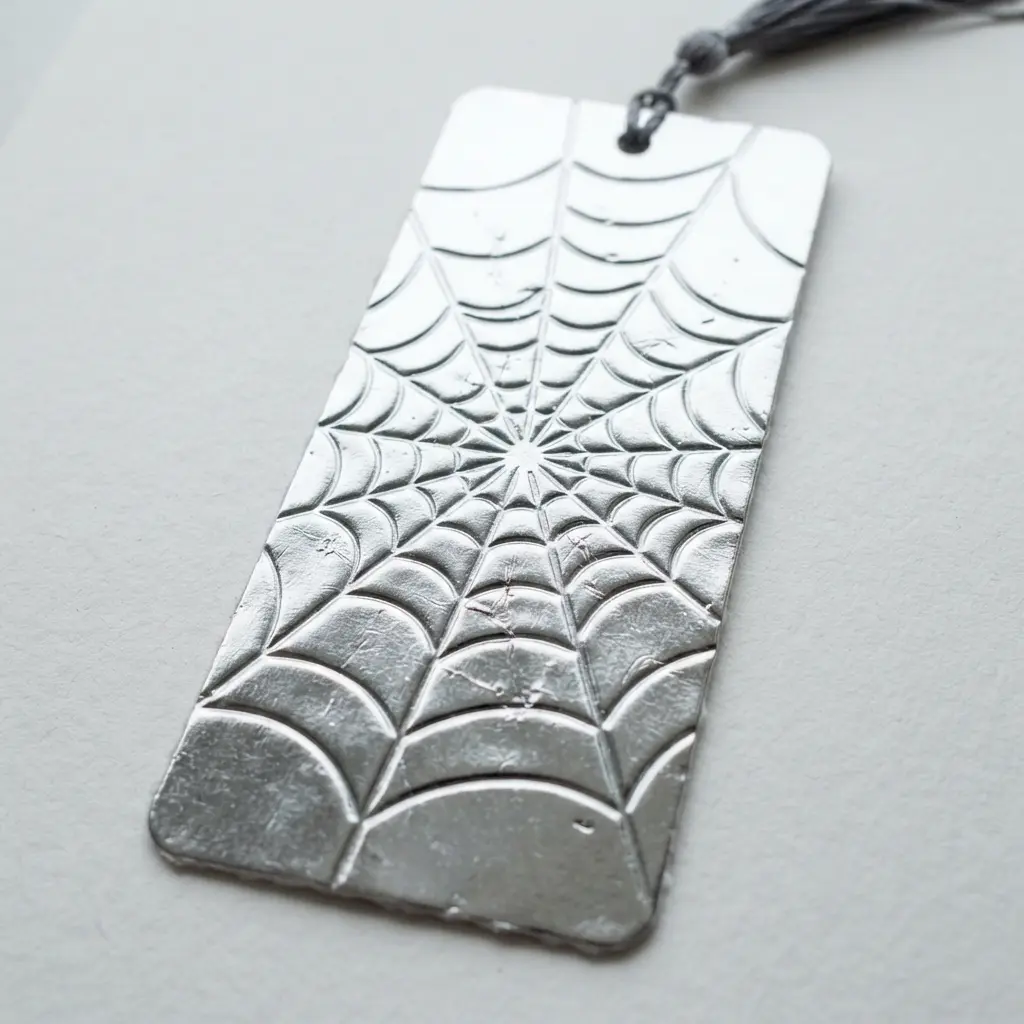
Who says Halloween projects cannot be elegant? This bookmark feels like a piece of jewelry for your book, with a raised spider web that you can actually feel. The magic happens with a specific embossing machine and a matching folder, pressing the design permanently into a metal blank. I love the way light catches the raised lines, making it look like a tiny, intricate sculpture. The result is incredibly durable and has a sophisticated, gothic charm. Your biggest success tip is to do a test run on a scrap piece of the same material first. This ensures you get the pressure setting just right for a crisp, detailed impression without any warping. That tactile, three-dimensional finish proves diy halloween bookmark crafts can be truly sophisticated.
It is a fantastic project for creating a keepsake or a special gift, and you can always add a little spider charm for extra personality. Speaking of adding personality, if you are in the mood for more wearable spooky accessories, those fun rings are another great way to elevate your look. It is so satisfying to run your fingers over the raised texture after it cools.
9. Stitched Frankenstein Monster Face Bookmark
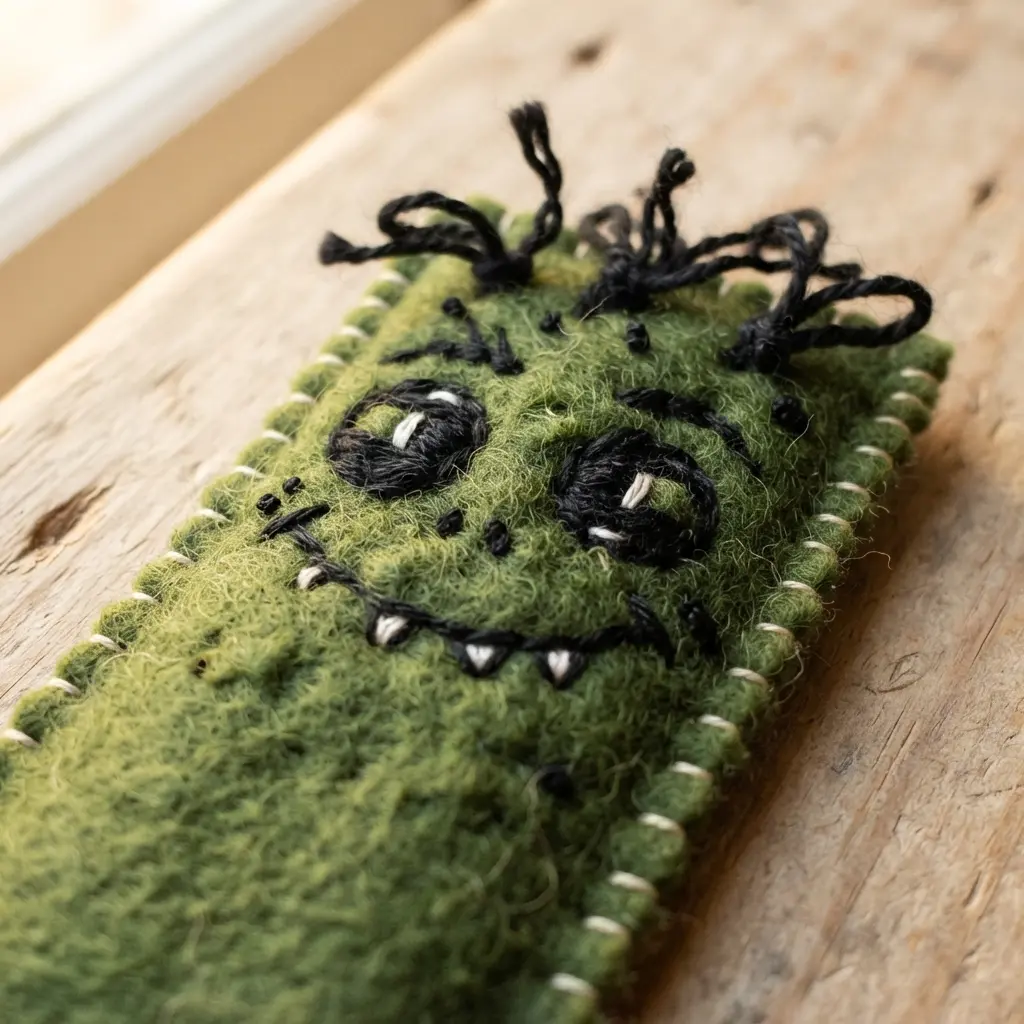
This one looks intricate, but the felt pieces come together in such a satisfying way. You start by cutting the blocky head shape from green felt, then layer on the flat-top hair and expressive eyes. The real magic happens when you add the signature stitches with black embroidery floss. It works because the hand-stitched details give it that classic, homemade monster charm. For a neater finish, use a tiny dab of fabric glue to hold small pieces in place before you sew. Once you have your spooky reading companion, you might want to make some DIY Halloween Treat Boxes to give your whole bookshelf a festive theme. These stitched details bring incredible life to your diy halloween bookmark crafts.
10. Dried Flower Witch Spell Bookmark
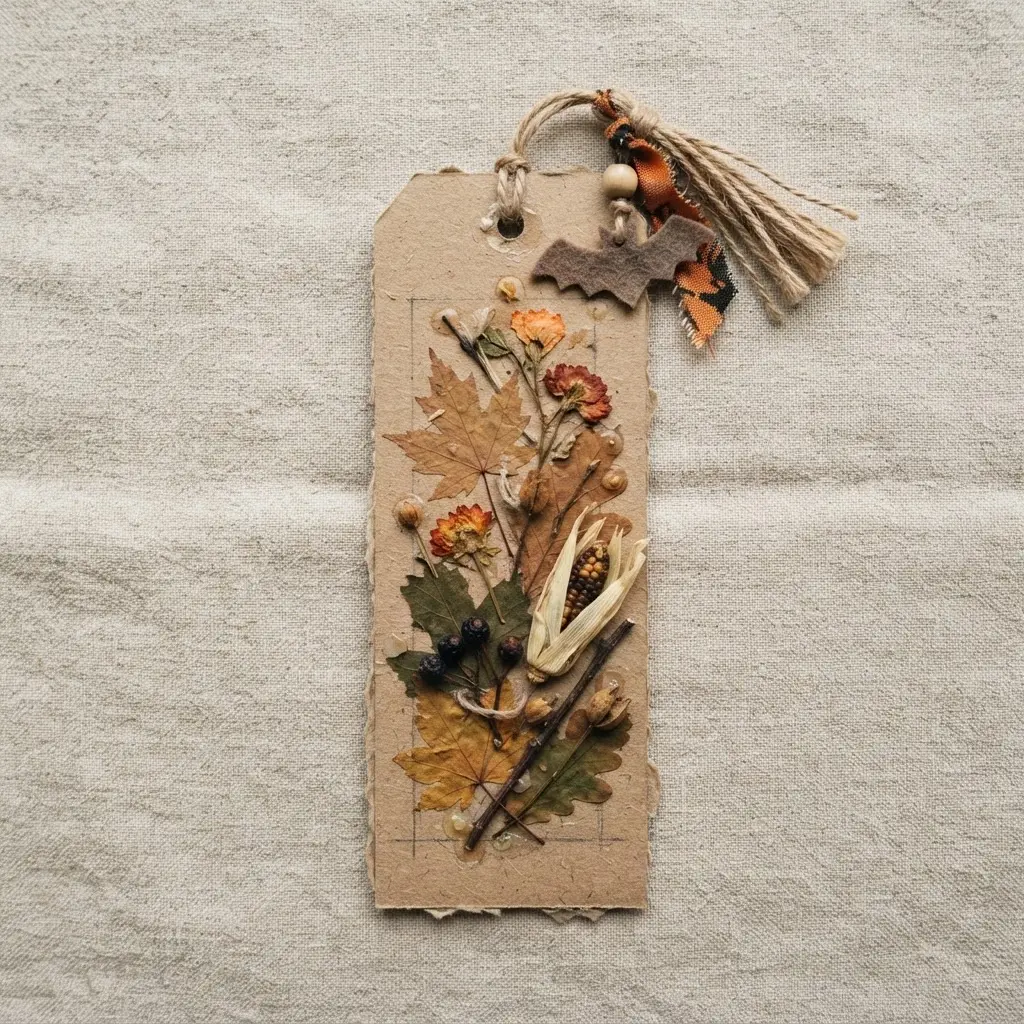
This one is for the book lovers who want to add a little personal magic to their reading time. You start with a sturdy piece of cardstock as your base and carefully arrange tiny, flat dried flowers and herbs on it. I love using a tiny dab of clear-drying glue to hold them in place before adding a handwritten spell or affirmation with a fine-tip pen. Once everything is dry, you seal it all in with a laminating pouch to protect your little charm. The result is a functional piece of art that feels uniquely yours. If you are already in a spooky mood, the same delicate touch works beautifully for making cheesecloth ghost decorations around the house. Trust me, the key is to keep your floral arrangement simple so it laminates smoothly. You will feel so proud when you slip this beautiful marker into your favorite story, completing your set of diy halloween bookmark crafts.
Preserving Paper Crafts With Laminating Techniques
A quick pass through a personal laminator will seal your bookmark completely, protecting any marker work or glitter from smudging onto your book pages. This is the ultimate step for durability, especially if you used any paint or loose glitter in your design. The laminate adds a slight stiffness that helps the bookmark hold its shape, and you can still trim it to size with a craft knife afterward. For a less rigid finish, a spray-on matte acrylic sealer works well, but you need to let it cure fully for a day before use. Either method ensures your hard work stays looking crisp and clean, ready to preserve all your diy halloween bookmark crafts for every spooky story.
Conclusion
I hope this list sparks an idea for your next cozy reading session. The best part about making your own markers is how personal they become, marking not just a page but a moment in your year. My advice is to pick the project that makes you smile first—sometimes the simplest one brings the most joy. Whether you keep them for yourself or share them with fellow book lovers, these diy halloween bookmark crafts are a wonderful way to weave a little handmade magic into your seasonal traditions. Happy reading, and happy making.
FAQs
Q: What is the best paper for making durable Halloween bookmarks?
A: Heavyweight cardstock is ideal for paper bookmarks. It holds its shape, resists bending, and provides a good surface for glue and decorations. For a more textured feel, consider using craft felt.
Q: How can I make sure my paper bookmark does not rip easily?
A: Reinforce the top of your paper bookmark where it sits over the page. You can laminate it, add a strip of clear packing tape, or glue a second layer of cardstock to that area for extra strength.
Q: What type of glue works best for attaching things like googly eyes?
A: A strong craft glue or a hot glue gun provides a secure bond for heavier items like large googly eyes or fabric pieces. For lighter paper-on-paper layers, a simple glue stick often works perfectly.
Q: Are these projects suitable for children to make?
A: Many of these ideas are great for kids with adult supervision. Projects like the ghost die-cut or simple paper clip markers are excellent starting points. Always provide child-safe scissors and non-toxic adhesives.
Q: Can I use these bookmarks in library books?
A: It is best to use very flat, lightweight paper bookmarks in library books to avoid damaging the pages. Avoid bookmarks with bulky decorations, loose glitter, or wet glue that could transfer onto the book.