Selecting Optimal Thread Weight for Uniform Draping
Your thread choice dictates the final look and feel for every easy DIY mini tassel you make. For the smooth, professional drape you see in boutique pieces, stick with fine, smooth threads like six-strand embroidery floss or mercerised cotton. The good news is these threads are simple to find and arrive in every color imaginable. They hold a crisp shape without feeling stiff. You want to avoid thicker, textured yarns because they create a bulky silhouette. Trust me on this, the right thread weight gives you that uniform, polished finish right from the start, making the rest of the process so much easier.
Measuring Consistent Loop Lengths Using Cardstock Templates
A small piece of stiff cardstock acts as your secret weapon for perfect sizing. Many hands tend to simply wrap threads around fingers, which leads to uneven loops and a ragged final haircut. Cut a template from an old greeting card to the exact finished length you want for an easy DIY mini tassel, then wrap your threads around its width. This simple trick ensures every strand stays identical, which builds the foundation for a sharp outline. You notice your binding sits straighter and your top knot looks compact. It takes two seconds but makes all the difference in your finished piece.
1. Bright Solid Embroidery Floss Earrings — A Pop of Pure Color
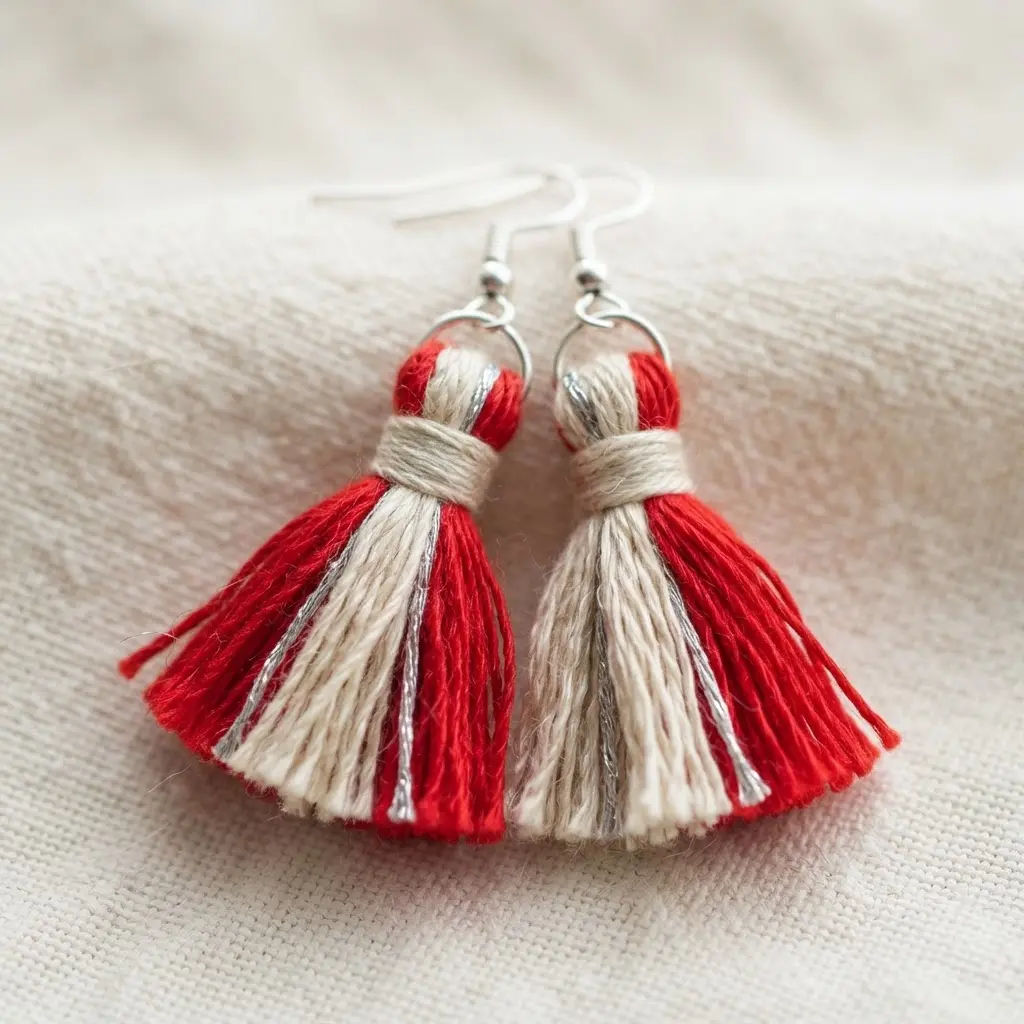
This one surprised me. You get a big, bold look with almost no weight on your ears. The process for an easy DIY mini tassel stays wonderfully simple. Start by cutting many strands of embroidery floss to the exact same length. Gather them, fold them in half, and tie them tightly near the fold to form your loop.
It works because that single, saturated color makes a clean statement. For a neat finish, I love using a tiny dot of clear fabric glue on the knot. It keeps everything secure without making the fibers stiff. Feel that satisfaction when you clip on your vibrant new earrings.
Once you have the basic shape down, you can find more mini tassel ideas to expand your collection with different textures. Does that not look great?
2. Metallic Thread Dainty Bracelet Charm — Subtle Shimmer
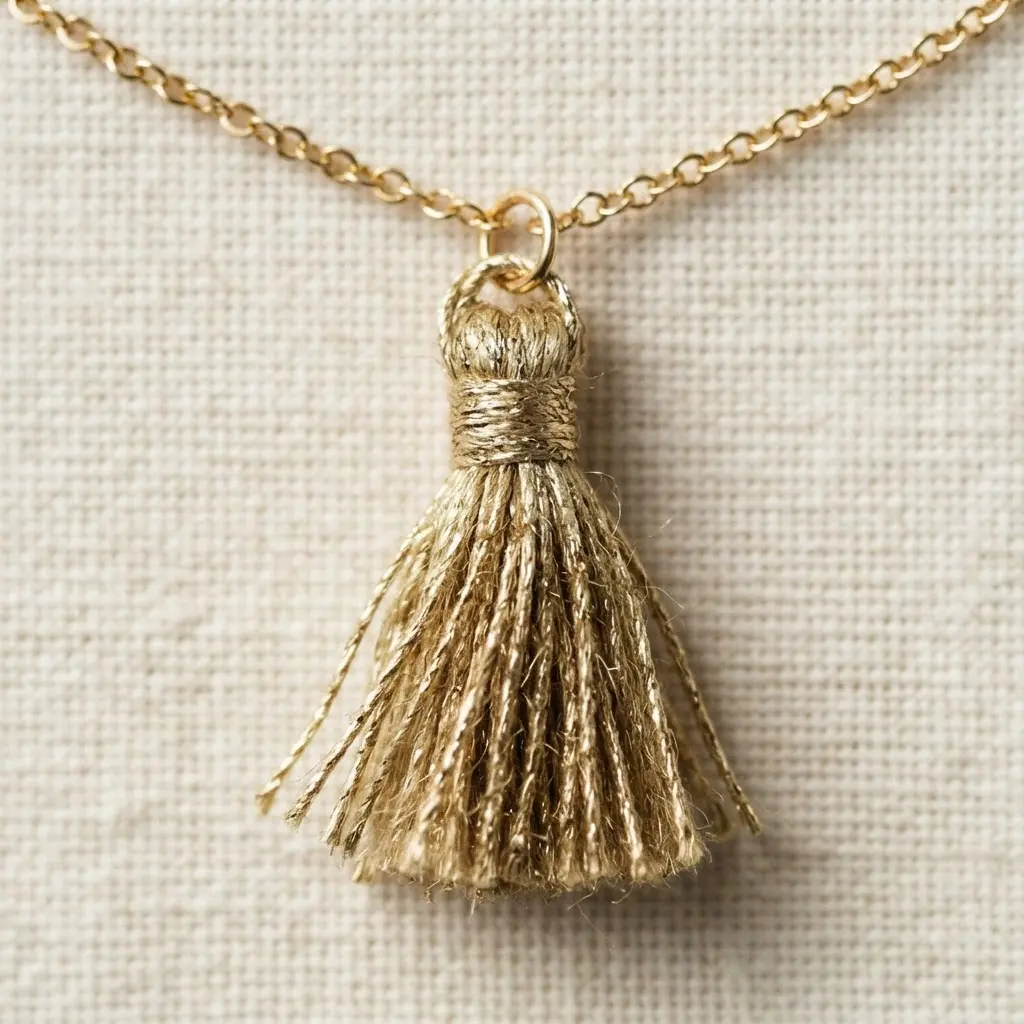
Ever wondered how to add a whisper of sparkle without overpowering your look? This charm relies on meticulous, tiny wrapping. You start with a fine metallic thread and a small bead core, then wind it tightly until the shape stays completely covered. The result creates a smooth surface that catches light in a gentle way.
It works because the scale remains delicate. That quiet shimmer makes it perfect for layering or wearing alone every single day. My go-to tip for success maintains consistent, firm tension as you wrap. Trust me, this prevents messy gaps while shaping an easy DIY mini tassel.
Attach it to one of your favorite simple heart bracelet designs for a personalized touch. Feeling ready to create your own subtle accent?
3. Suede Cord Boho Keyring Tassel — Earthy Texture
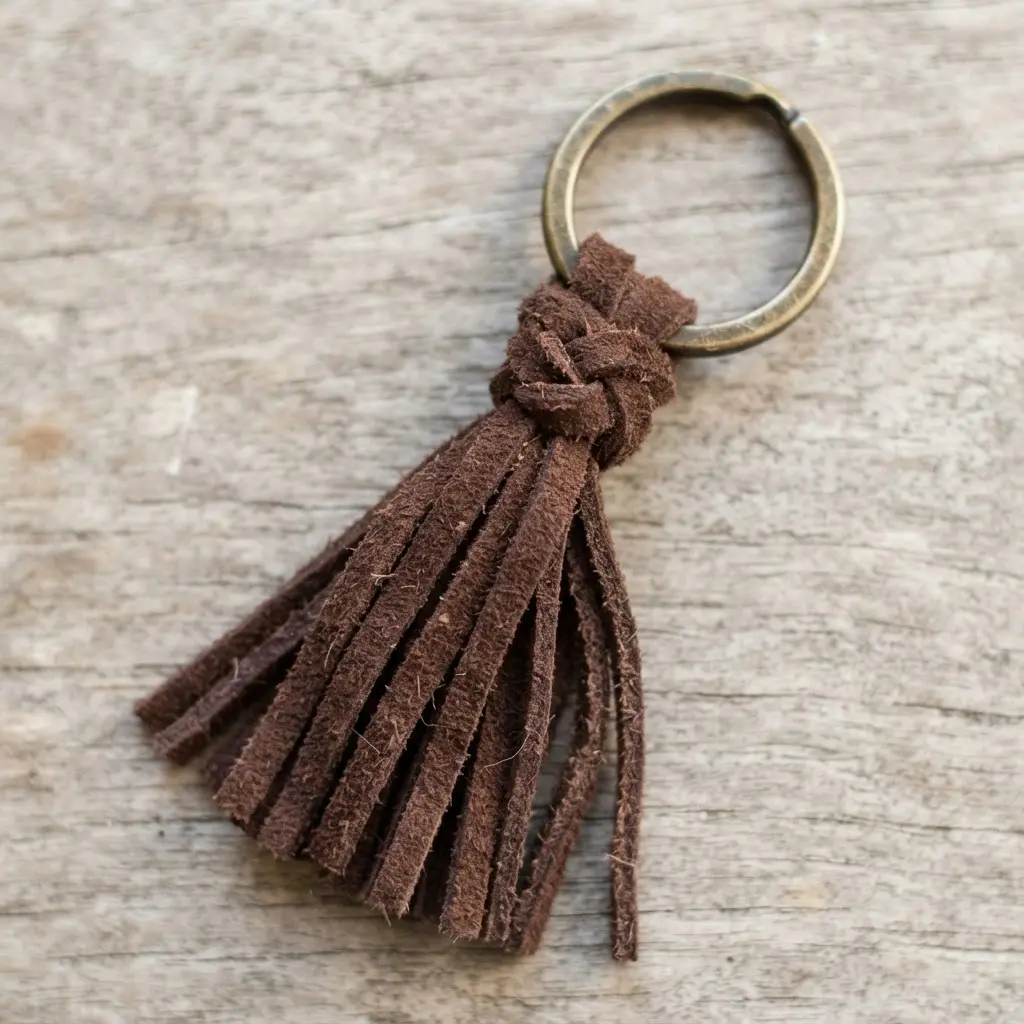
This piece looks like a store-bought accessory but stays incredibly simple to construct. You start by cutting several lengths of suede cord in a nice earthy color, gathering them at one end. Loop them through a keyring and tightly bind the top with a spare piece of cord to form the head.
The soft, napped texture delivers that wonderful bohemian vibe. It feels satisfying to hold and looks fantastic swinging from your keys or bag. I love how you easily customize the length and add a few wooden beads for extra personality while building an easy DIY mini tassel.
This makes a great first accessory. Read up on creating stylish drop earrings to apply the same wrapping skills to a matching jewelry set. Does that not look stunning?
4. Pastel Ombre Floss Tassel Bracelet — A Soft Gradient
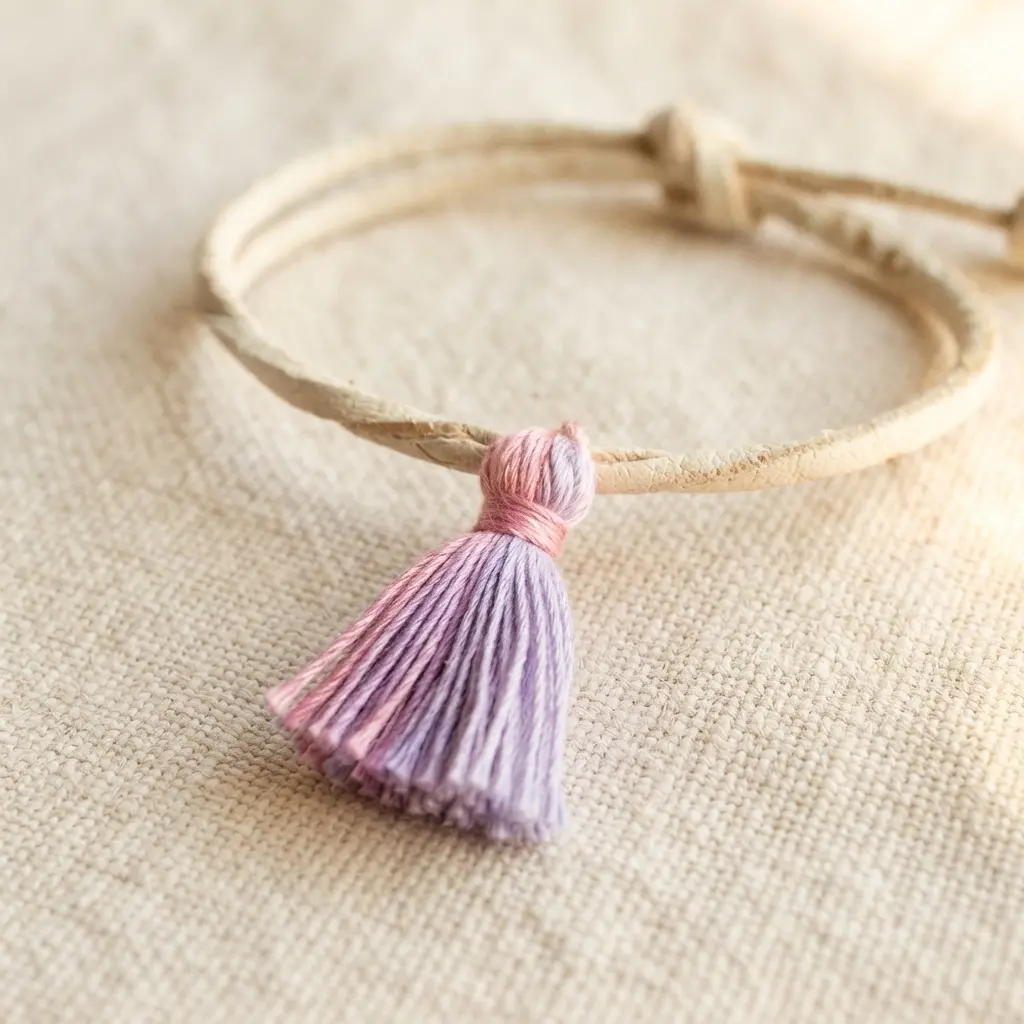
This one looks so intricate, but it remains surprisingly straightforward. You start by cutting multiple strands of embroidery floss in your chosen pastel shades. The trick involves arranging them on your beading wire in the exact order you want that dreamy gradient to flow, moving from blush pink into lavender.
I love how the soft color transition creates a gentle, soothing look. Those tiny fringe pieces you add give it a playful touch without heaviness. A key tip uses a small piece of cardboard as a template so every knot comes out perfectly uniform for an easy DIY mini tassel.
Isn’t it satisfying when a project feels both elegant and totally approachable? You feel so proud wearing this delicate, charming piece.
5. Beaded Top Mini Tassel Necklace — Elegant Detail
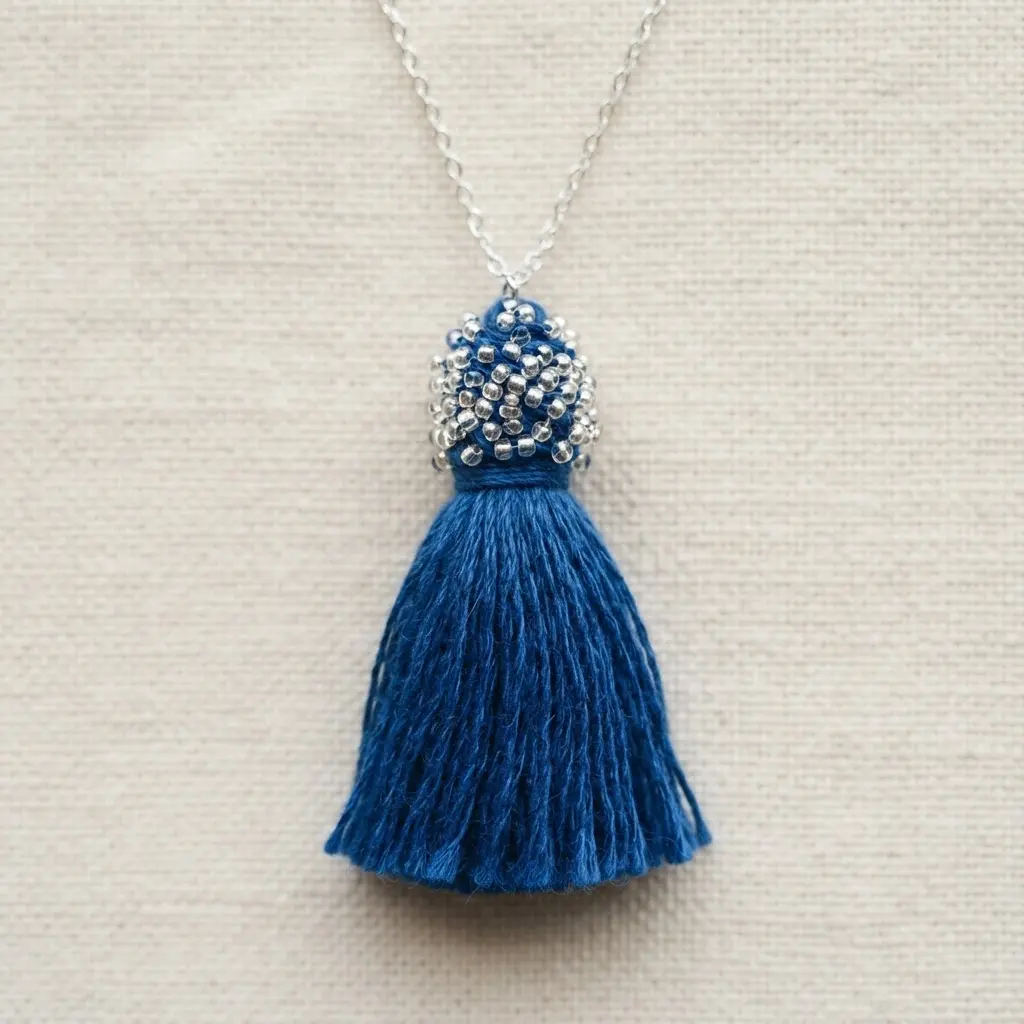
This little necklace proves a small detail creates a big impact. It looks complex, but it stays simple to assemble. You will create a small, neat knot from your chosen thread and attach it to a beaded top strung on a headpin. Connect the whole piece to a delicate chain.
The magic sits in the texture combination. The soft flow of the fringe plays beautifully against the bead structure. Keep your wrapping dense and uniform for a polished finish. That final elegant touch comes from choosing a fine cable chain to balance your easy DIY mini tassel perfectly.
It stays wonderfully versatile. You make it with gemstone beads for a night out or simple seed beads for everyday wear. Check out cute popsicle stick necklaces as another easy project. Does that not feel satisfying?
6. Neon Yarn Cluster Tassel Earrings — Bold and Playful
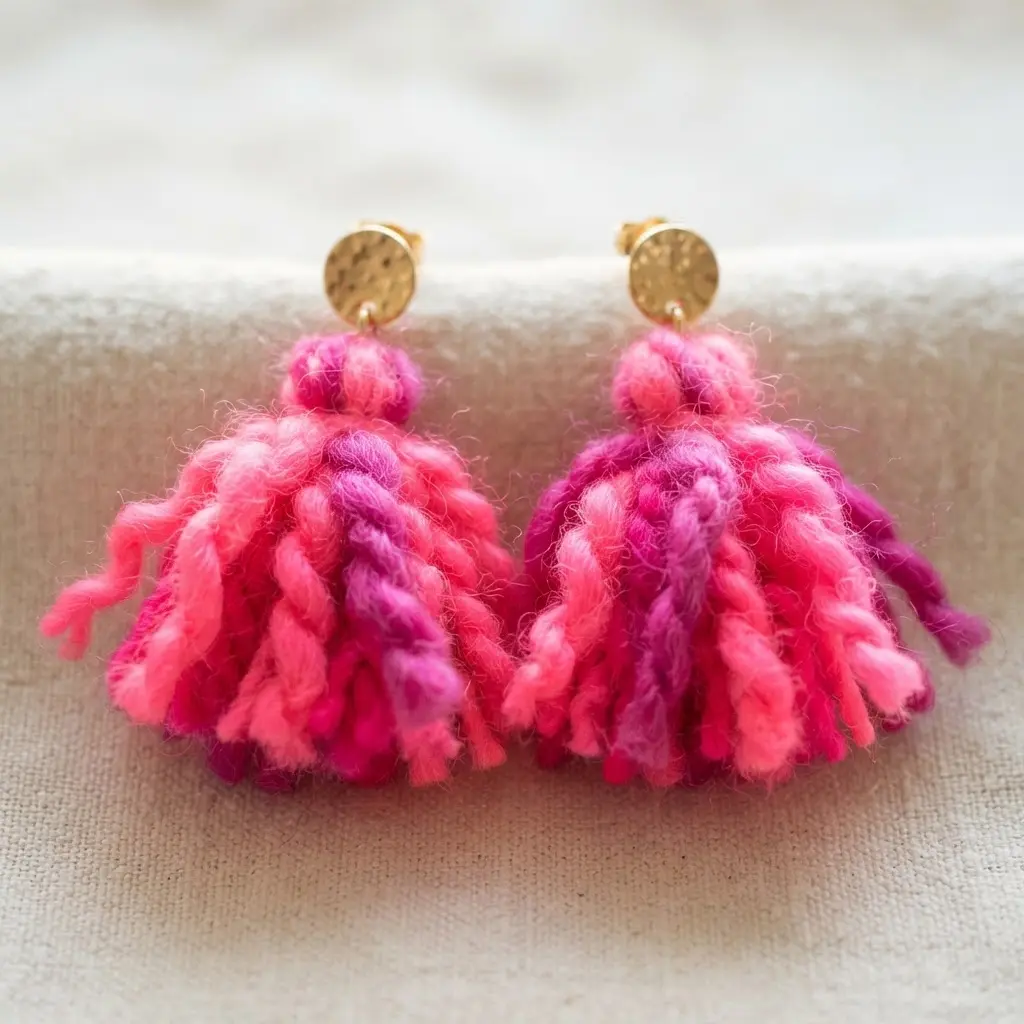
Ever wanted to make earrings that feel like a party for your ears? This project looks vibrant and full, but it stays surprisingly simple. You will cut many strands of your brightest neon acrylic yarn to match length, gather them at the fold, and bind the top tightly.
The secret to that bouncy shape relies on using enough yarn to create a true cluster. I love how the lightweight fiber lets them move with you, and those electric colors instantly lift any outfit. They make a fantastic first project because the wrapping technique stays forgiving.
A great next step after shaping an easy DIY mini tassel leads you toward creative straw weaving bracelets to build fiber skills further. Does that not look like pure fun?
7. Leather Cord Minimalist Tassel Pendant — Clean Lines
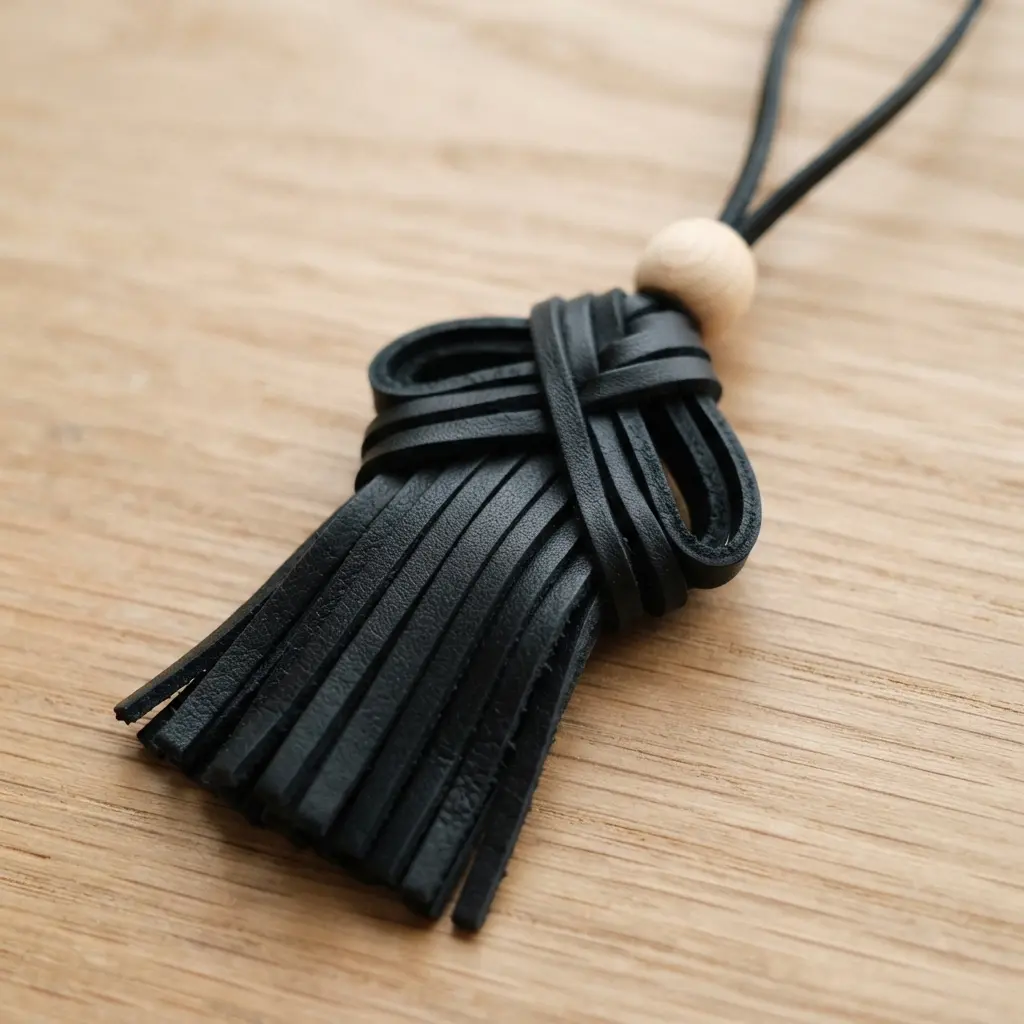
This is the piece I reach for when I want that sleek, modern look without fuss. You gather your uniform leather strips, fold them, and create a tight wrap at the top to form the neat head. The magic happens during the final trim, where you snip the ends straight for a crisp line. It works because the simple shape lets the beautiful leather shine.
Trust me, the key to that elegant silhouette uses a sharp pair of scissors for every cut. It marks the difference between a chic pendant and a messy one. Once you master this cutting technique for an easy DIY mini tassel, you hold a versatile accessory that feels incredibly satisfying to wear.
8. Gold Cap Silk Tassel Bracelet — A Polished Finish
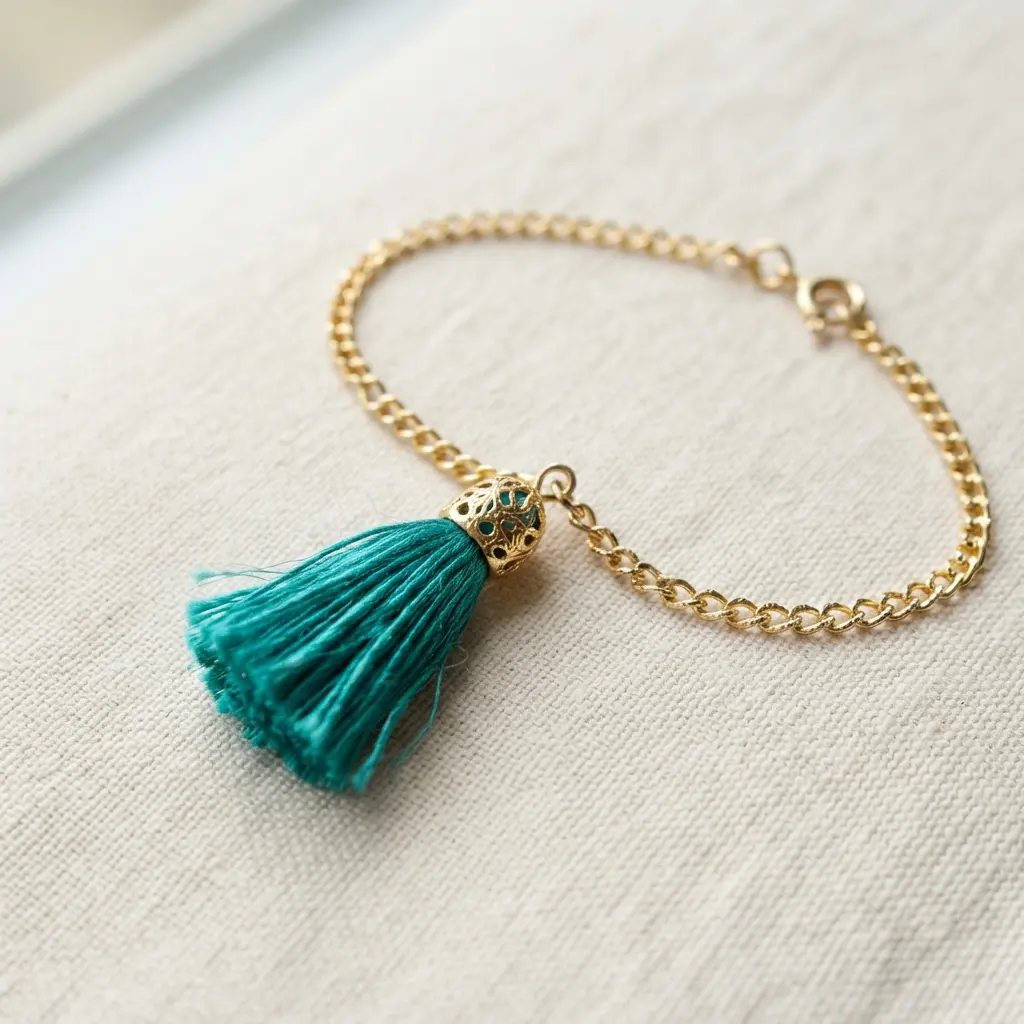
Who says elegance must be complicated? This bracelet looks like a high-end boutique find, but it stays straightforward. The magic sits in contrasting the soft, flowing silk fibers with that gleaming gold cap. You simply gather your silk threads, secure them inside the cap, and attach it to your chosen band.
That polished finish catches light with every movement. What makes this design so effective stays its versatility. A common mistake uses a mismatched gold tone for the cap and chain, which cheapens the overall aesthetic. Stick with matching gold vermeil for a cohesive look while building an easy DIY mini tassel.
You will love how luxurious this feels on your wrist.
9. Multicolor Thread Layered Tassel Choker — Eclectic Mix
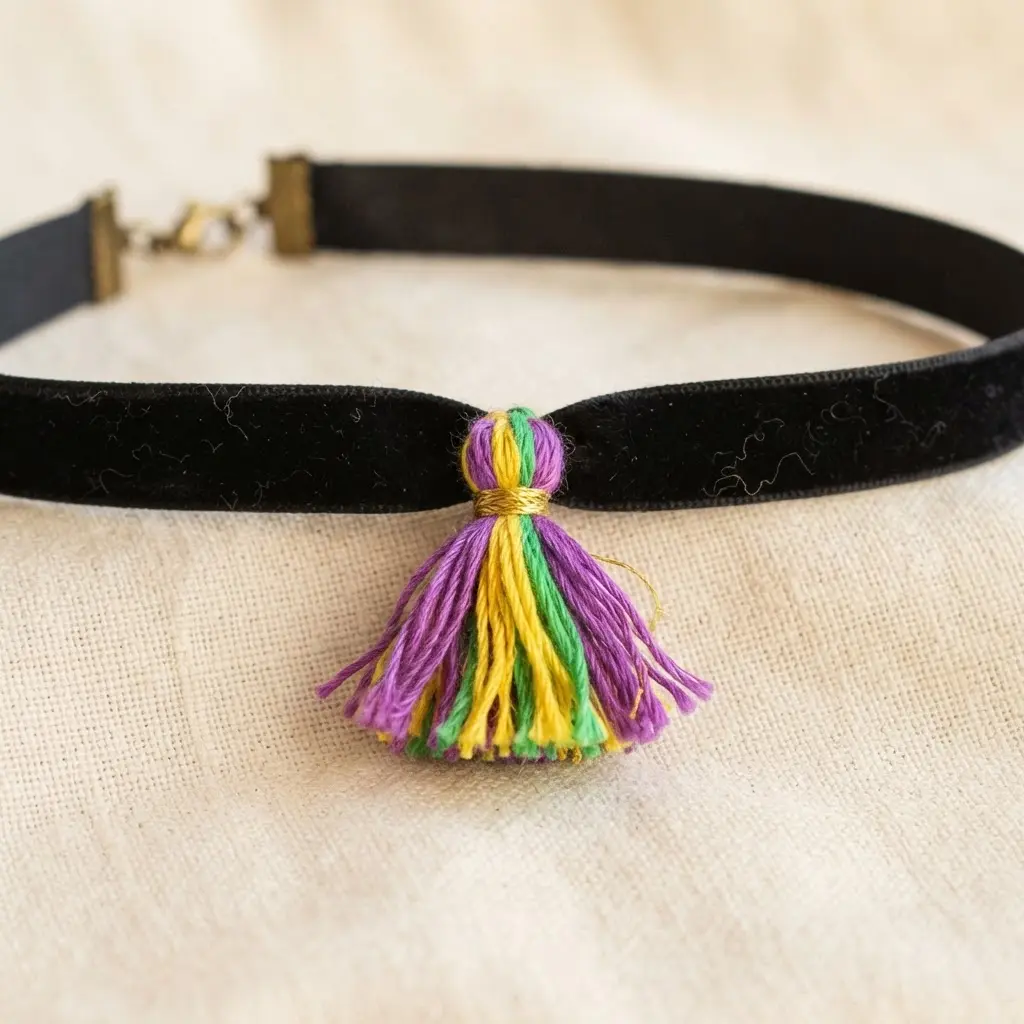
This one stays a total showstopper. You layer multiple strands of different colored threads, wrapping them around a sturdy ribbon base to build rich, textured volume. Then you tie on a few vibrant knots for movement. Isn’t that a fun way to make a statement?
The magic lives in the color mix. I love grabbing a whole rainbow of embroidery floss and cotton thread, letting the tones play off each other. You secure everything with tight knots as you weave to prevent unraveling later. Trust me, that extra tug makes all the difference for an easy DIY mini tassel.
It works because the handcrafted layers feel uniquely yours. For a polished finish, consider how your piece will close. A secure lobster clasp and jump ring keeps it in place while adding a professional touch. Feel how cheerful and bold the final piece becomes.
10. Silver Wrapped Perle Cotton Tassel — Textural Interest
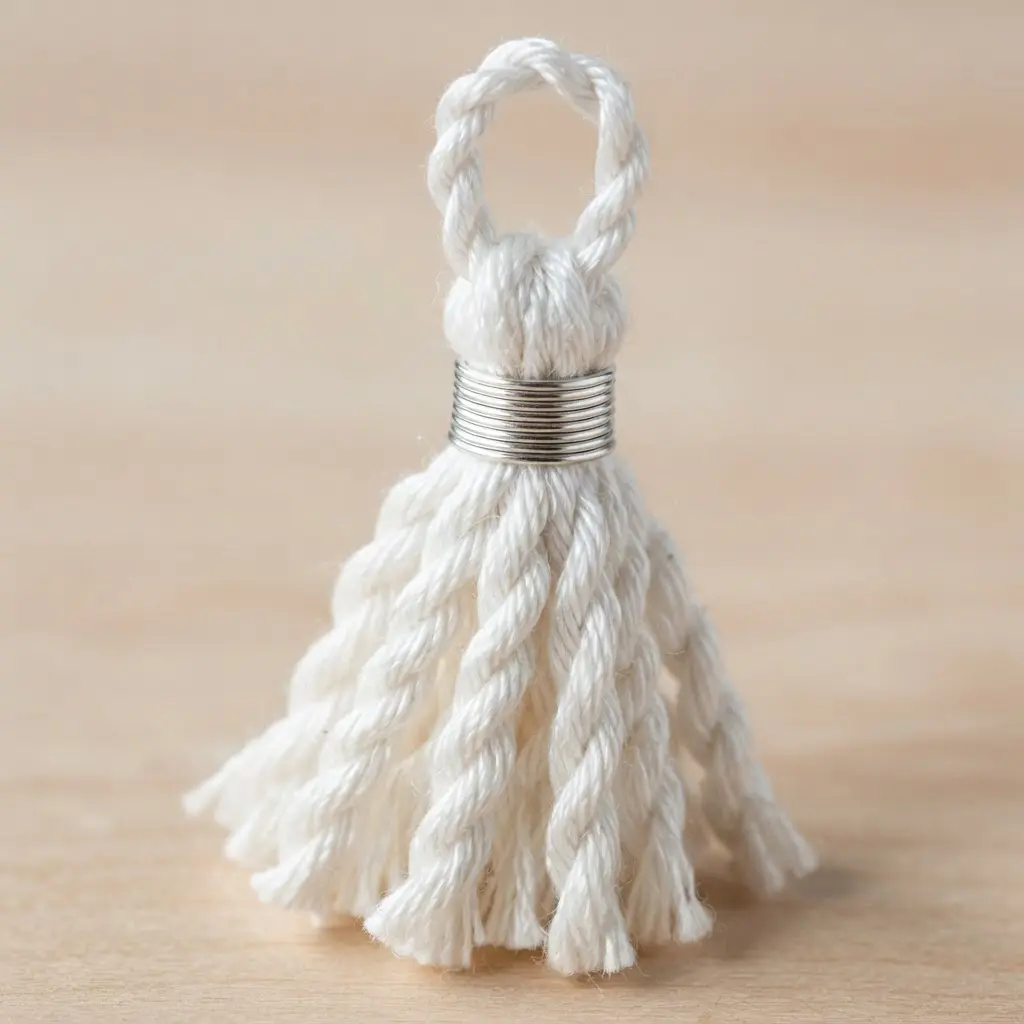
Ever wondered how to add elegant sparkle to a simple fringe piece? This one stays high on my favorites for its sophisticated finish. You gather lustrous mercerized perle cotton and tie the ends together. Then wrap that top section with fine silver wire to secure a shiny head.
The magic sits in those contrasting textures. The cotton sheen plays against the metallic wrap, creating wonderful visual interest. I love elevating that basic shape into something special for a necklace or bag. Check detailed fabric bracelet making guides to see similar principles in action.
Trust me, that final silver glint changes everything while you shape an easy DIY mini tassel. Does that not look stunning?
Trimming Techniques for Sharp Professional Tassel Ends
Precision in the final haircut defines the professional result. After you secure your binding knot with clear drying adhesive, lay the piece flat on a hard surface. Use your sharpest embroidery scissors to make one confident cut across all threads in your easy DIY mini tassel.
Do not snip in small pieces, as that leaves staggered ends. Hold the blades steady and slice straight through to finish the project cleanly. You gain a blunt edge that looks manufactured. That final trim highlights the silhouette and makes your color choices stand out, especially next to simple metal findings.
Conclusion
So, which of these vibrant ideas caught your eye? Whether you felt drawn to soft pastels or bold neon, each one begins with the same simple wrapping technique. My advice selects the design that makes you smile the most and gives it a try using materials on hand. The real skill builds from that first attempt, showing how a few wraps transform into something proud. These little projects prove creativity never requires complication to feel rewarding. I hope this list gives you the confidence to start shaping your own easy DIY mini tassel today.
FAQs
Q: What is the easiest way to make a mini tassel for a beginner?
A: Wrap embroidery floss around a small rectangle of cardboard about 20 times. Slide the loops off, tie a separate piece of floss tightly around the top loops, then cut the bottom loops to create the fringe. Trim the ends evenly.
Q: How do I keep my mini tassel from looking messy or uneven?
A: Ensure your wrapping stays tight and even before you tie it off. Use sharp scissors to trim the cut ends, and consider using a tassel cap or a neat bead to hide the tied top for a clean finish.
Q: What can I use if I don’t have a tassel cap?
A: You thread a small bead with a large hole over the tied top. Alternatively, wrap the neck of the piece tightly with a matching metallic thread or a thin piece of wire to secure and decorate it.
Q: How do I attach a mini tassel to a bracelet securely?
A: Use a small, closed jump ring. Open the ring with pliers, slide it through the loop at the top of your piece, then attach it to a link on your bracelet chain or the clasp before closing the jump ring tightly.
Q: Can I make these tassels with yarn instead of embroidery floss?
A: Yes, but for a mini tassel, use a thinner yarn or only a few strands. Yarn will create a fuller, softer finish. Adjust your wrapping count so the piece stays a manageable, delicate size for jewelry.